Gardeners’ Toes?

If your feet look anything like mine after gardening in flip-flops for months on end, then they will be in need of a little tender loving care.

I am such a fan of all things natural, so here is my super fast recipe for my own Gardeners’ Hand & Foot Salve.

For best effect, give those paws a good buff all over with a pumice stone, then scrub with a little olive oil mixed with Epsom salts and a few drops of peppermint essential oil. Soak in warm water for five minutes then wash the scrub off, dry and apply this home made balm. Cotton socks will let it really soak in so this is great to do before bedtime.

This salve can be used for hardworking hands and feet, it is deeply nourishing and contains plenty of natural goodness to help heal cracks and dryness.

Ingredients:

70g beeswax

70g cocoa butter (or shea)

220g olive oil

20g honey

20 drops of each of the following: rosemary, lemongrass, lavender, tea tree and peppermint essential oils.

Method:

Weigh the first three ingredients into a glass jug, add the honey, then boil a small amount of water in a saucepan. Turn the water down to a simmer and then carefully place the jug into the pan creating yourself a water bath. Stir the contents of the jug continuously with a metal spoon until they have melted completely, add the essential oils, then remove carefully from the water bath and pour into whatever receptacles you have. The silver pots are very inexpensive and easy to obtain from eBay. They make fabulous gifts for people too!

Allow to cool completely before popping the lids on top. Job done.

Carry a small pot in your handbag and have a big pot by your bed. Wonderful.

Edit: We have also discovered that this particular combination of oils is fantastic at keeping mosquitoes away so use on pulse points whenever you are at risk of being nibbled!

Thou shalt not waste homegrown anything…

I so love to grow fruit and veg in the garden and whilst I try my best to learn lessons from each previous year and grow the right amount of everything to feed our home, invariably there are gluts. I don’t think it will be long until my kitchen is courgette-tastic again, and I’m quite sure my husbandly one can’t wait for me to be hiding the blighters in everything I cook for him.

Looking back over previous posts a couple of years ago, I could only dream back then of the ‘problems’ with excess strawberries that allotmenteers described (life goals – yes I know I’m sad) but this year I have found myself in the fantastically fortunate position of being that woman who has more strawberries than I can consume, which is a huge triumph for me given that I eat close to my own body weight of the things for breakfast every morning.

Having been away this weekend, I came back home to a fair pile of over ripe strawberries that were just too soft to really to enjoy. Much like pears, there seems to be an incredibly small window for the perfect ripeness (my autocorrect just changed that to right penis and I am chuckling, am such a child) which is something you just don’t get with shop bought fruit… has anyone else noticed that?

There was absolutely no way on this earth I was going to let these beautiful softies go to waste. Anyone who knows me will know how much I absolutely cannot abide waste of anything, especially things grown with time, love and care. It comes from growing up in a single parent family with one very frugal mum.

The two options I could see, were to either freeze them and throw them into smoothies as and when required (I may still do that if I have another big haul) or make some jam to enjoy with scones in the garden over the summer. Or maybe a strawberry liqueur? Note to self: must have a little investigate and see if that would work. Could be nice with a cheeky prosecco?

Anyway, the jam option won my heart in the sunshine of today, and I randomly ended up with 654g of strawberries so threw the equivalent weight of jam sugar into a large pan with a big glug of lemon juice, mashed everything with my potato masher and boiled the buggery out of it all for 10 minutes. It still hadn’t set as much as I wanted so I gave it another two minutes until the jam was clinging to the side of the pan. I have tried every method under the Sun, frozen saucers, and two thermometers, but there is no substitute for practice and just ‘knowing’ when it is right.

I let the jam cool for about five minutes so it wouldn’t erase my fingerprints when I jarred it up and it has all set absolutely perfectly. I find there is no need for any more pectin when you use jam sugar as it’s already in there in the right quantities.

Look at that colour. Am I allowed to say ‘oh my’ with a fifty shades tone in my voice about jam?

Bring. On. The. Scones.

Plagiarism…

Who would ever have thought that I would be the victim of plagiarism? Not me. 

I’ve spent some time as a photographer in the past and found that people will cut off your signature from the photographs and share them and not credit them as your work. That’s bad enough but when they’ve not even paid you in the first place and you’ve done them a favour… yes, well. Enough said. 

Nobody writes a blog to make money. Well I don’t. I suppose it is partly as a diary for myself, archives if you like, for me to look back on. In the process, if I can help anyone else along the way by sharing some information on how I make something, do something or anything else, then all is good.

I will say now that I categorically have no problem at all with my posts being shared.

We all adapt recipes. Scribble things on the back of an empty envelope while watching a tv show, copy something out of a friend’s book, look something up on tinterweb and shove it in our recipe folder. It gets covered in splatters when you’re cooking and you’ve no idea where it came from. Fair do’s. 

Today, however I saw one of my blog post recipes being flagrantly copied and pasted and passed off as someone else’s. Upset? Heck yes. A few words had been changed along the way and the ingredients listed in a different order but it was absolutely akin to somebody copying someone else’s homework and thinking the teacher wouldn’t notice. They were my own words. Written by me. I can actually hear myself saying them. I write my blog posts and recipe methods in a chatty colloquial fashion as if I am talking to you and it was usmitakeable.

When I very politely pointed out to the person who wrote said piece that the words were not her own, she tried to brush it off and say she had read my blog when it was written two years ago but that the recipe was her own and she’d never even tried mine. Caught red-handed. Bunny in headlights. You little Tea Leaf. All it needed was a line saying adapted from my original recipe. Just a little politeness and courtesy. Costs nothing.

But no. I have been removed, blocked and blacklisted. Lucky old me. What is it they say? Copying is a form of flattery? Not in this case. This is plagiarism.

Granted, I have been off the radar for a good few months, I broke my leg before Christmas and had a horrific few months with countless hospital visits, surgery and enough metalwork holding me together to build a tower of Mechano. And so I haven’t felt much like blogging. But this is enough to give me a kick up the proverbial. I am back in action.

So please enjoy my blog, my recipes and anything else you find along the way. Cook, make, and share away.  Have the confidence to try something new. Enjoy the great sense of satisfaction that comes from growing, making, and baking.  All I ask is that you don’t pass my words off as your own.

Thankyou x 

For the love of tweed…

Firstly, let me apologise for the absolute tardiness since my last blog post. Just too much has been going on in my little world and I’ve no idea where to start. I don’t know what day of the week is sometimes.

Life on the farm has been much fun albeit busy, but now the nights have drawn in and cosy nights sitting under a blanket are the norm. I had my first mug of mulled wine last week. Is that too early? 

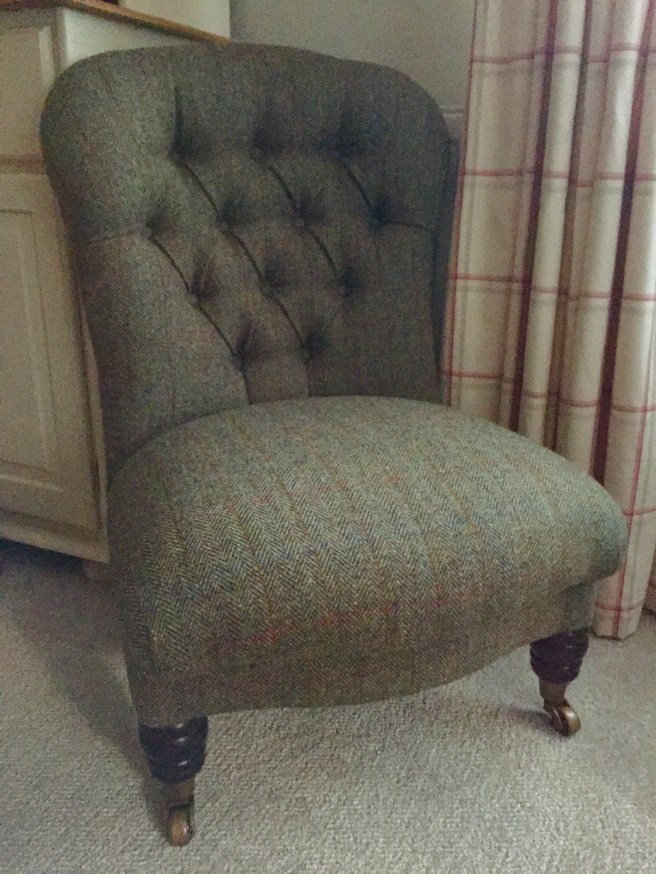
I wanted to share my latest completed upholstery project with you. He is one of tweedy loveliness.

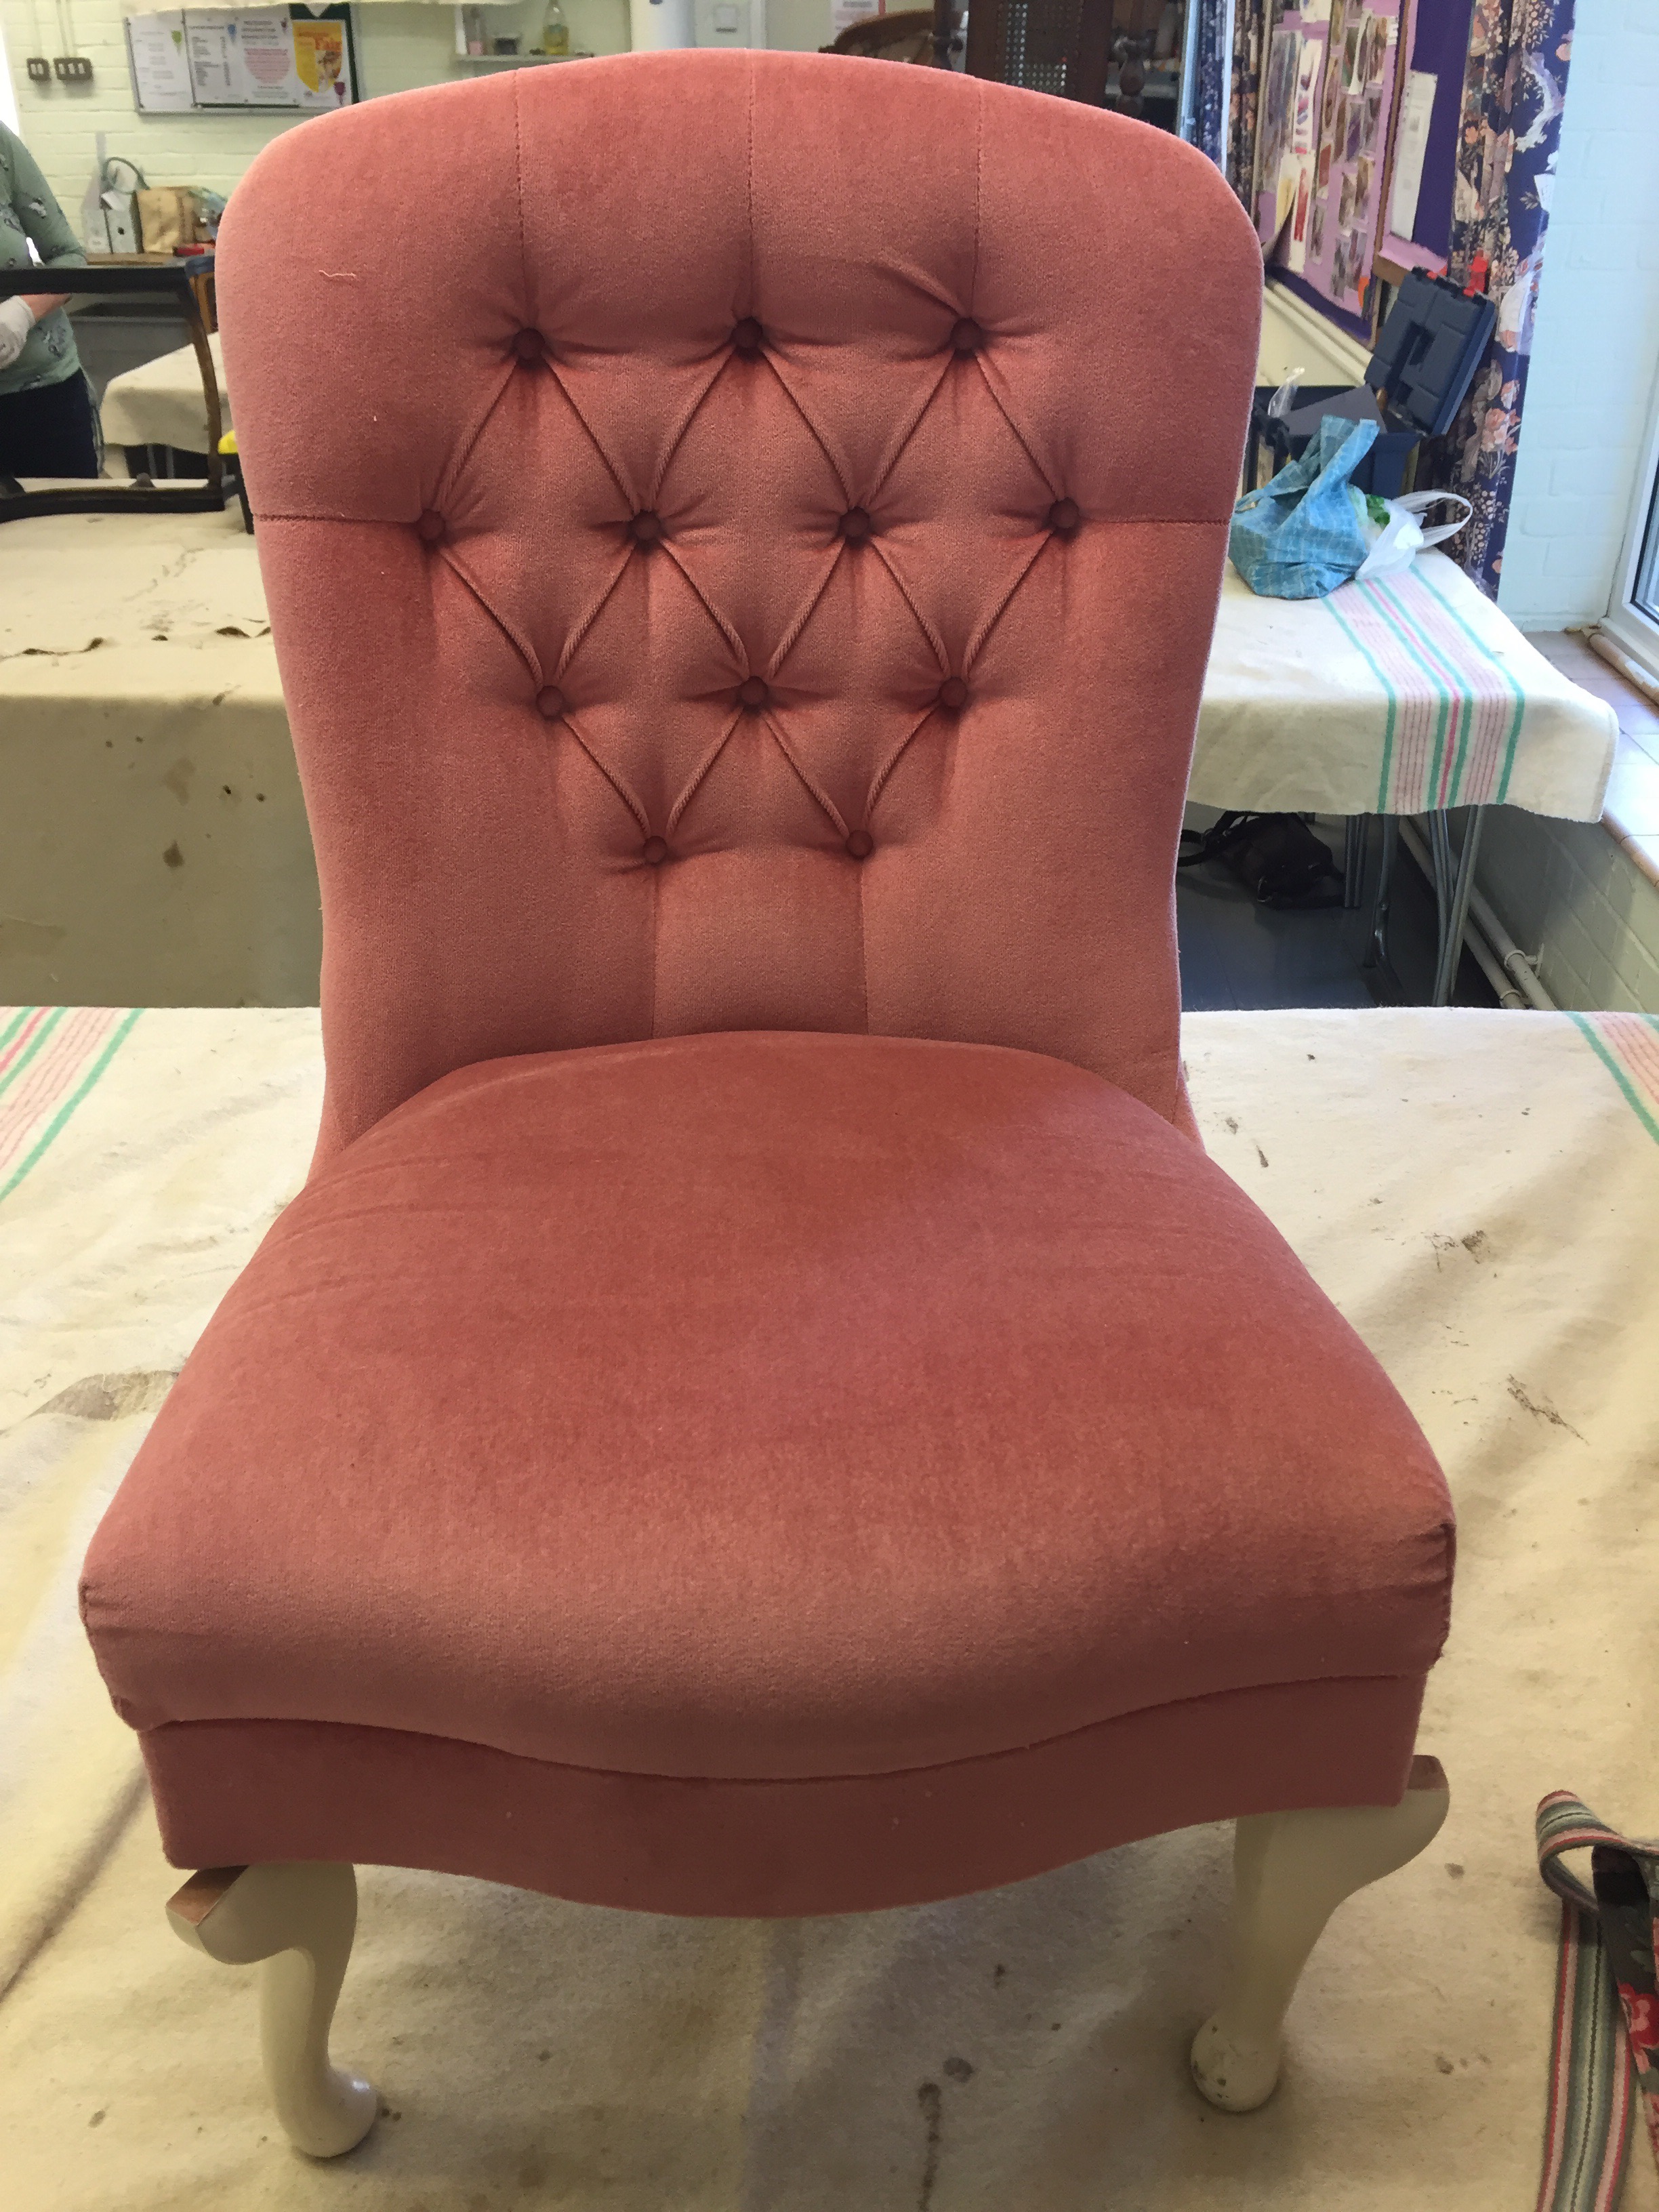
Some months ago, whilst wandering aimlessly around a big secondhand furniture warehouse as I do reasonably frequently, I stumbled across a ‘beautiful’ chair which I could not take my eyes off. I duly paid my £20 to the charity and the gentleman on the till could not believe how excited I was with my purchase. They say that beauty is in the eye of the beholder and in this case you certainly did need a little vision but I knew immediately what I wanted to do with this…

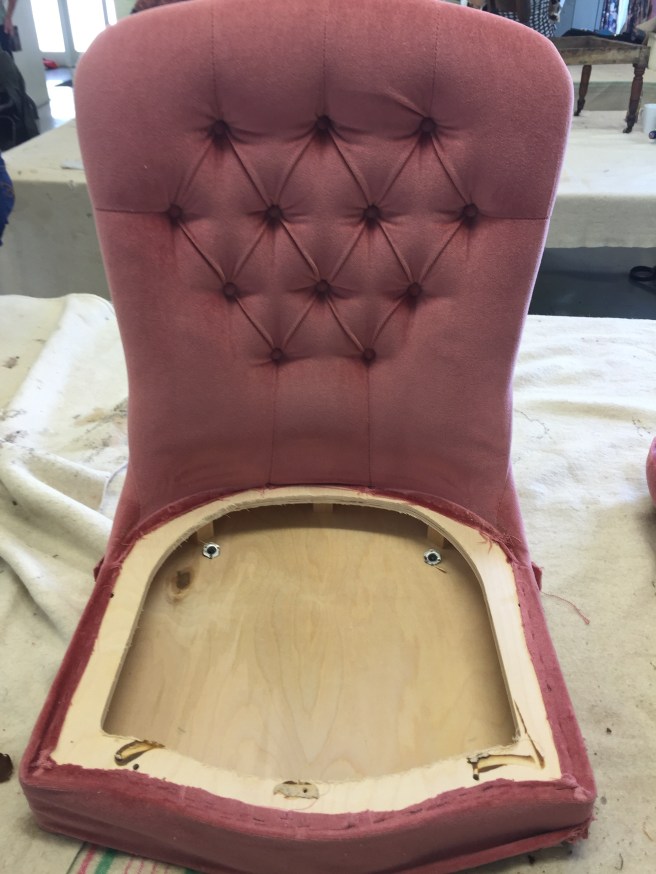
Here he is in all his pink Draelon, white plastic legs glory.  And I’m going to make him look a million dollars.


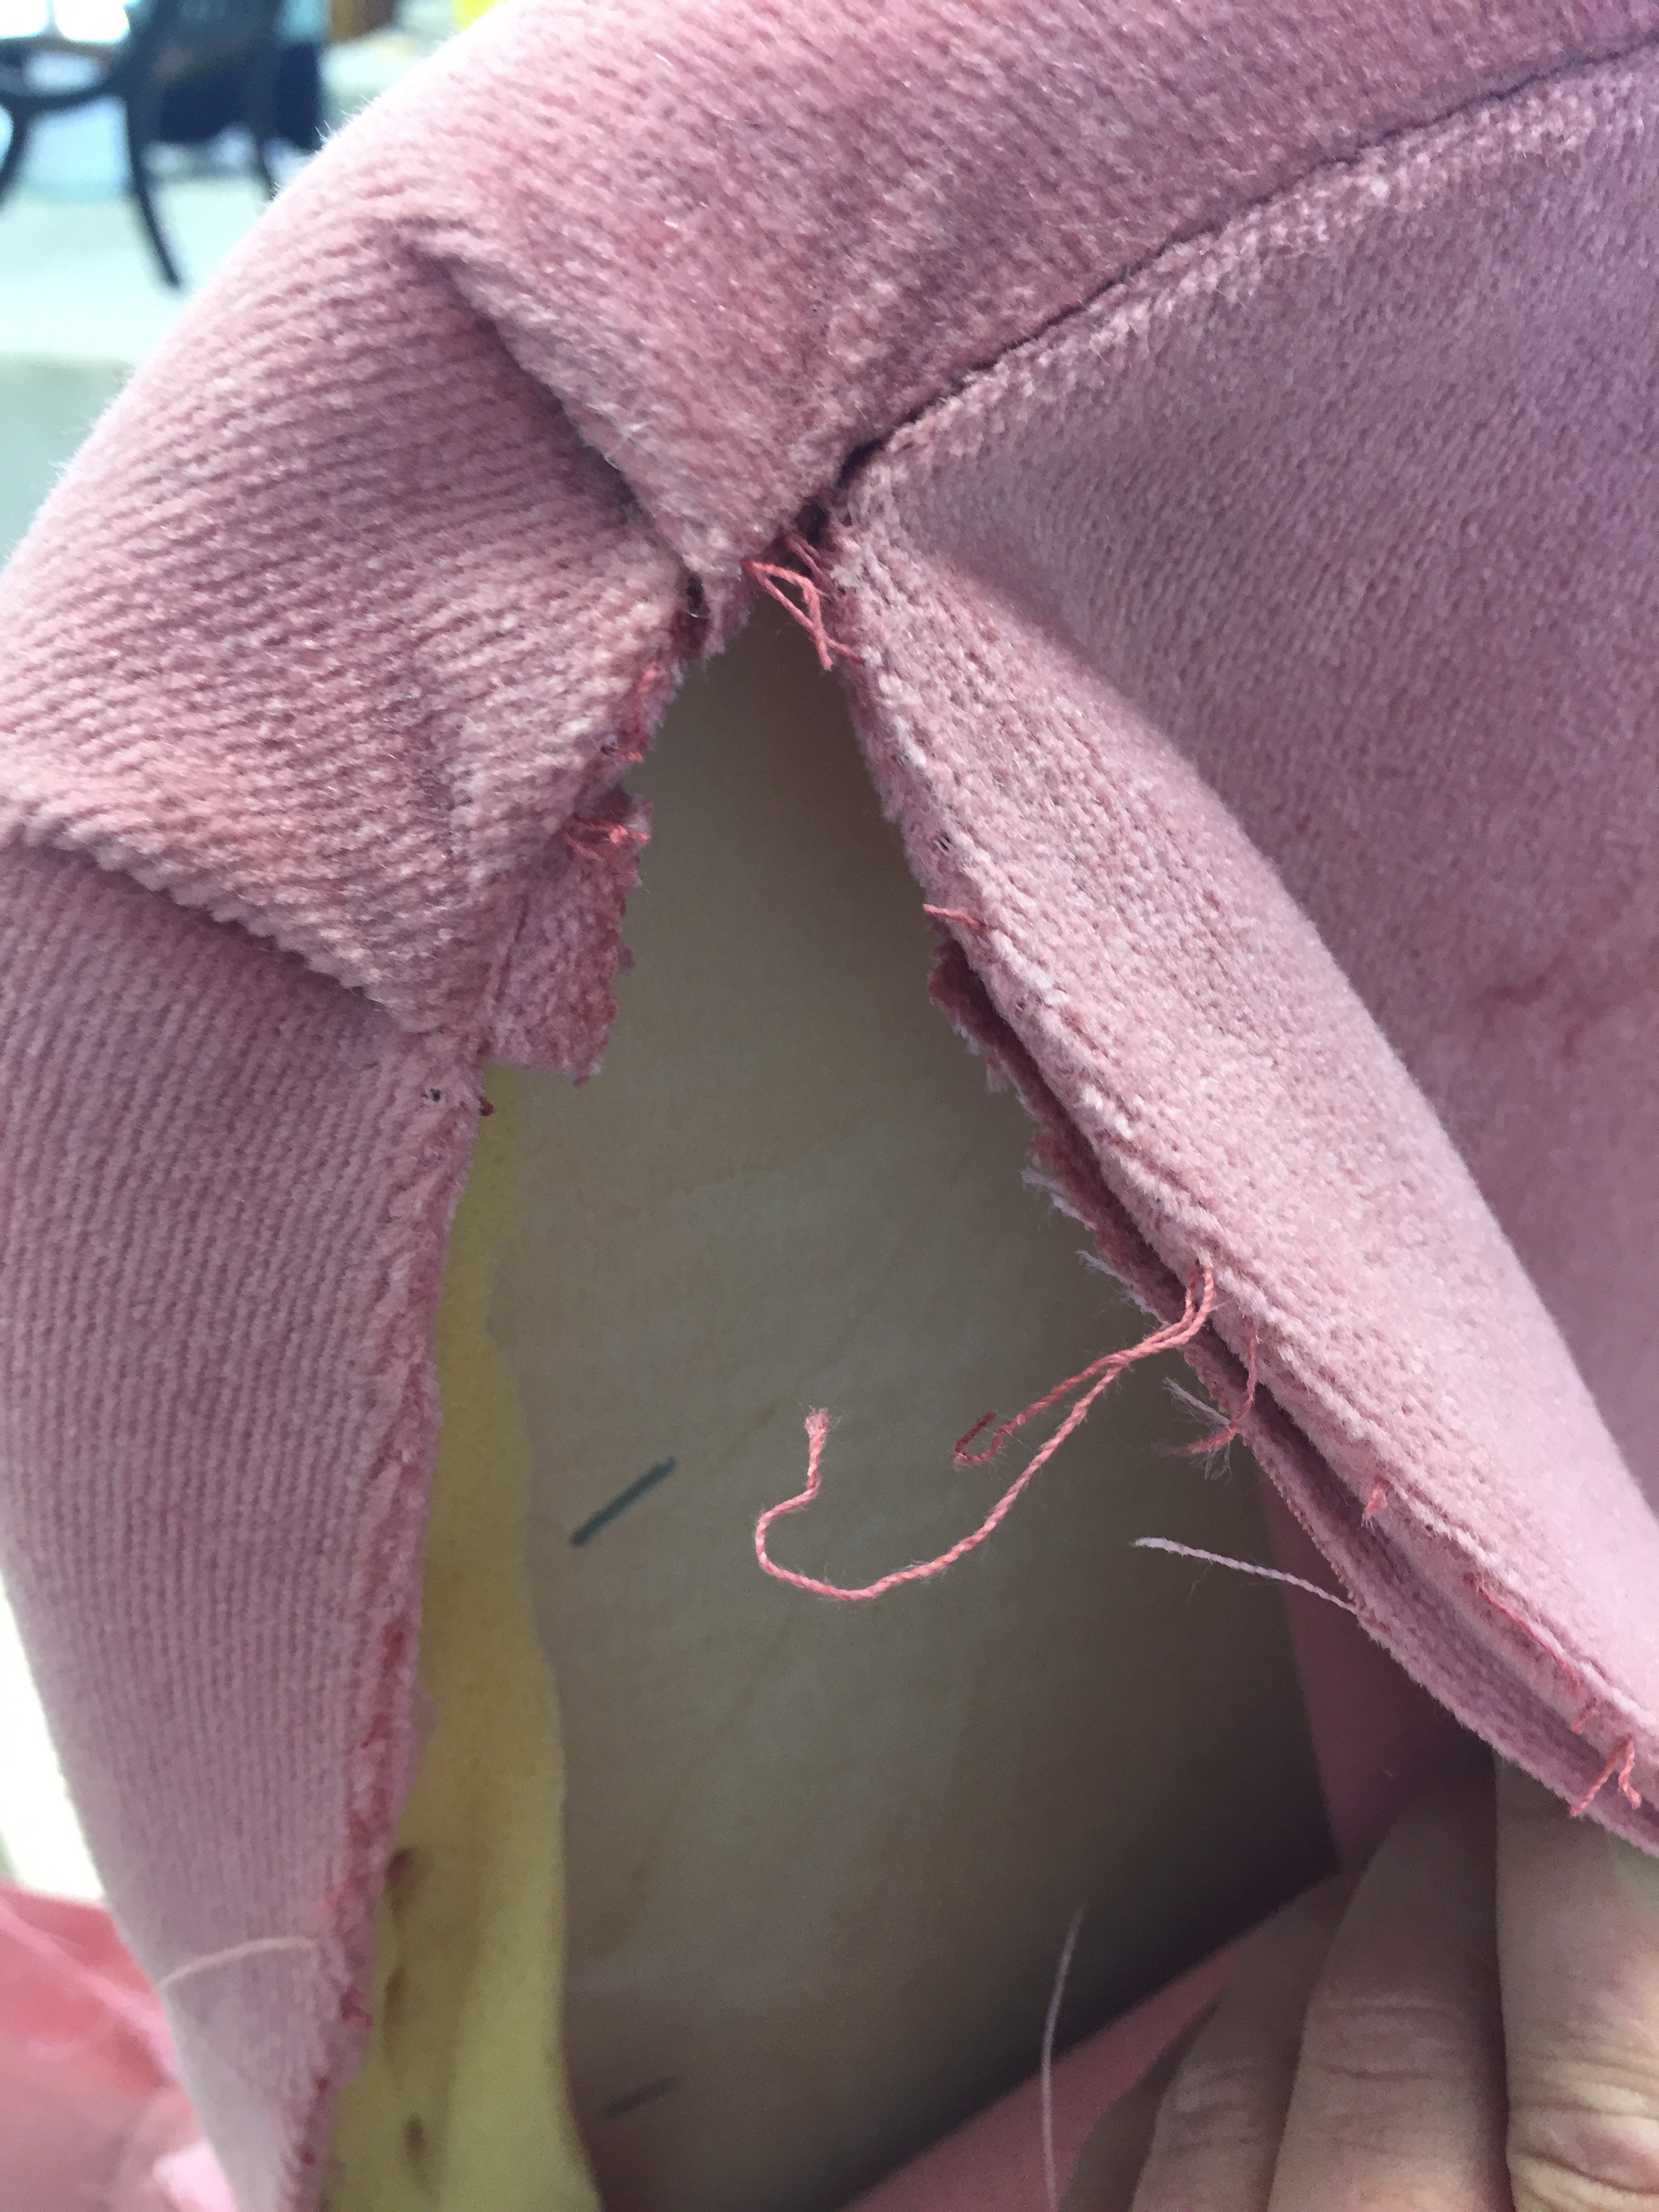
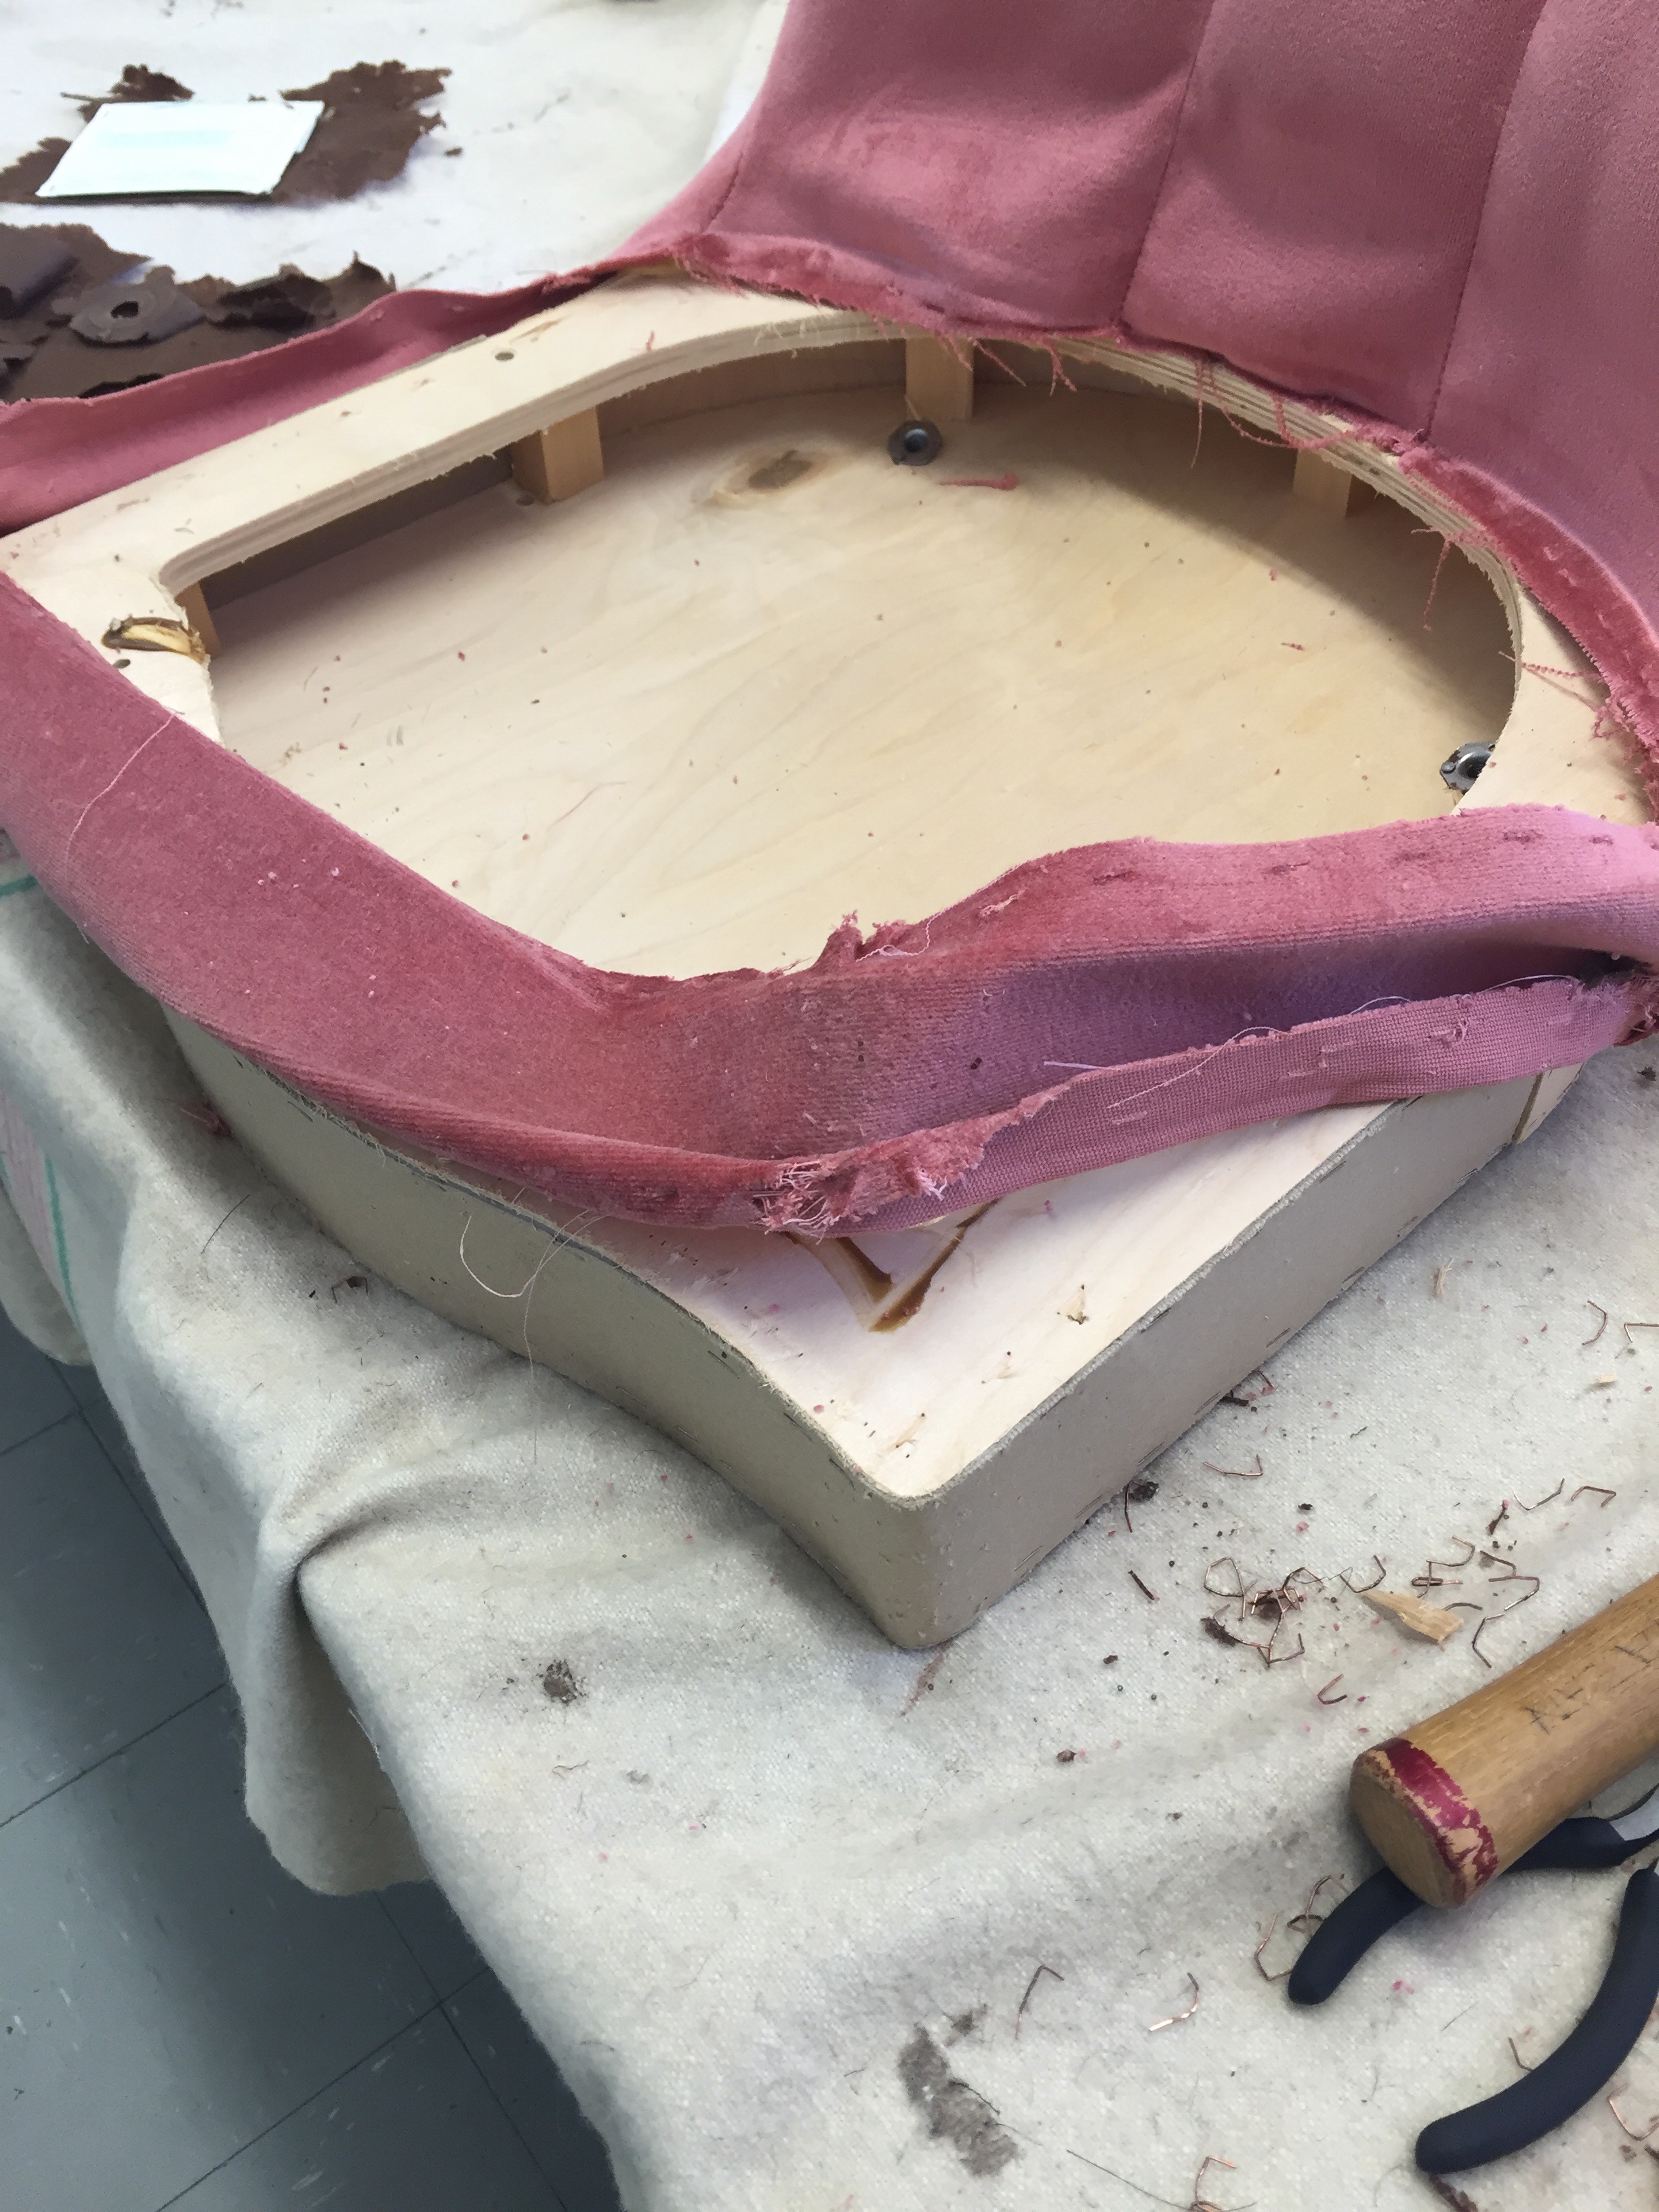
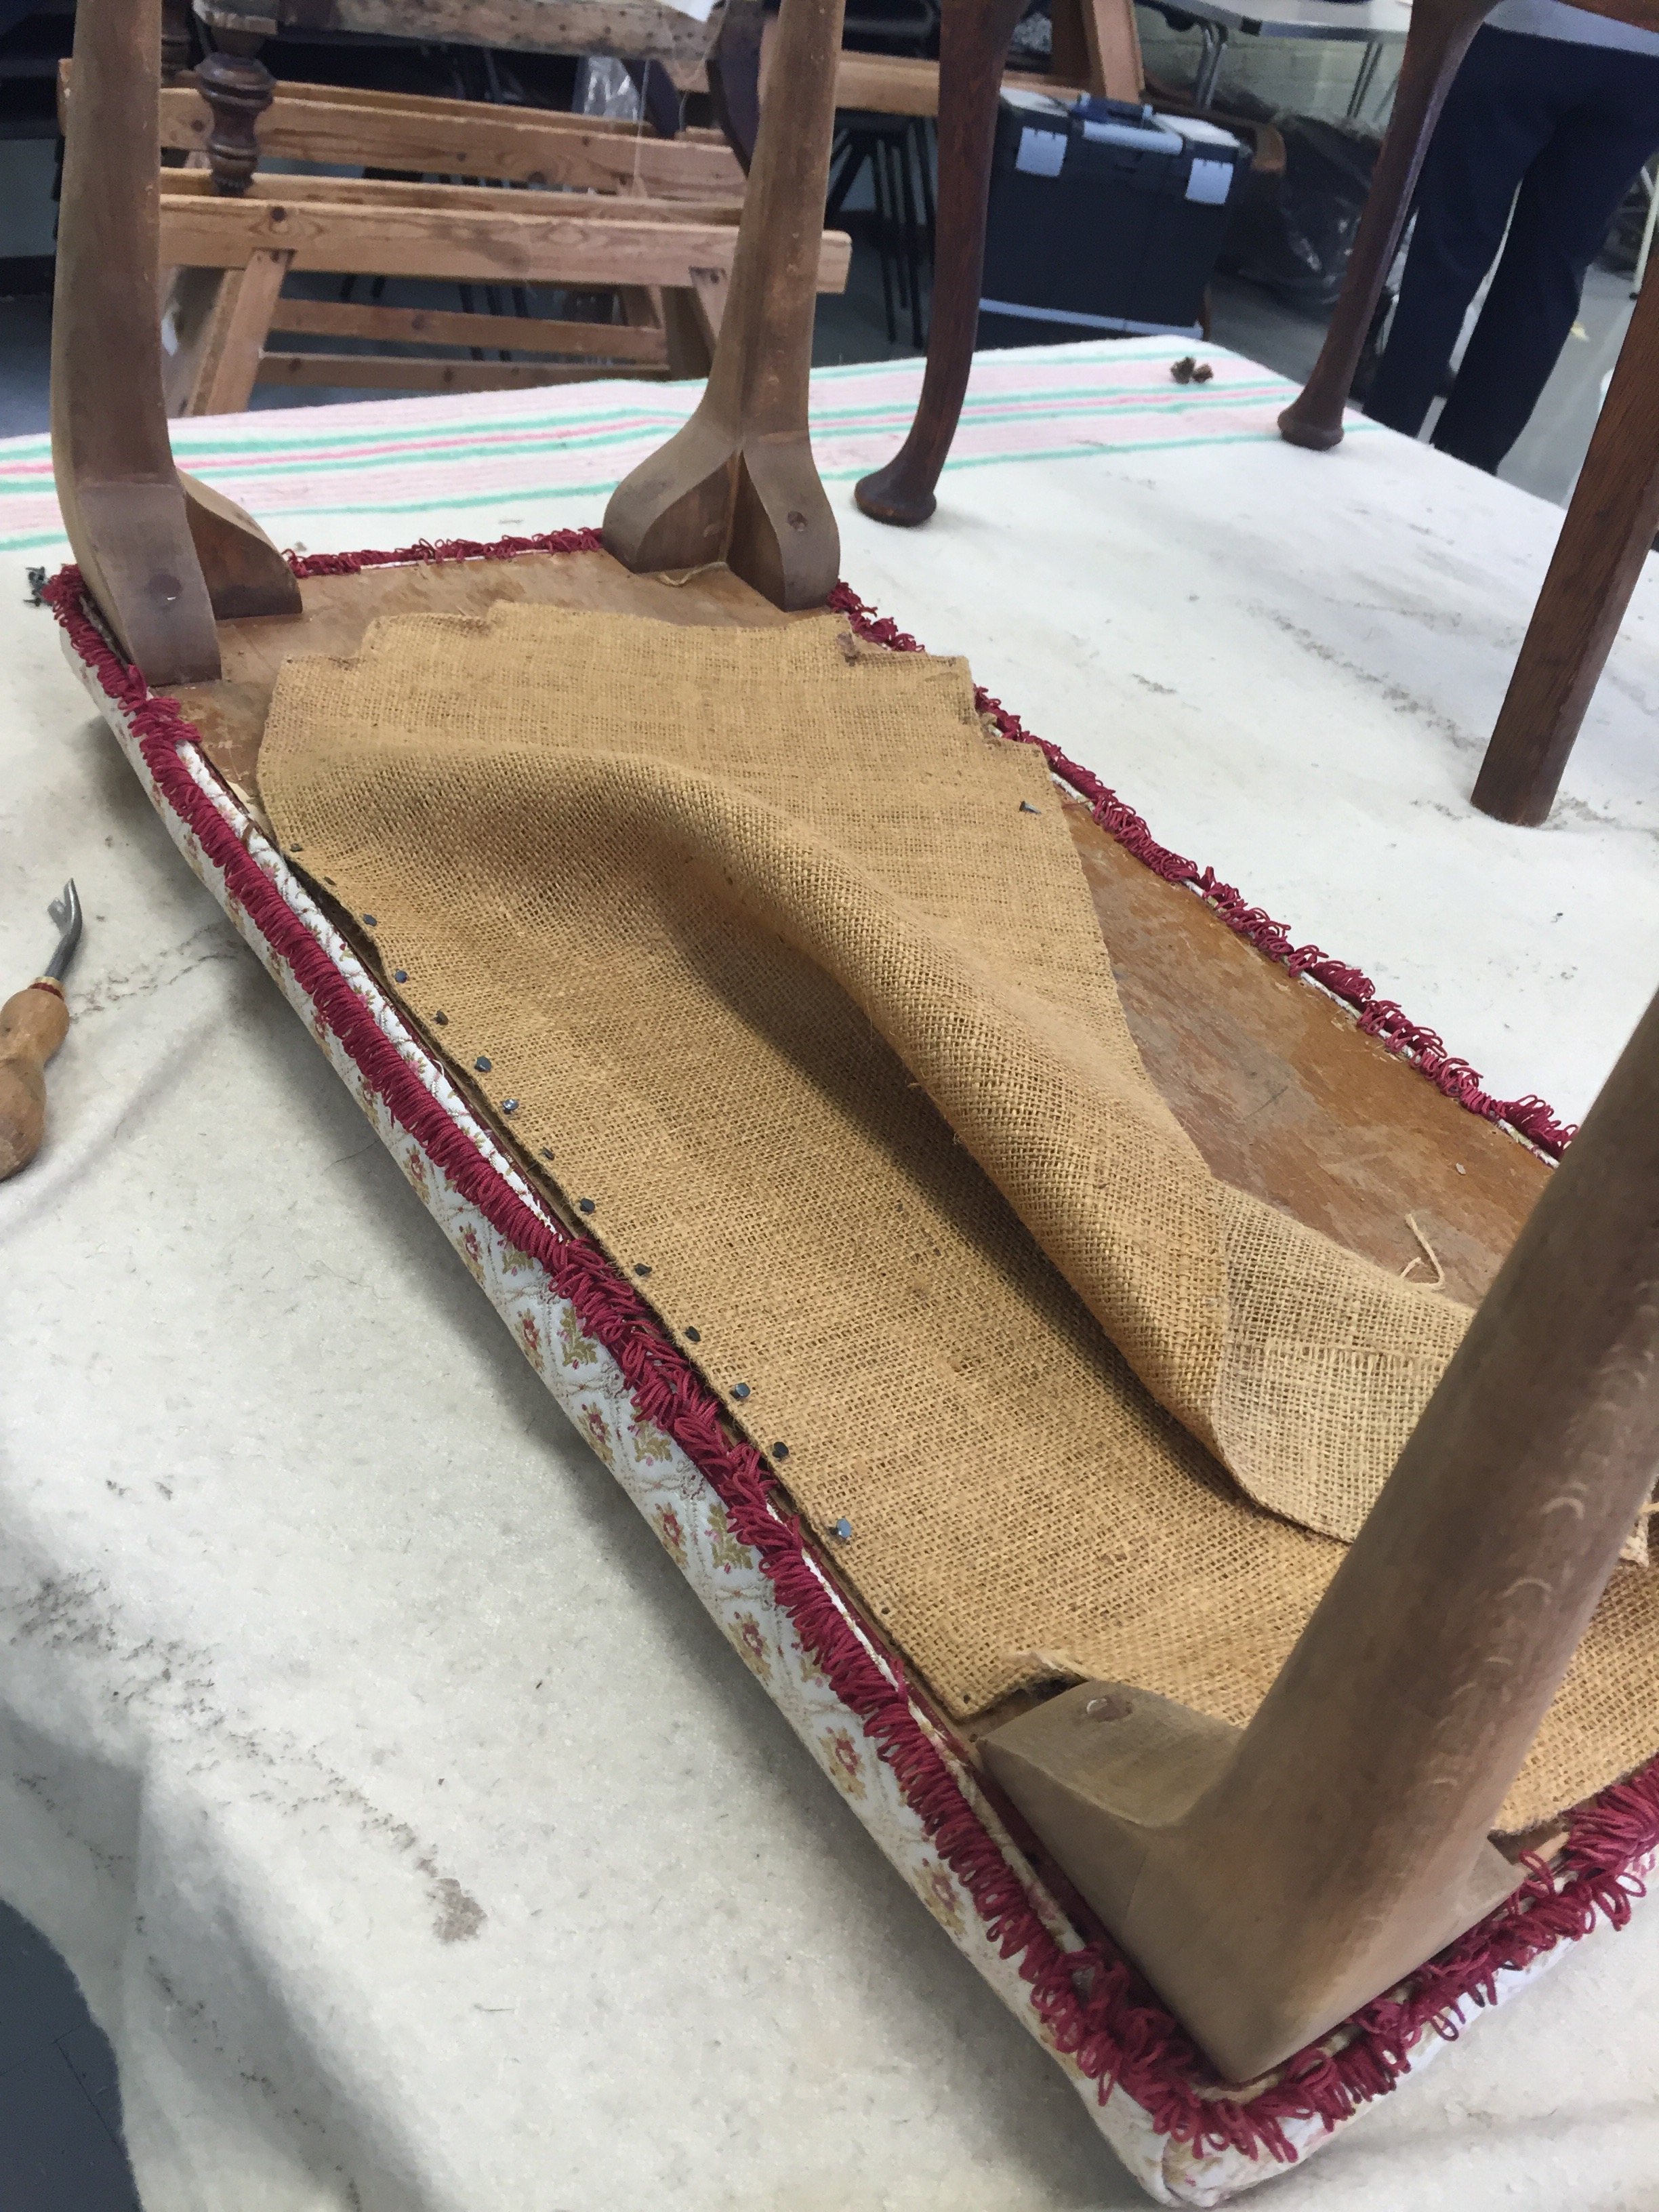
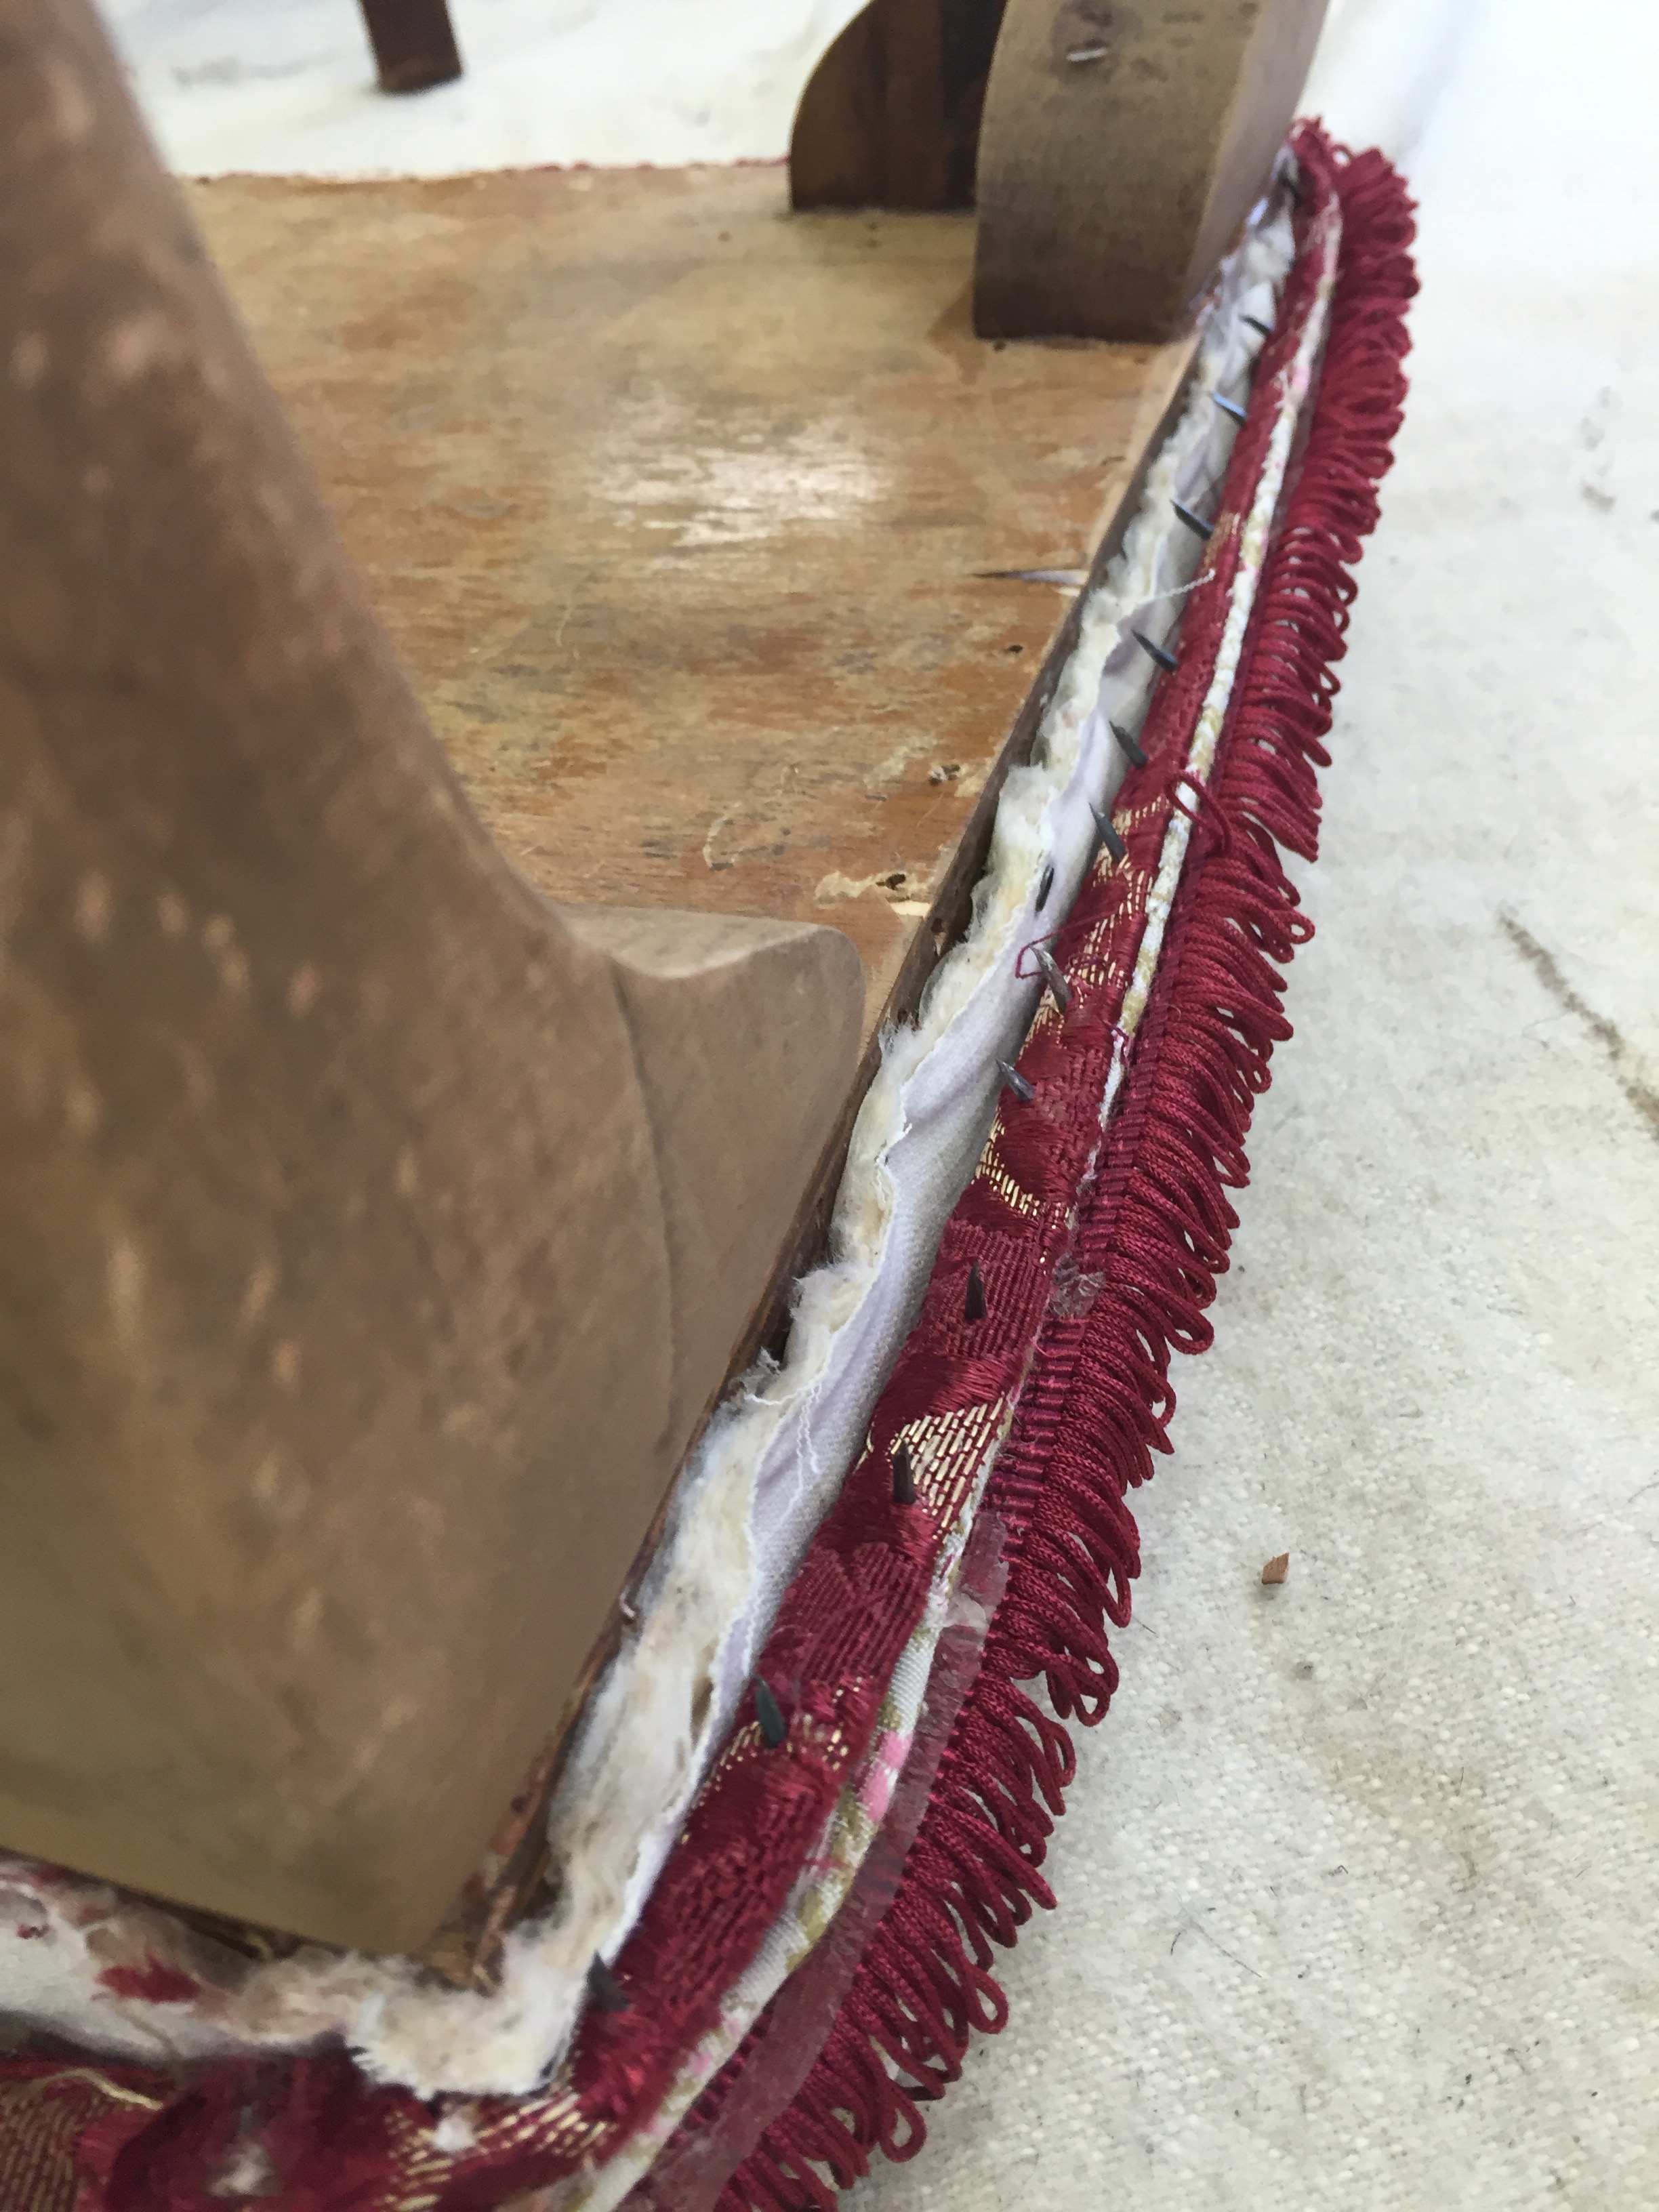
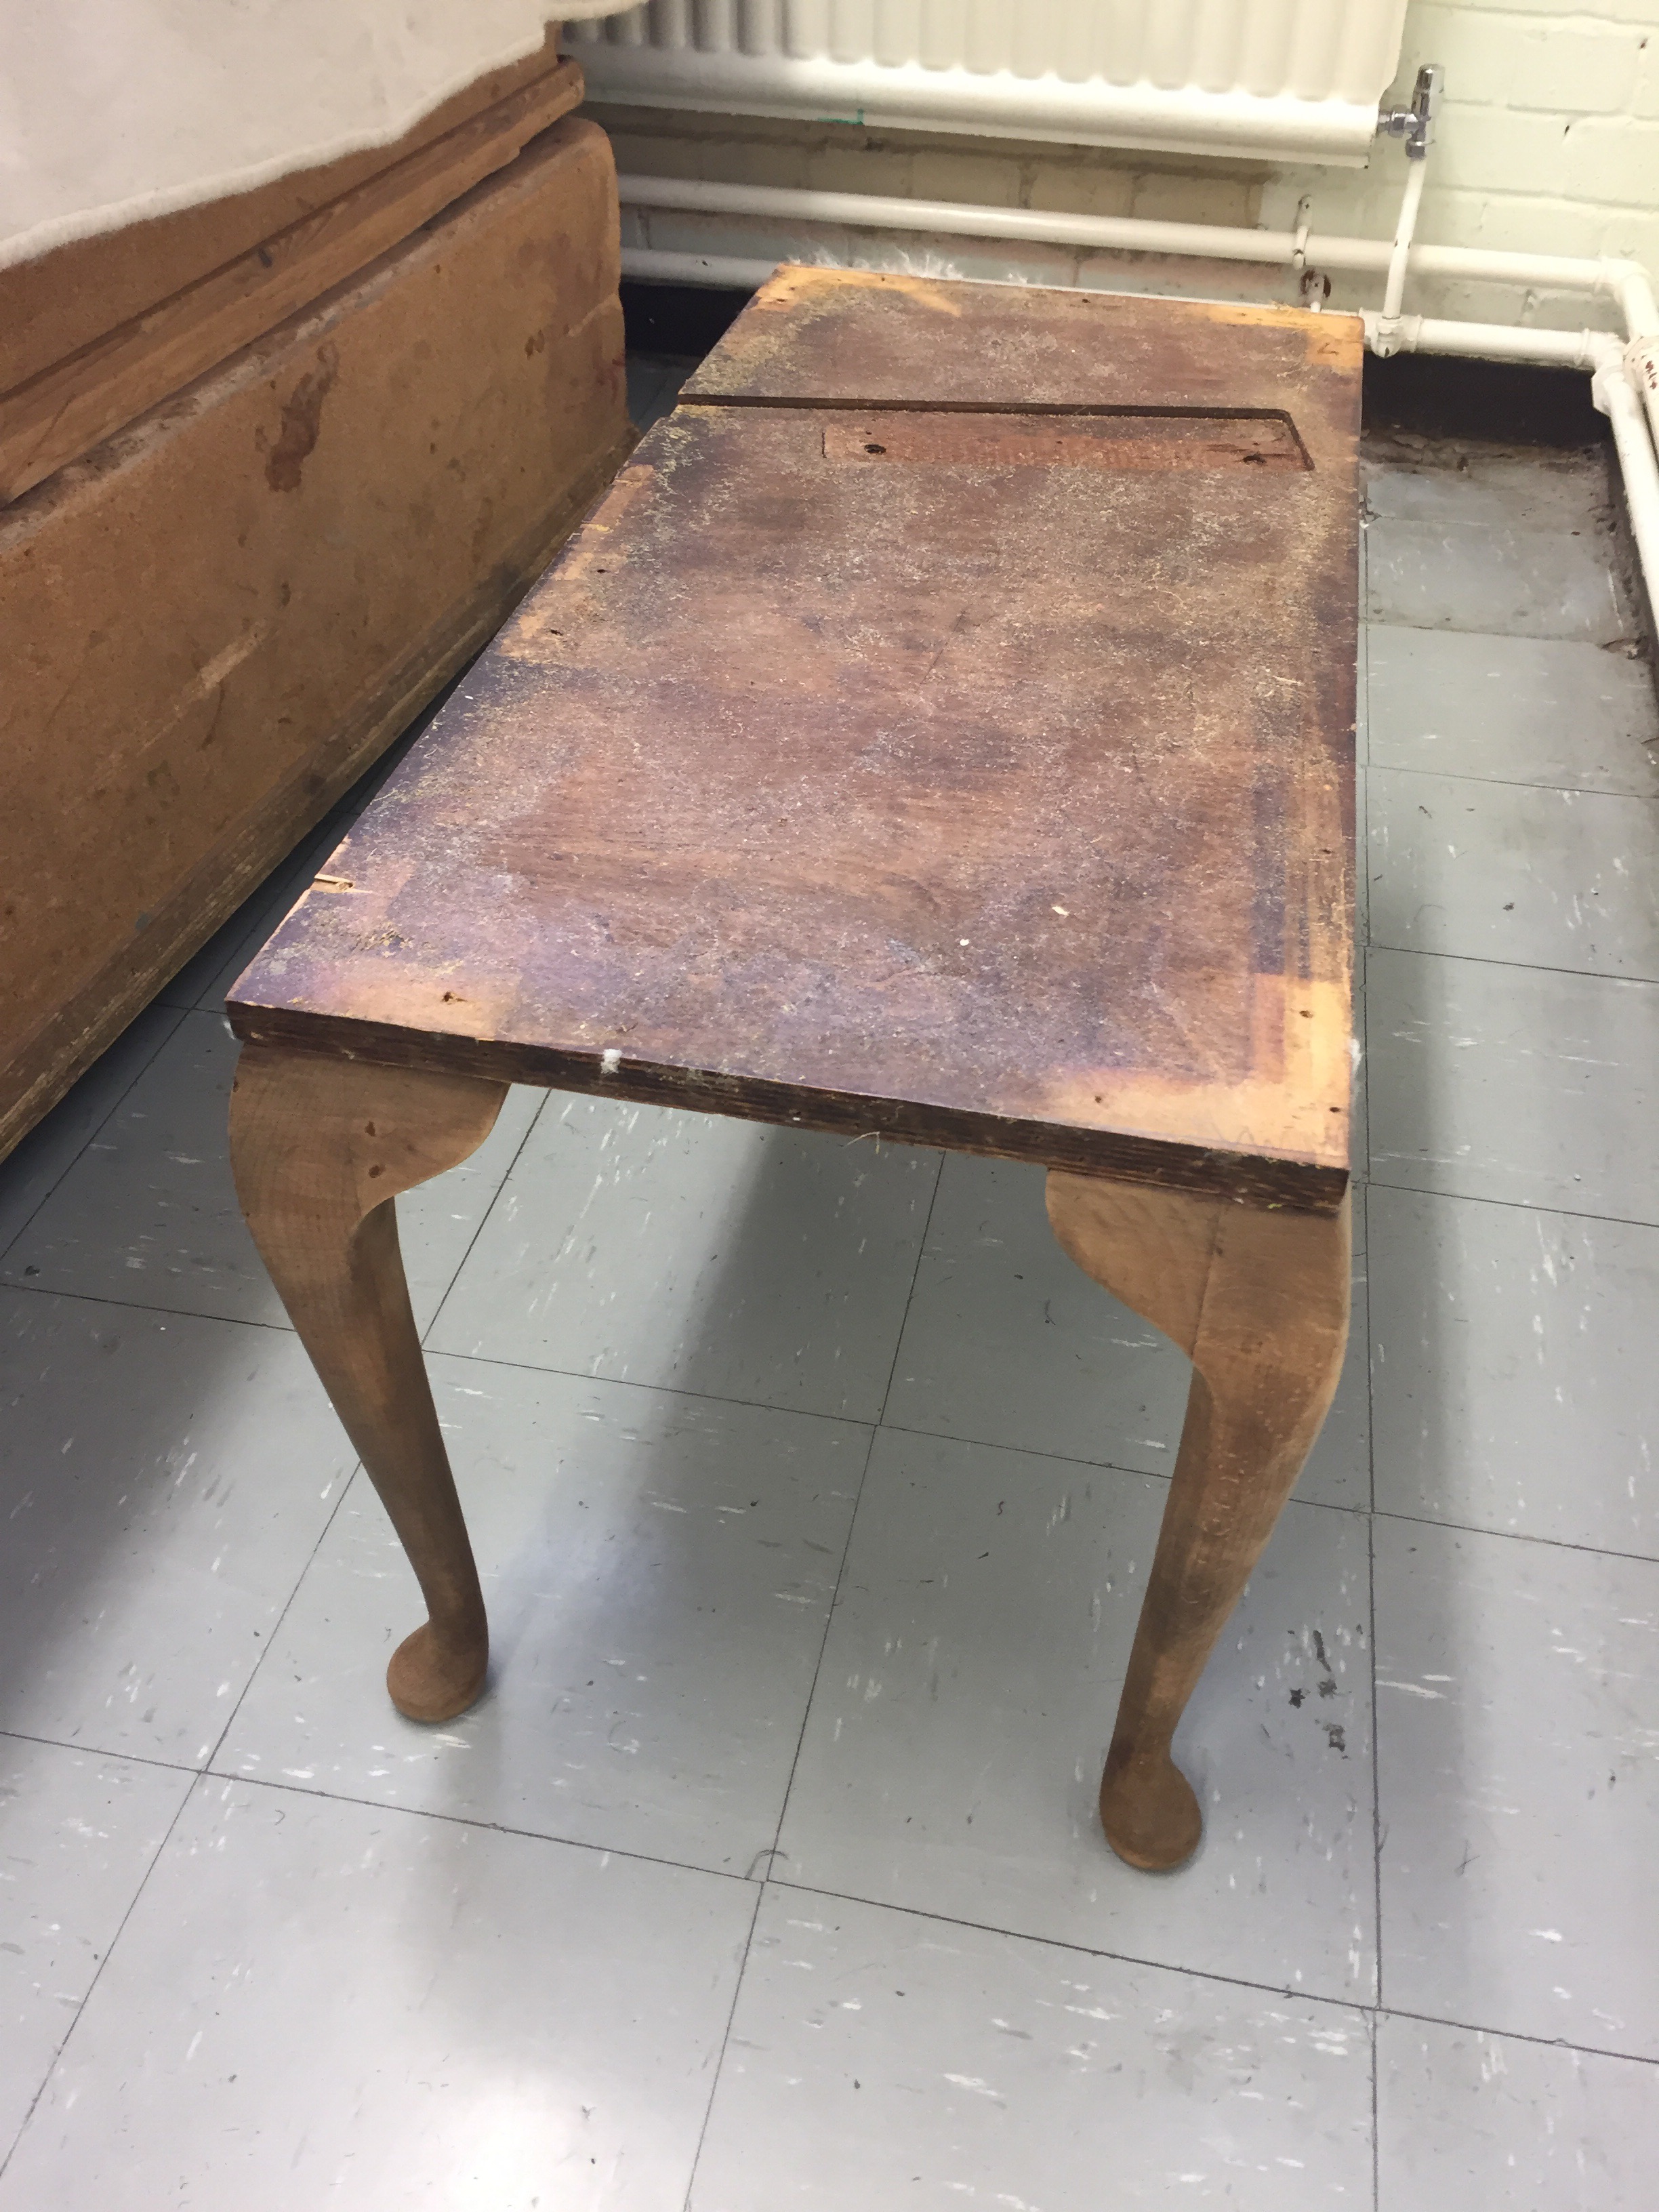
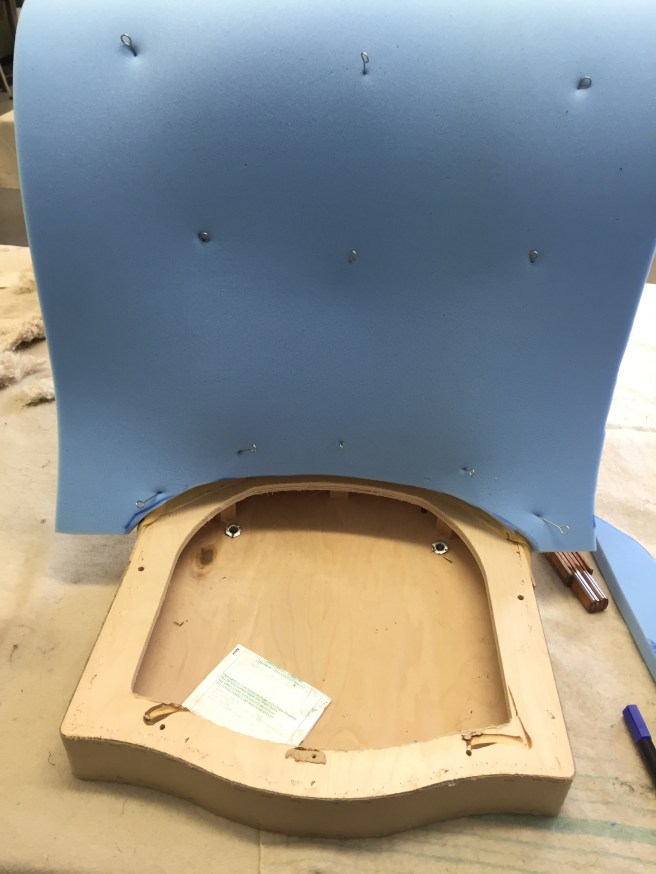
The first thing that I had to do was take everything apart and strip it back to nothing, you won’t be surprised when I say that what was underneath was not a lot more than a cardboard frame.

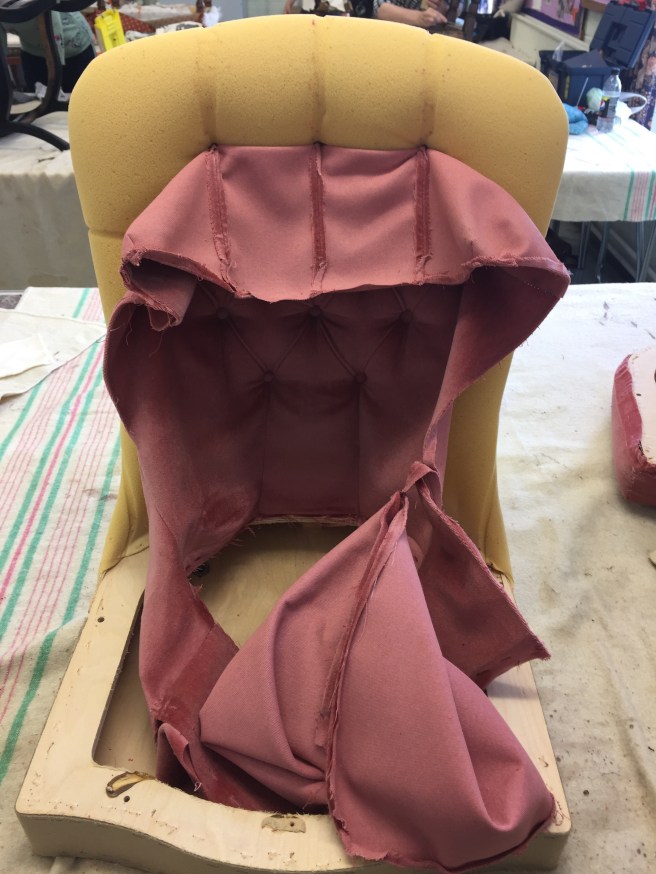
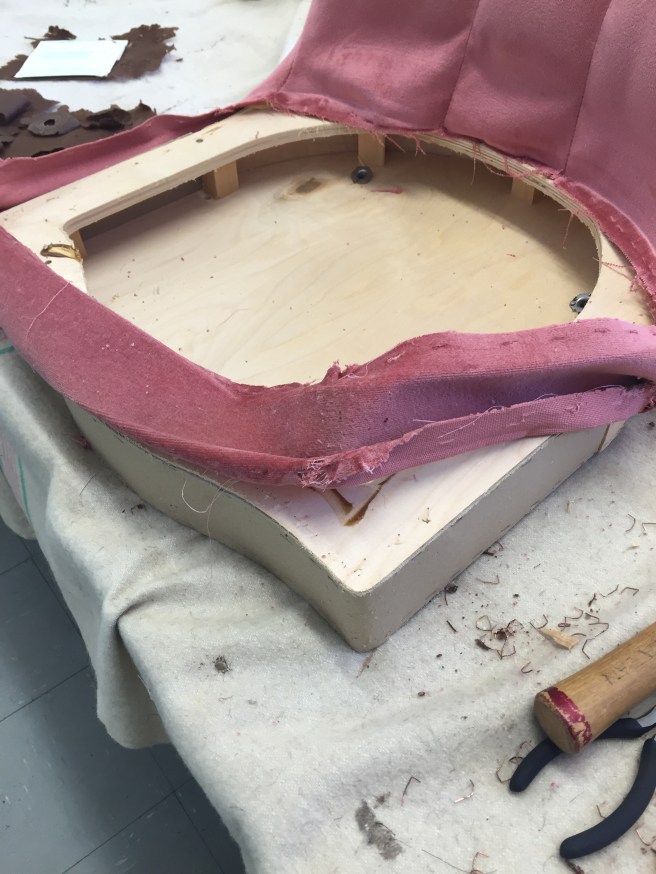
So all I had now was a very basic chair shape. If you are an only fools and horses fan, you will see why I have affectionately called this my Trigger’s Broom chair.

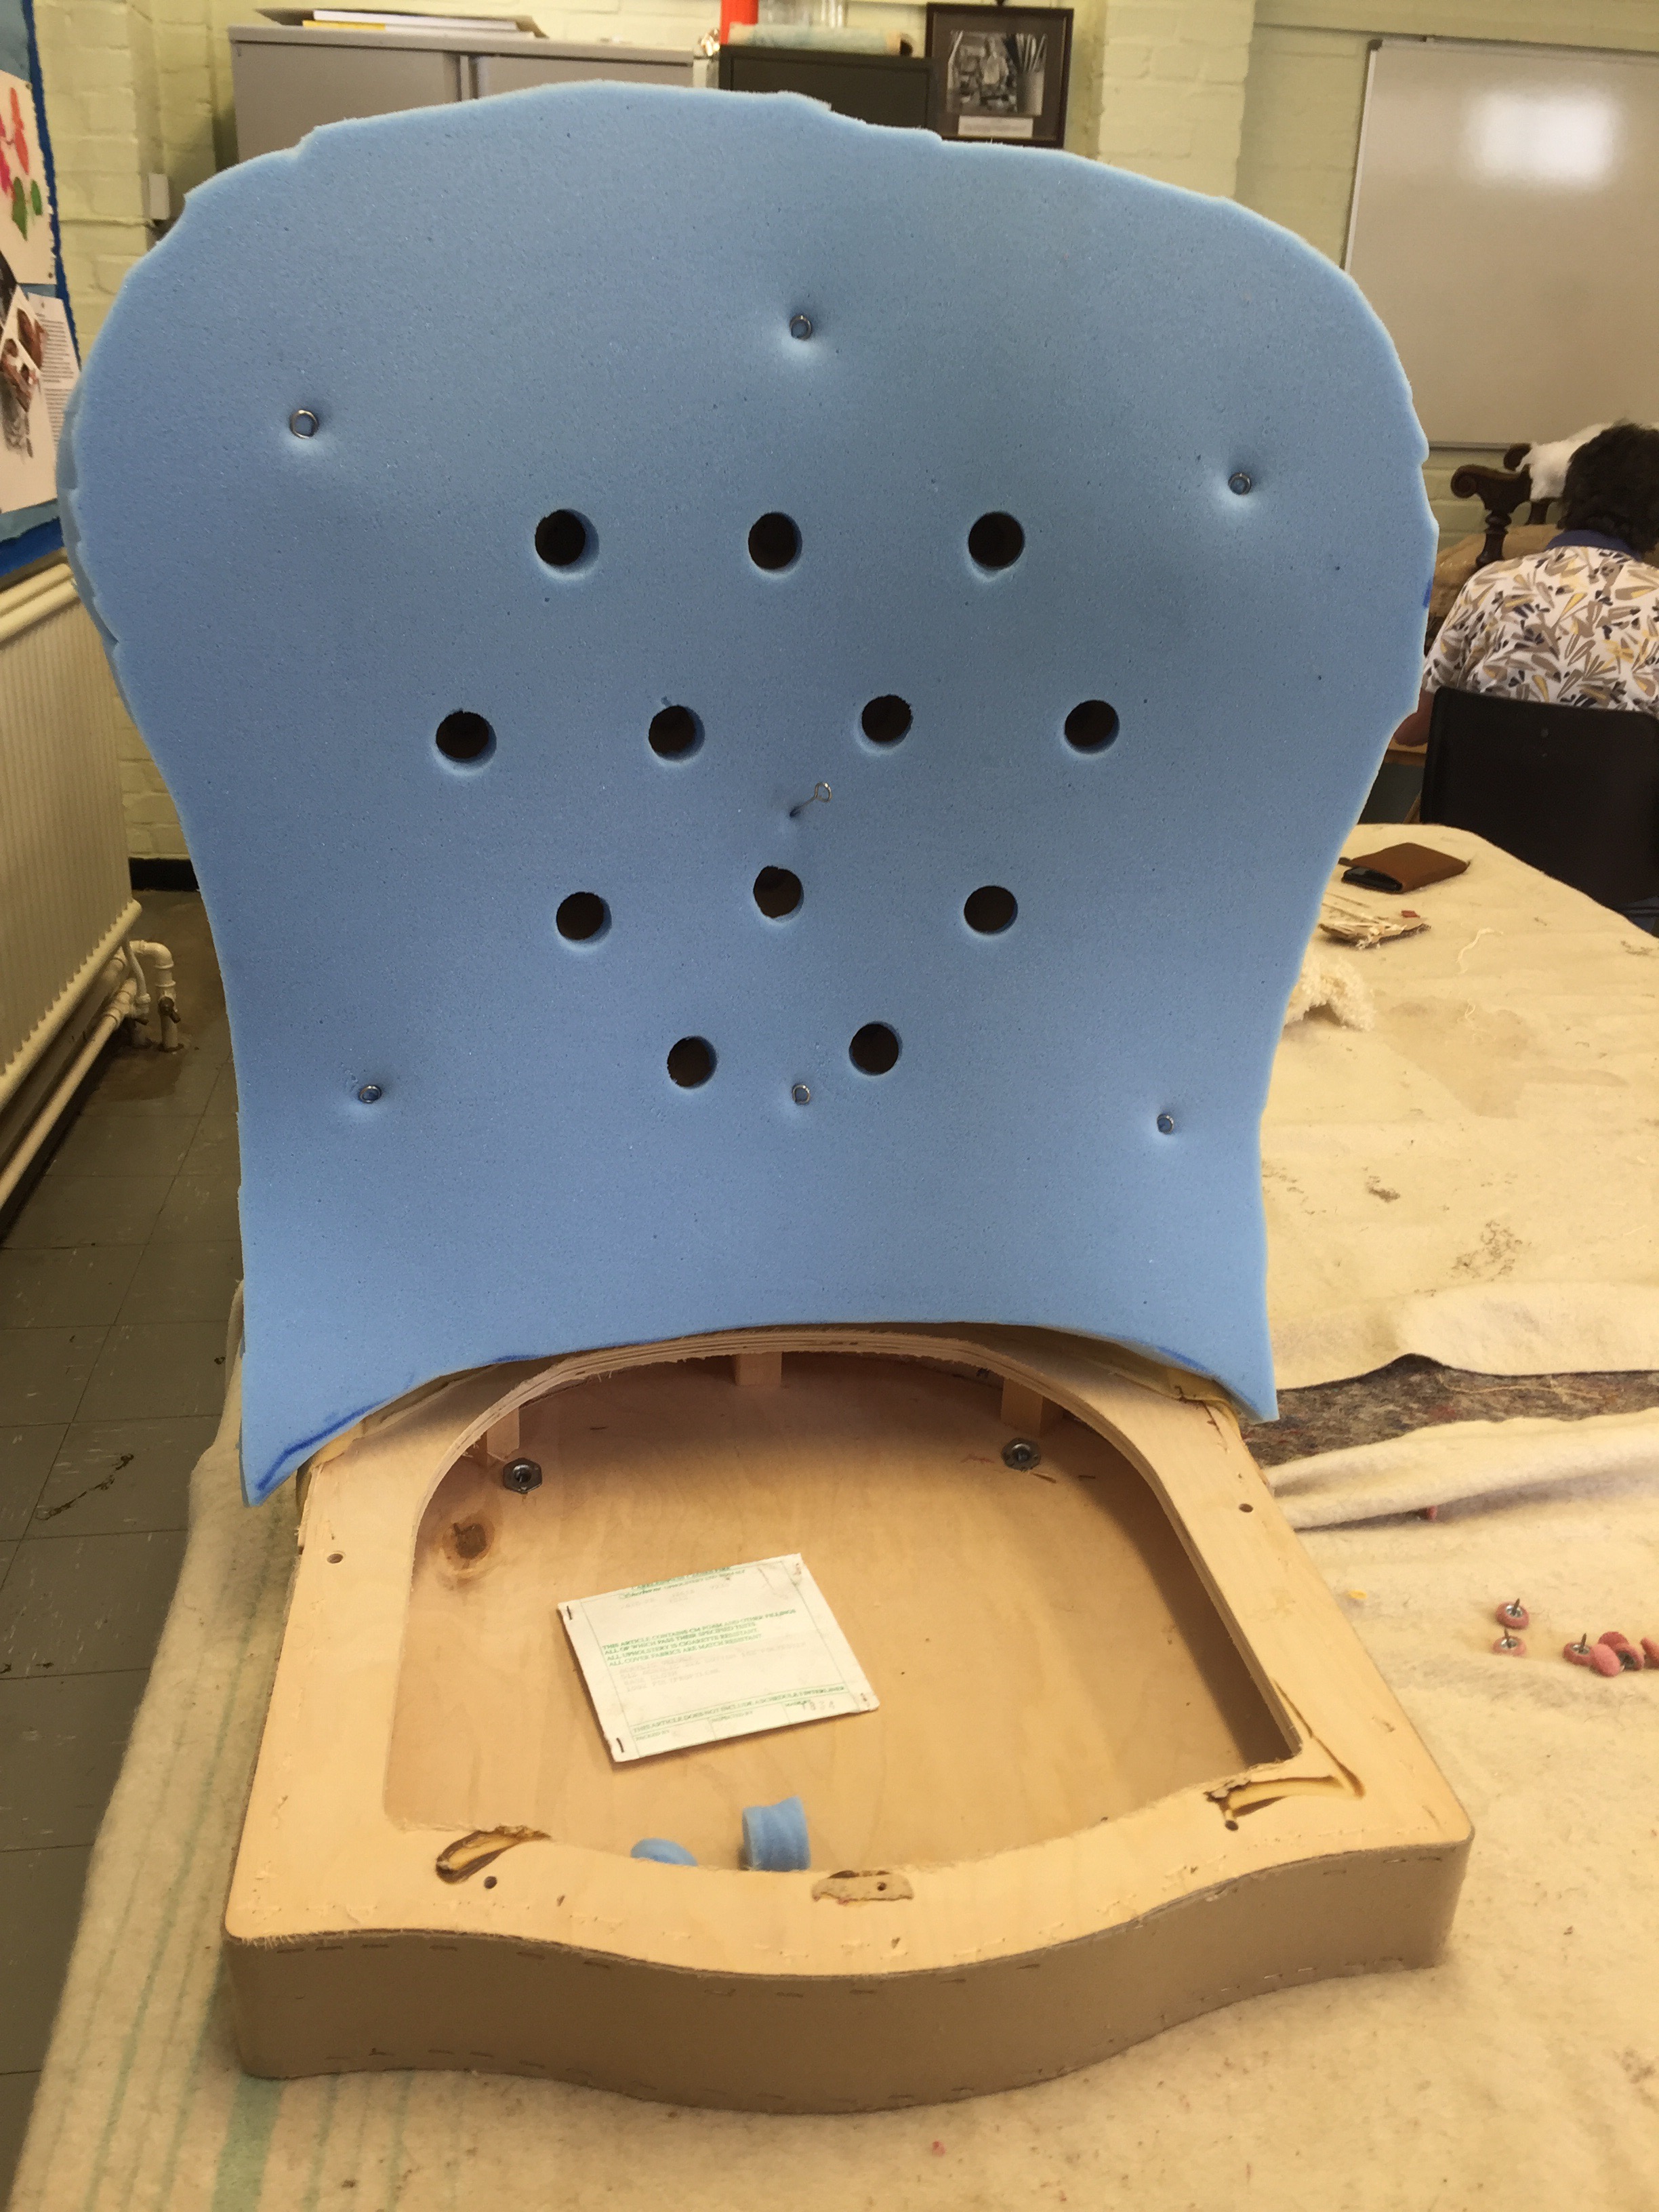
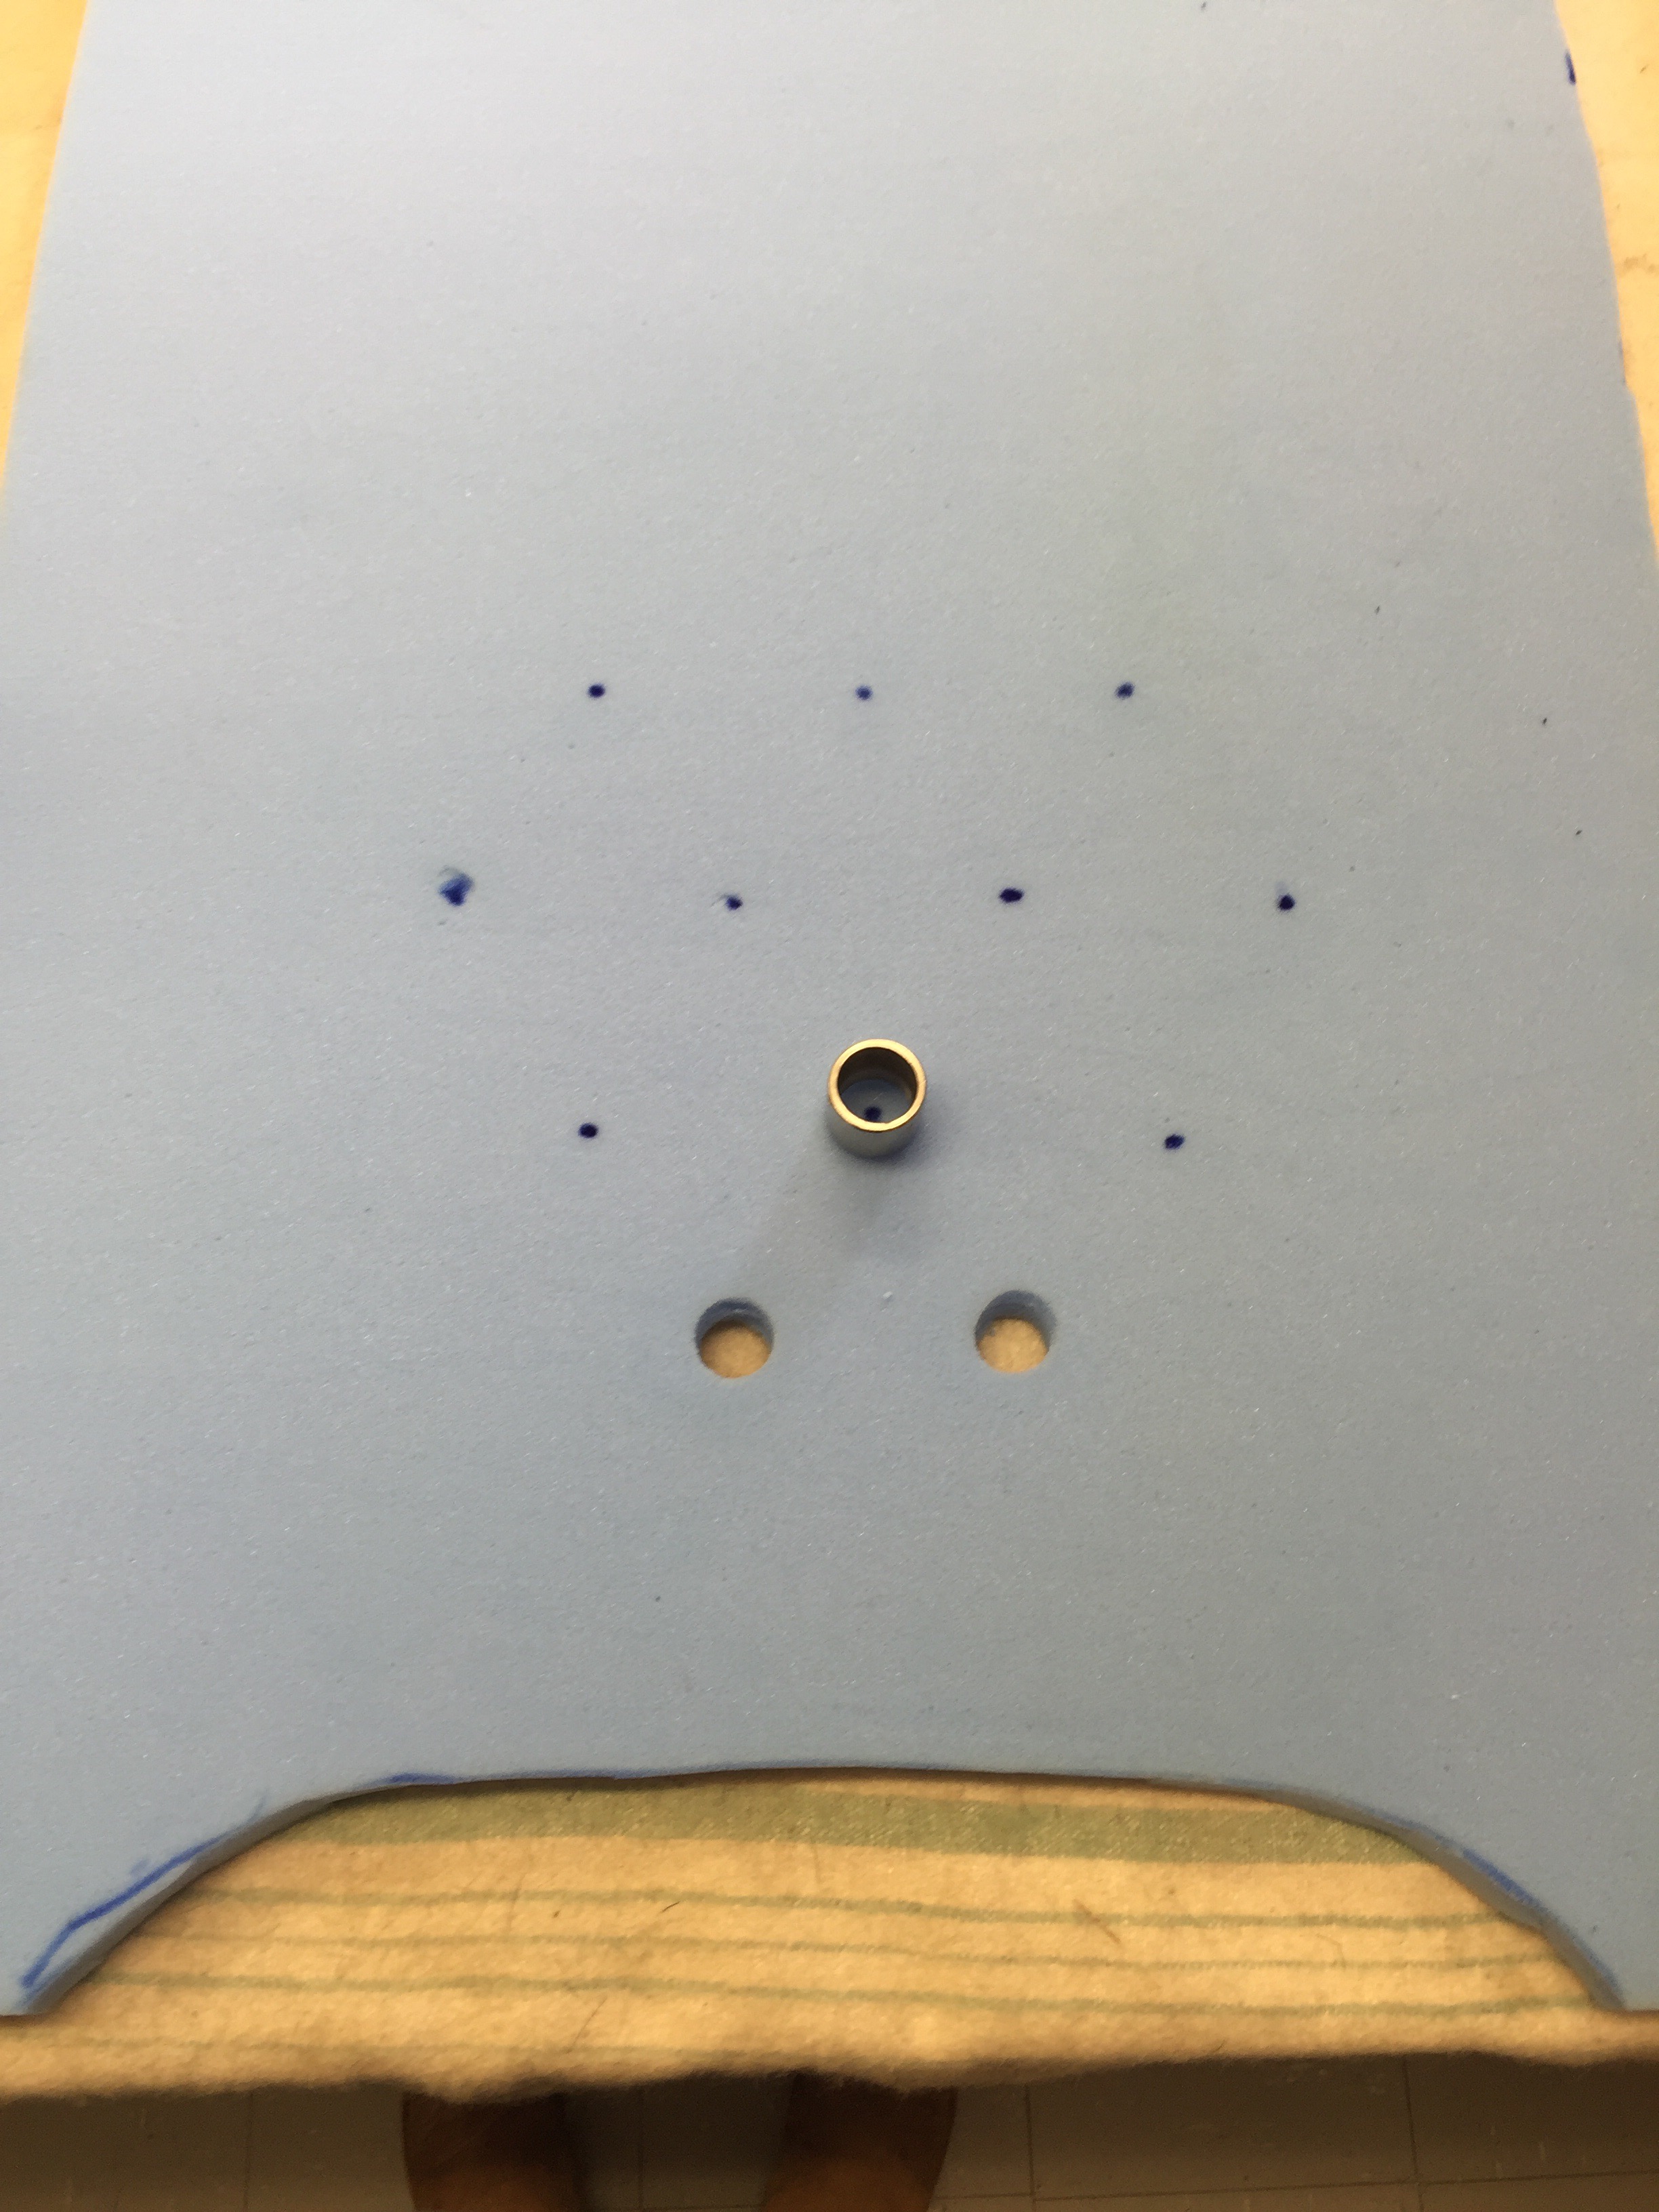
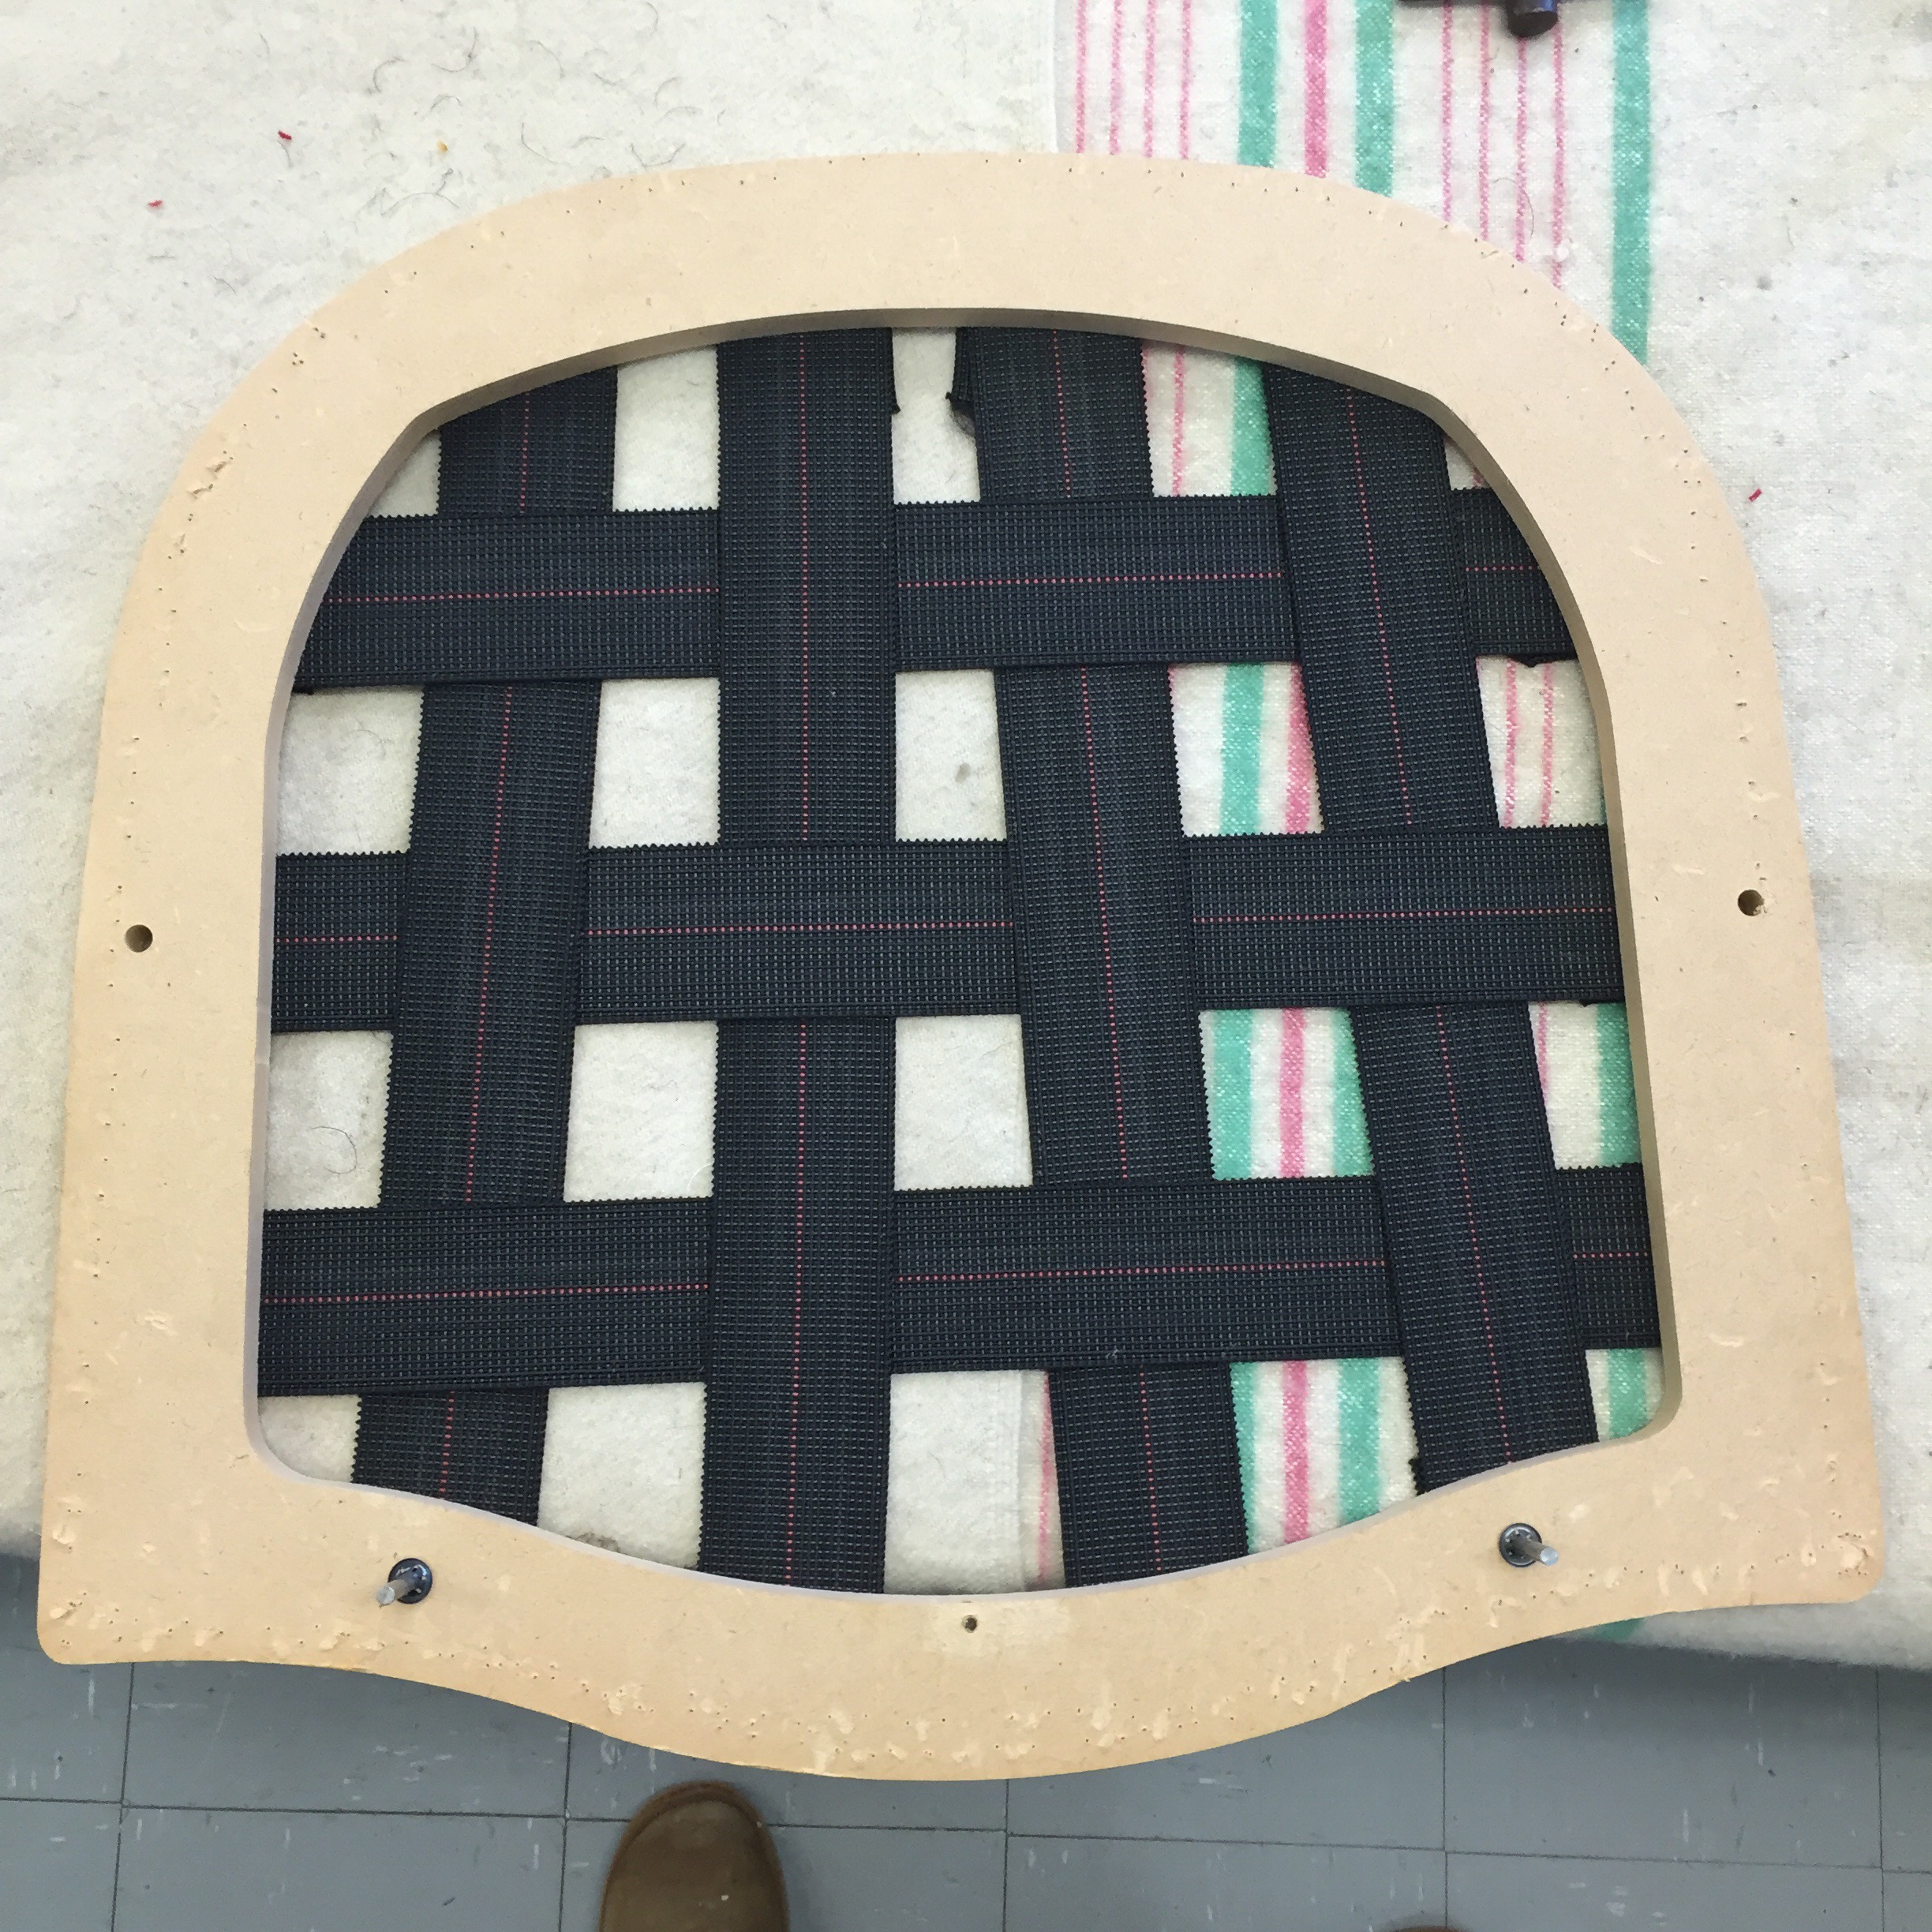
I cut new foam for the back, rewebbed underneath, and made a new foam seat. I changed the shape slightly of the top of the chair by adding some extra foam.


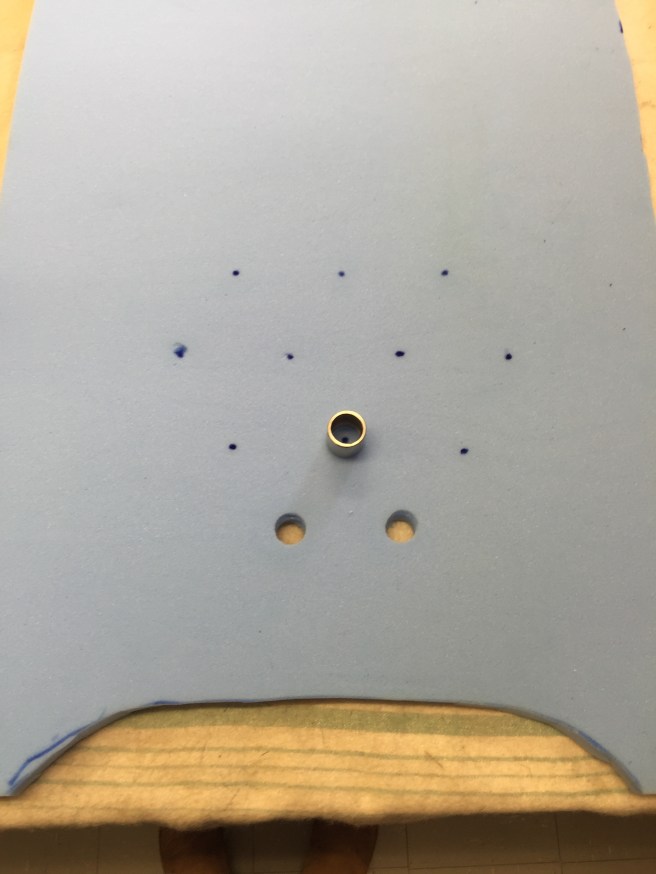
(Because this is a modern chair, perhaps 1970s or 1980s, I have chosen to use modern techniques here.)

Already I could feel the chair starting to come back to life and off I went in hunt of my perfect fabric. Sometimes I have such a fixed picture in my mind of how I want something to end up, there is just no budging me from it. I found my dream shop, a warehouse literally full of thousands and thousands of rolls of absolutely any fabric you can think of. I thought I would be there for half an hour but 2 1/2 hours later, I walked out in a daze, totally overwhelmed by the place. I also had my 2m of new top cloth and I was so excited.

I was then on a roll to get the chair finished, I have a terrible habit whenever I am doing anything like this to focus myself entirely on the end result. (I am the sort of person who is already hanging new curtains and flumping the new cushions before the paint is dry when we decorate a room).

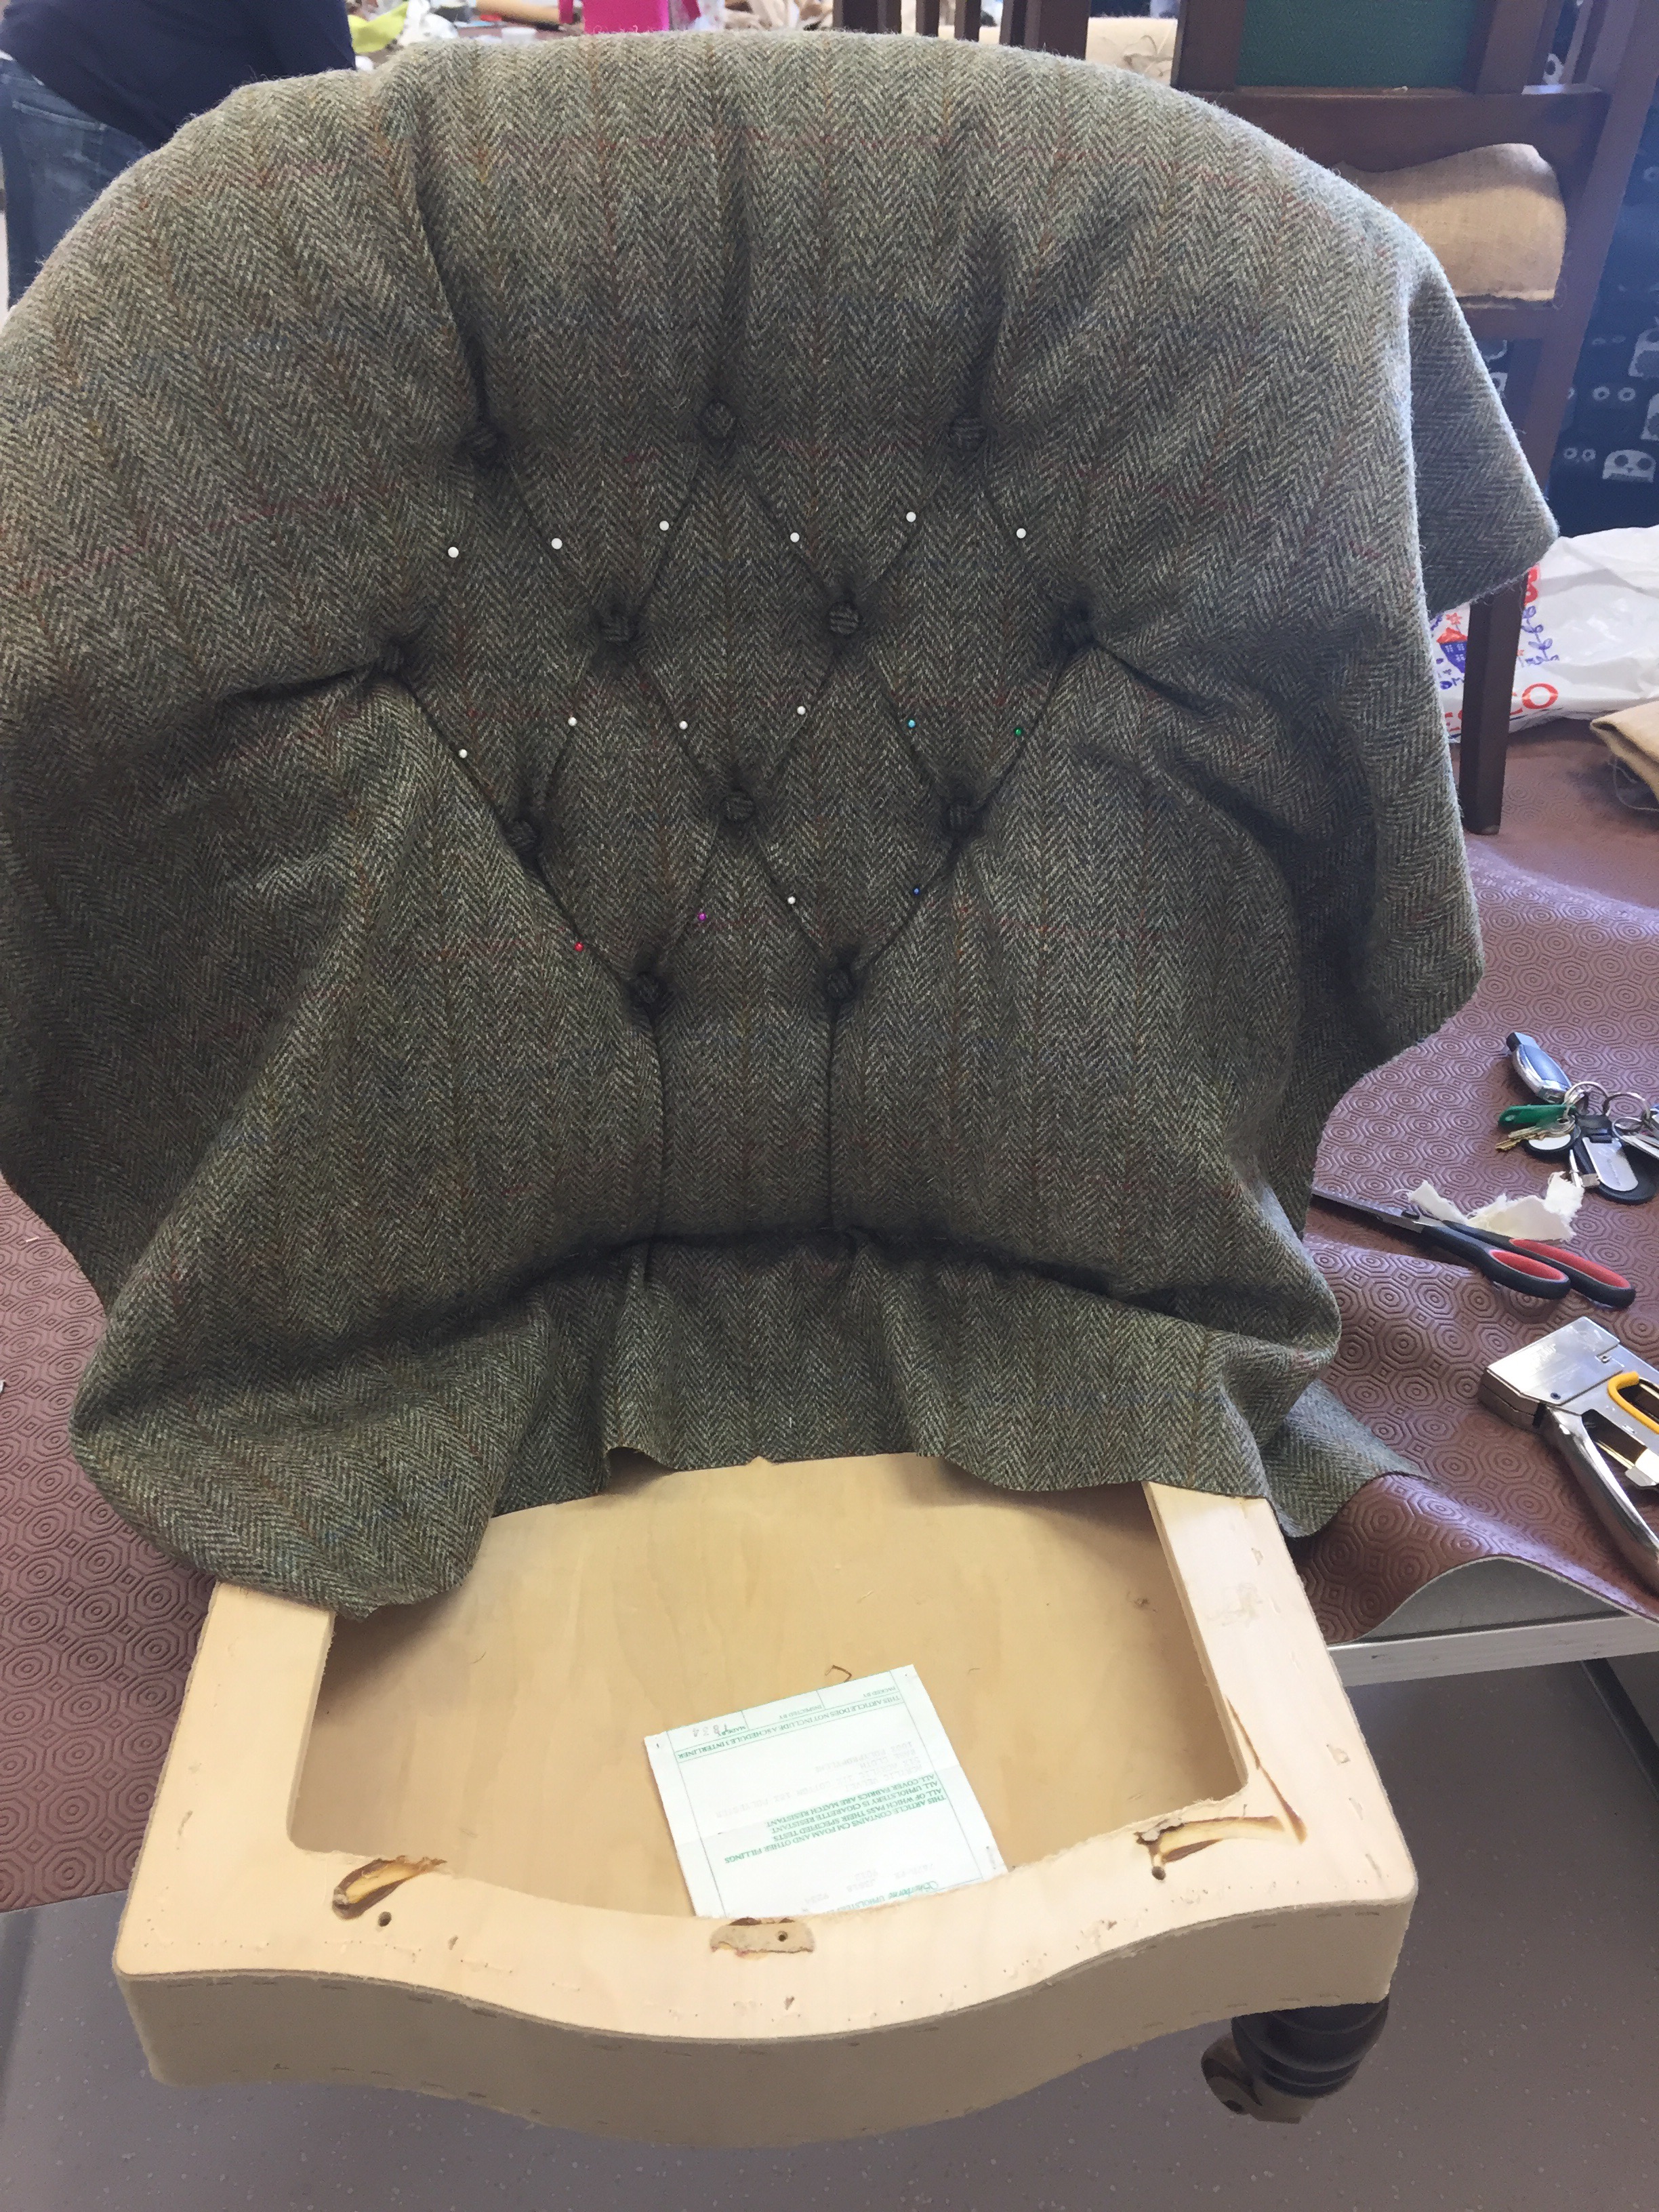
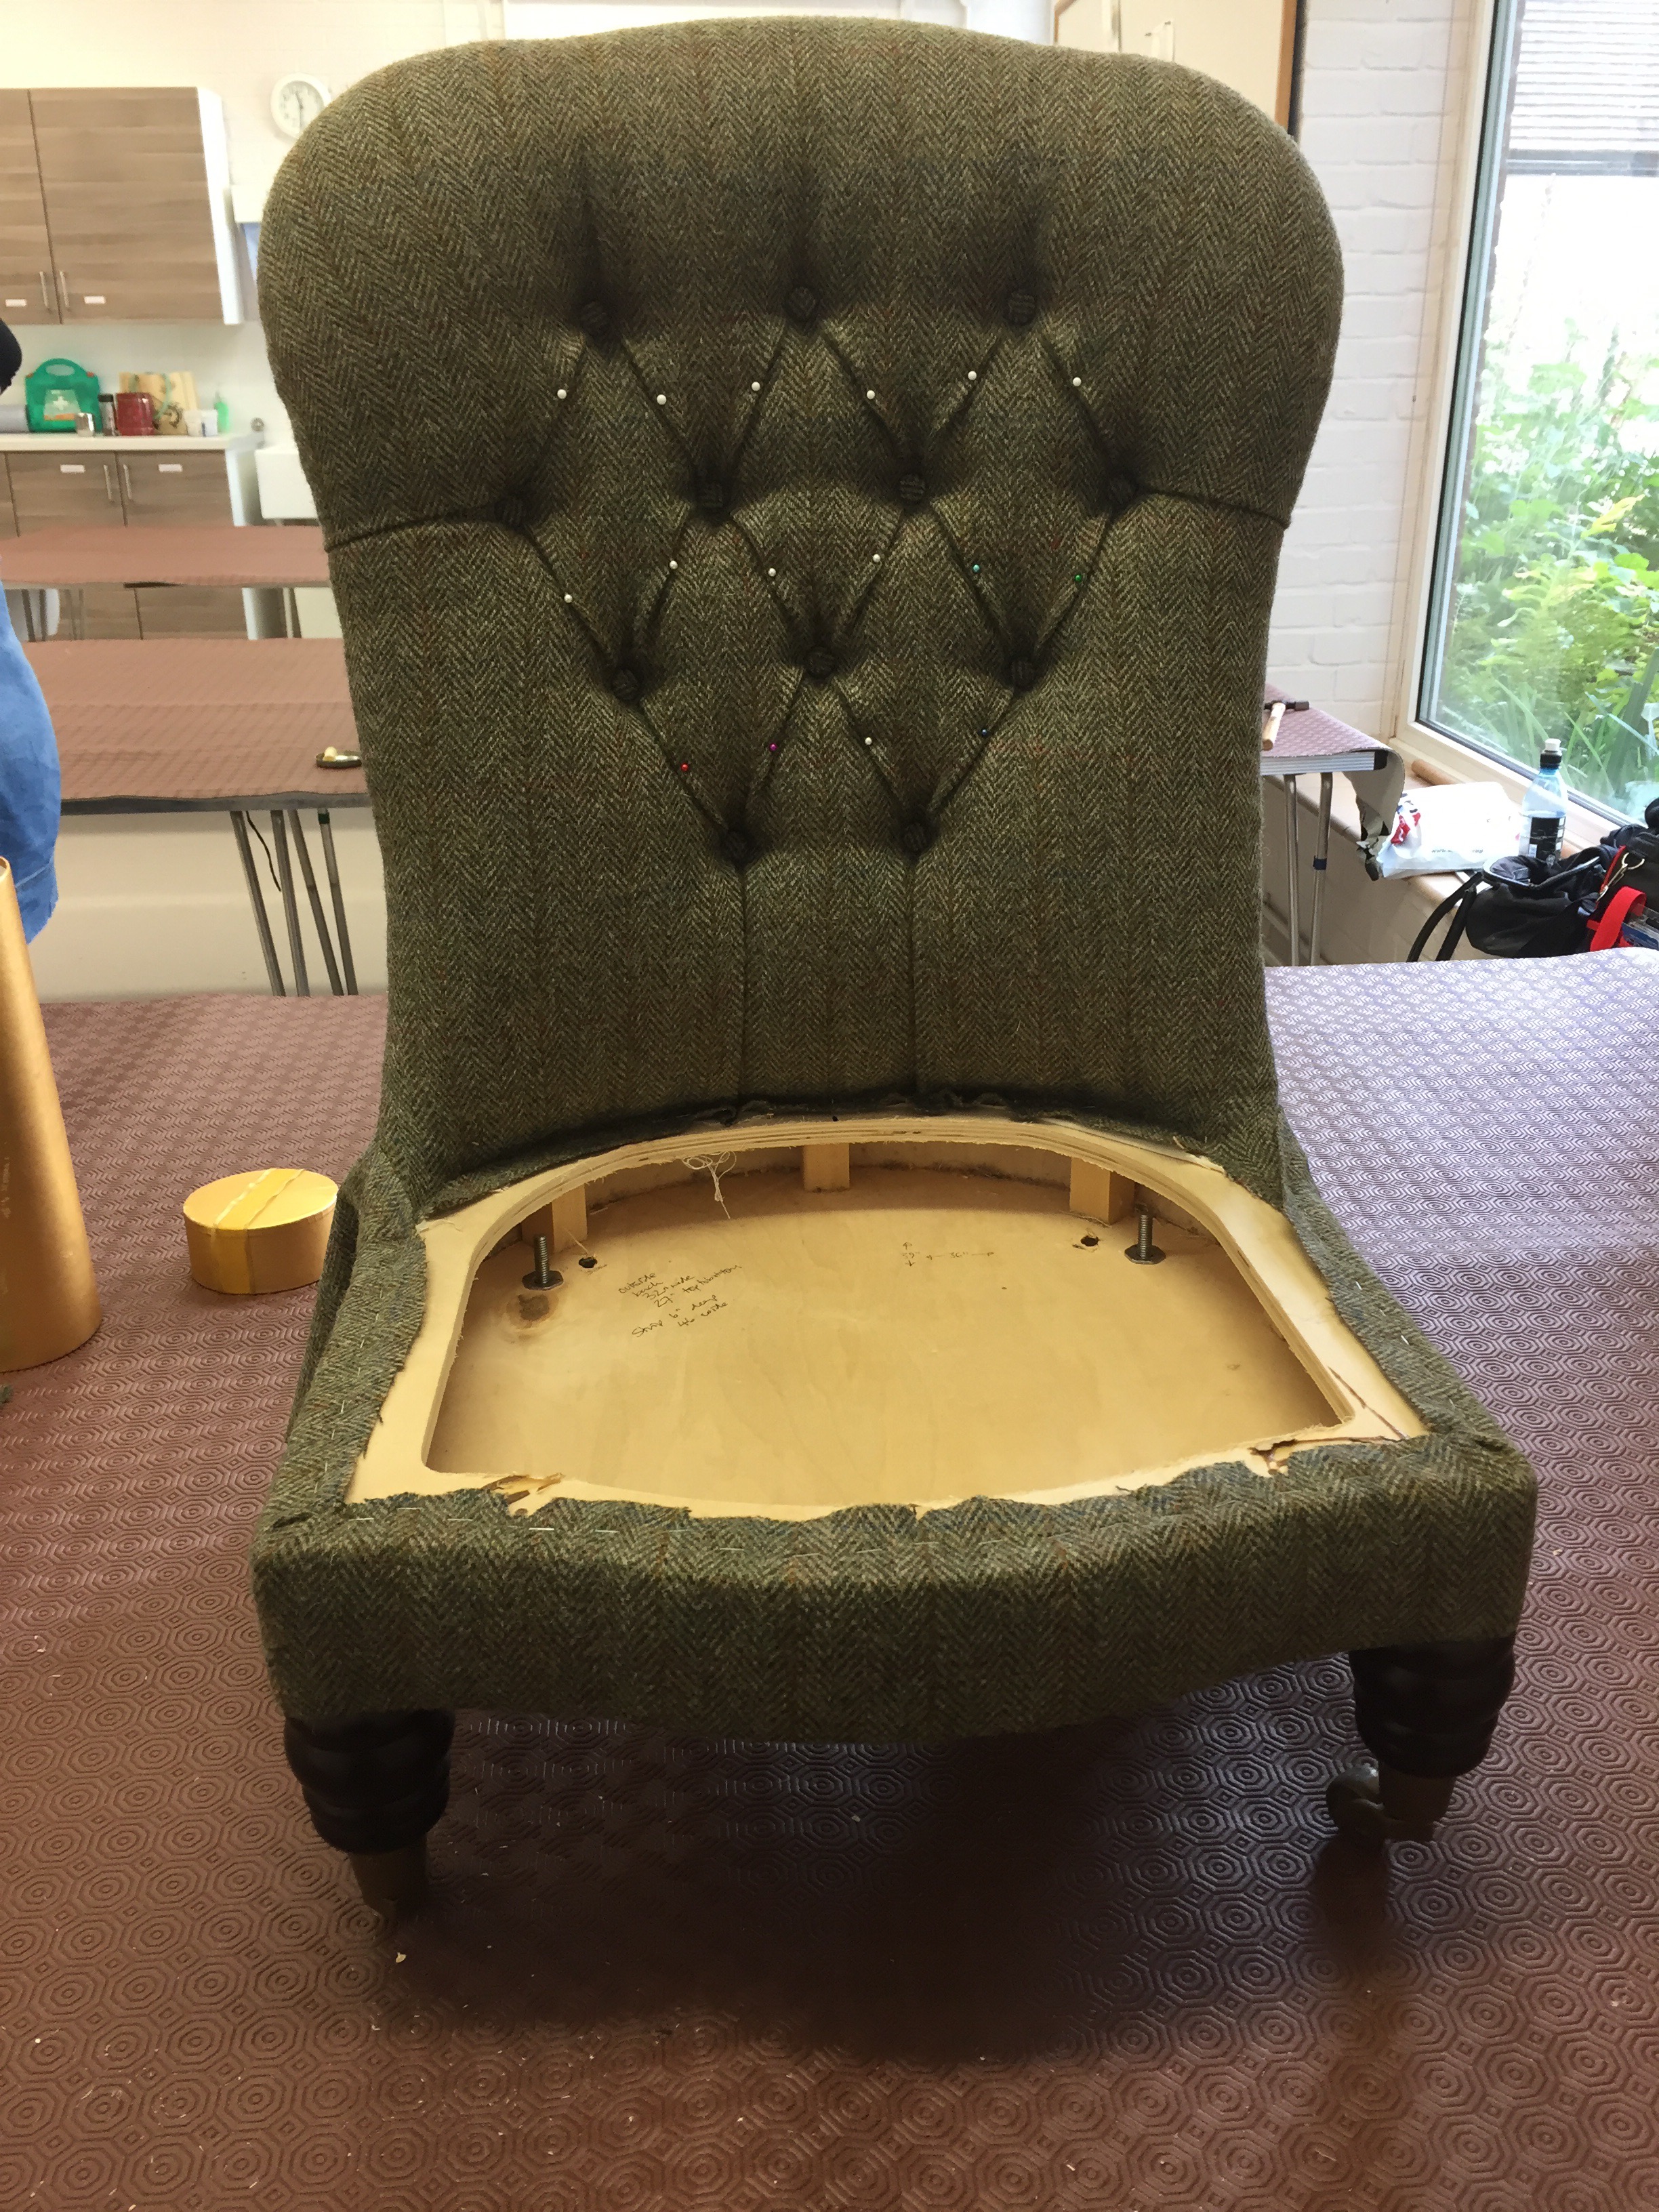
Onto deep buttoning.


Now I have been told that deep buttoning is every upholstery student’s nemesis. I have obviously never done it before and my teacher was slightly concerned that this was perhaps a little bit advanced for me but hey, there’s only one way to learn isn’t  there?

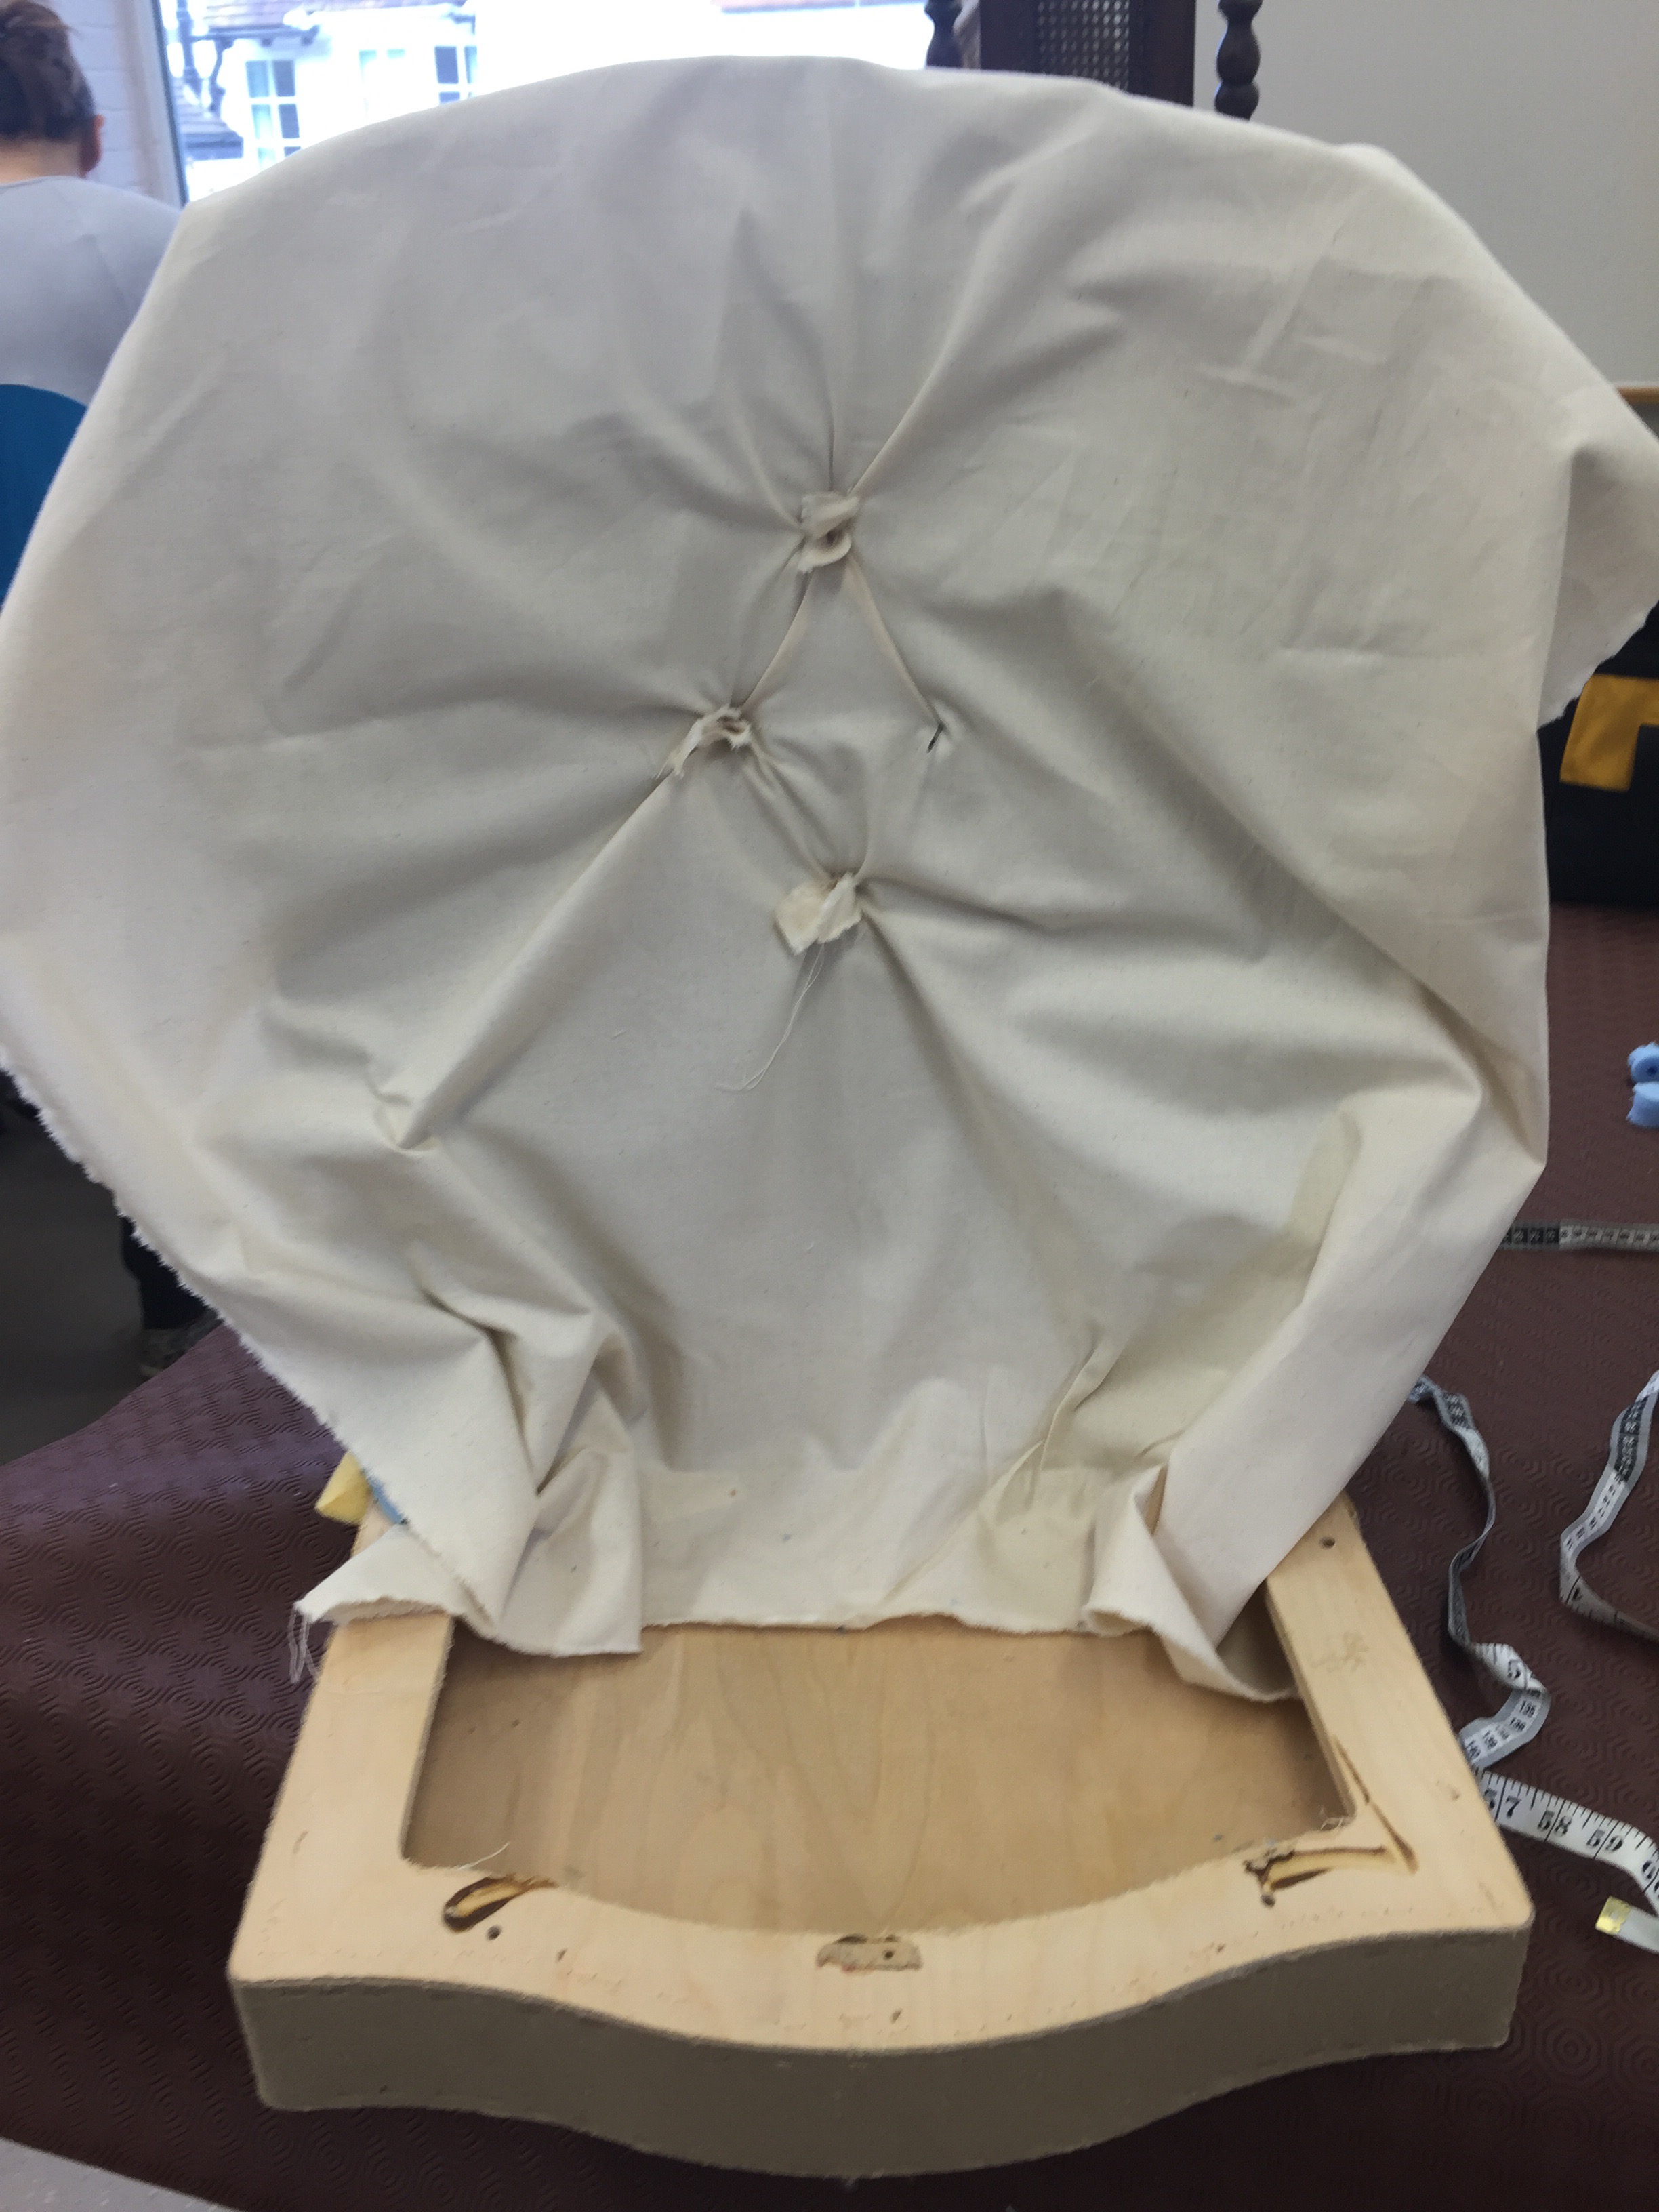
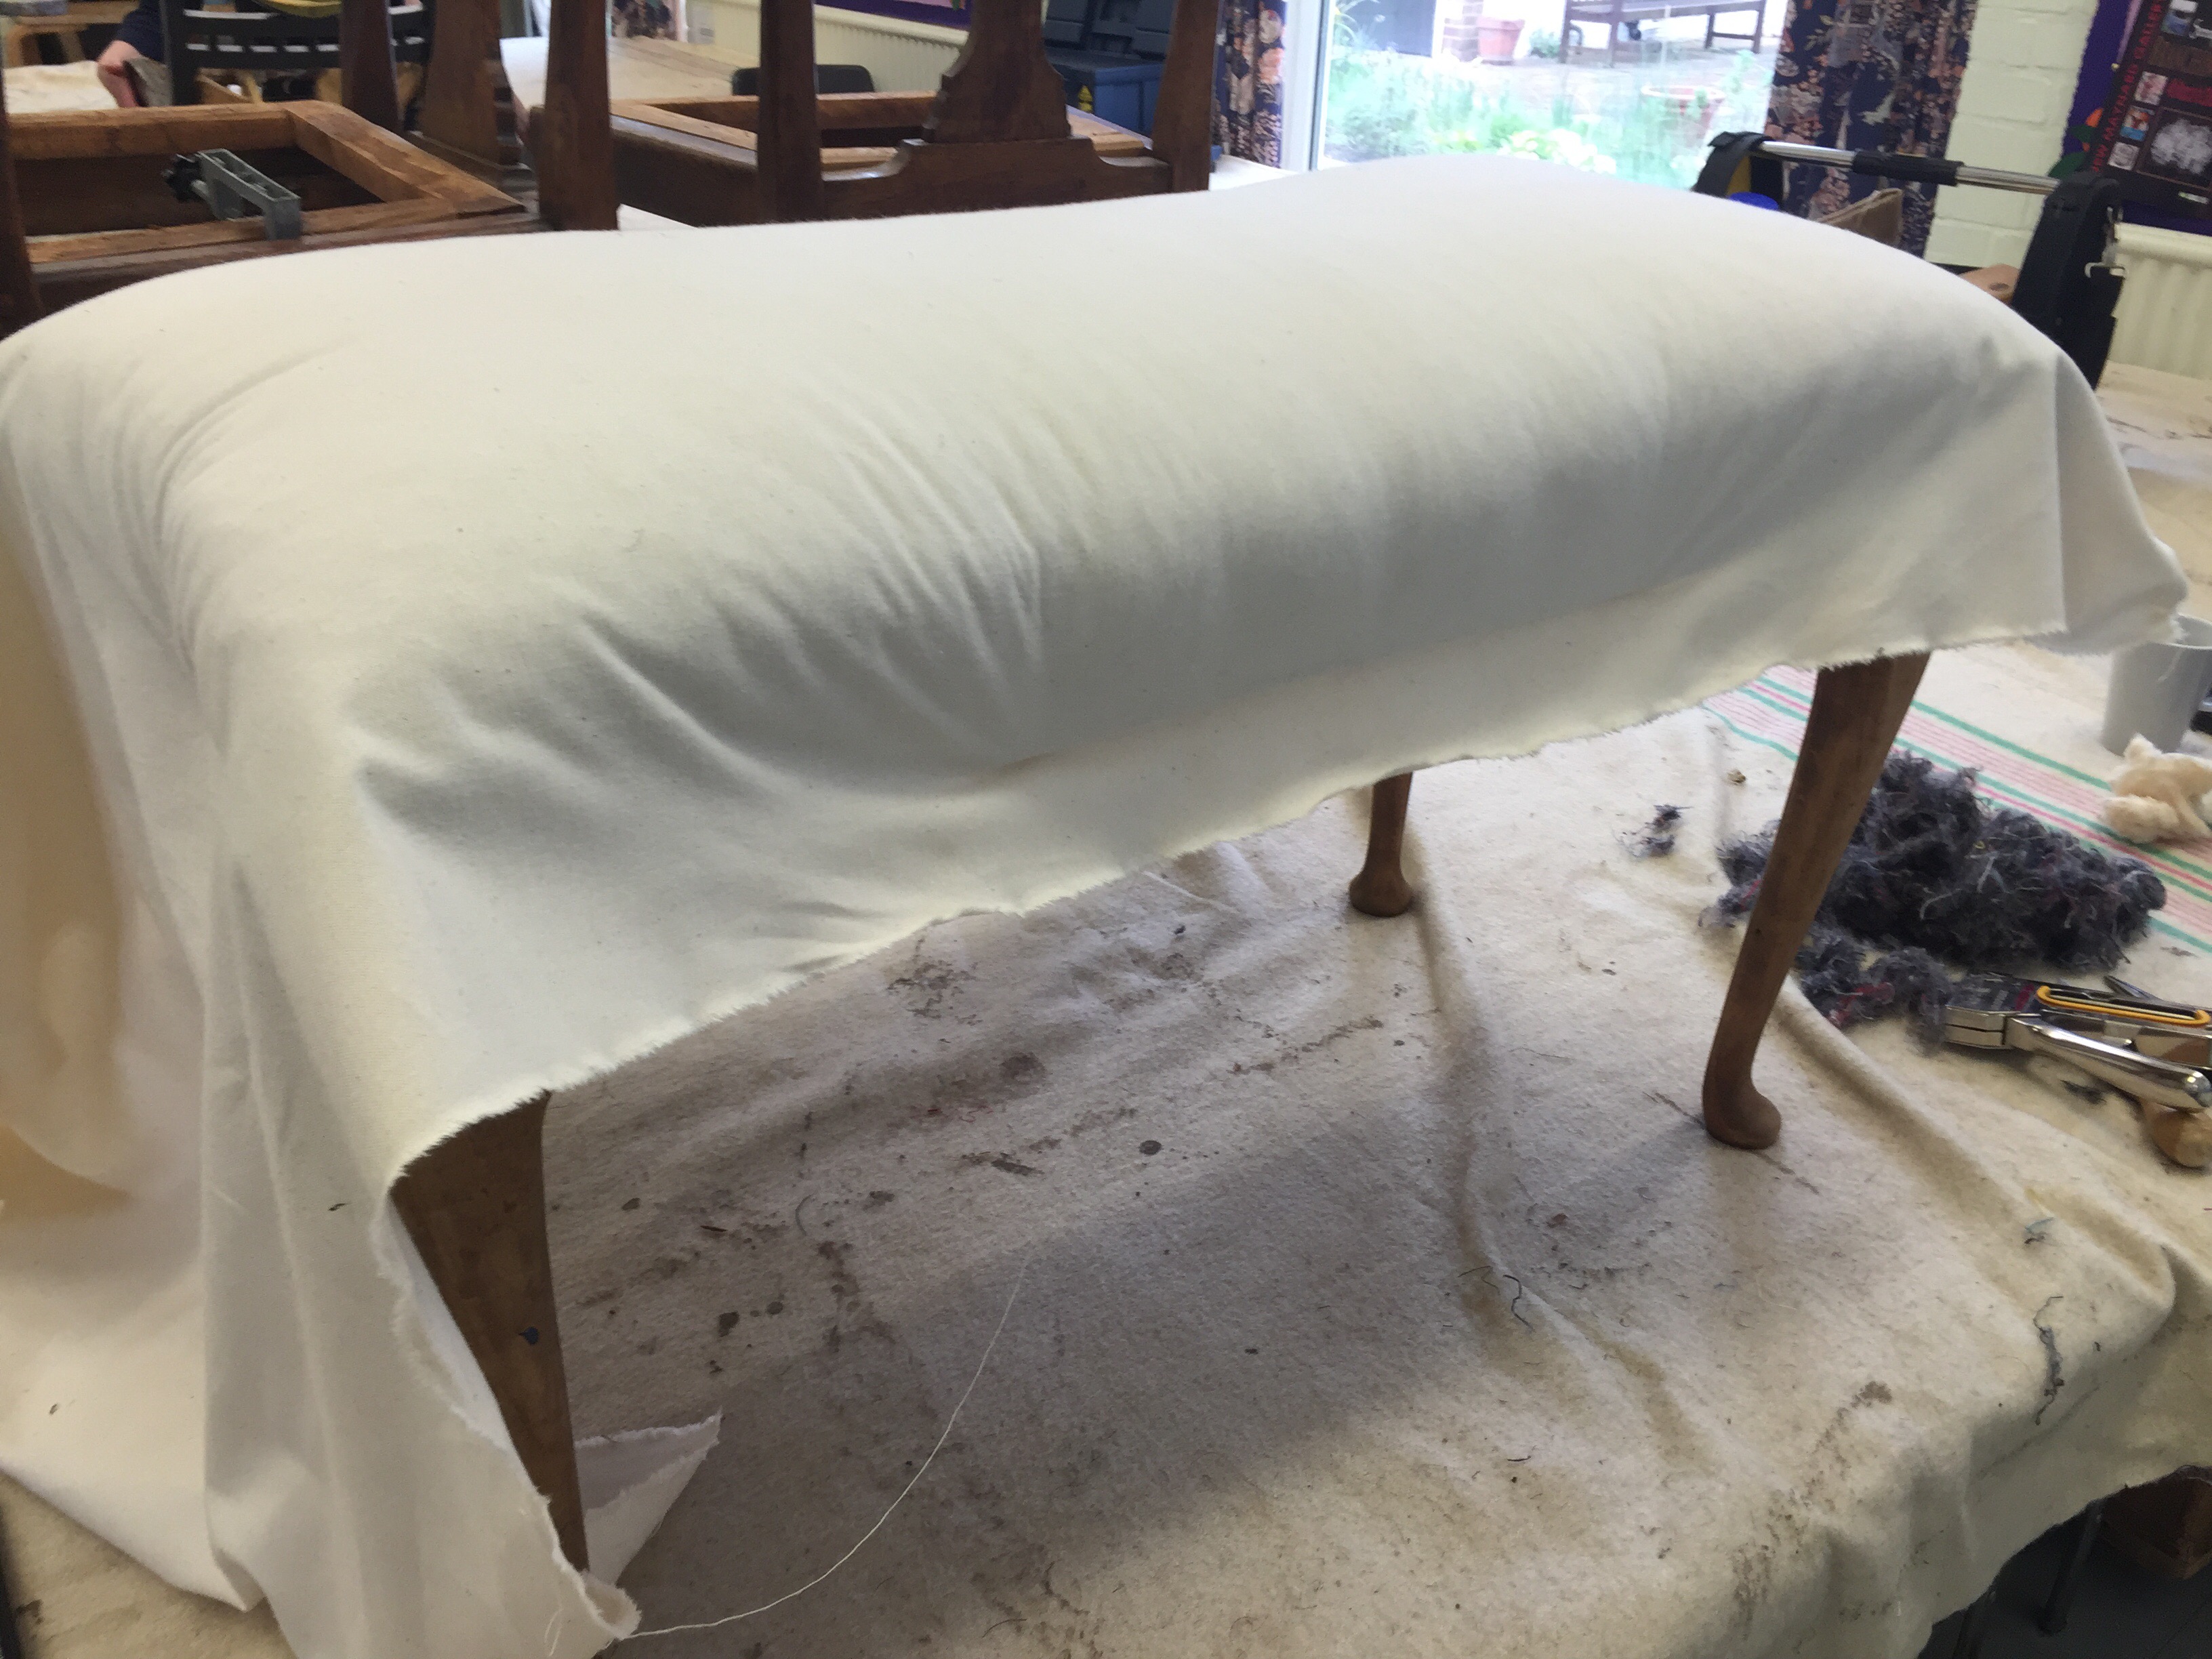
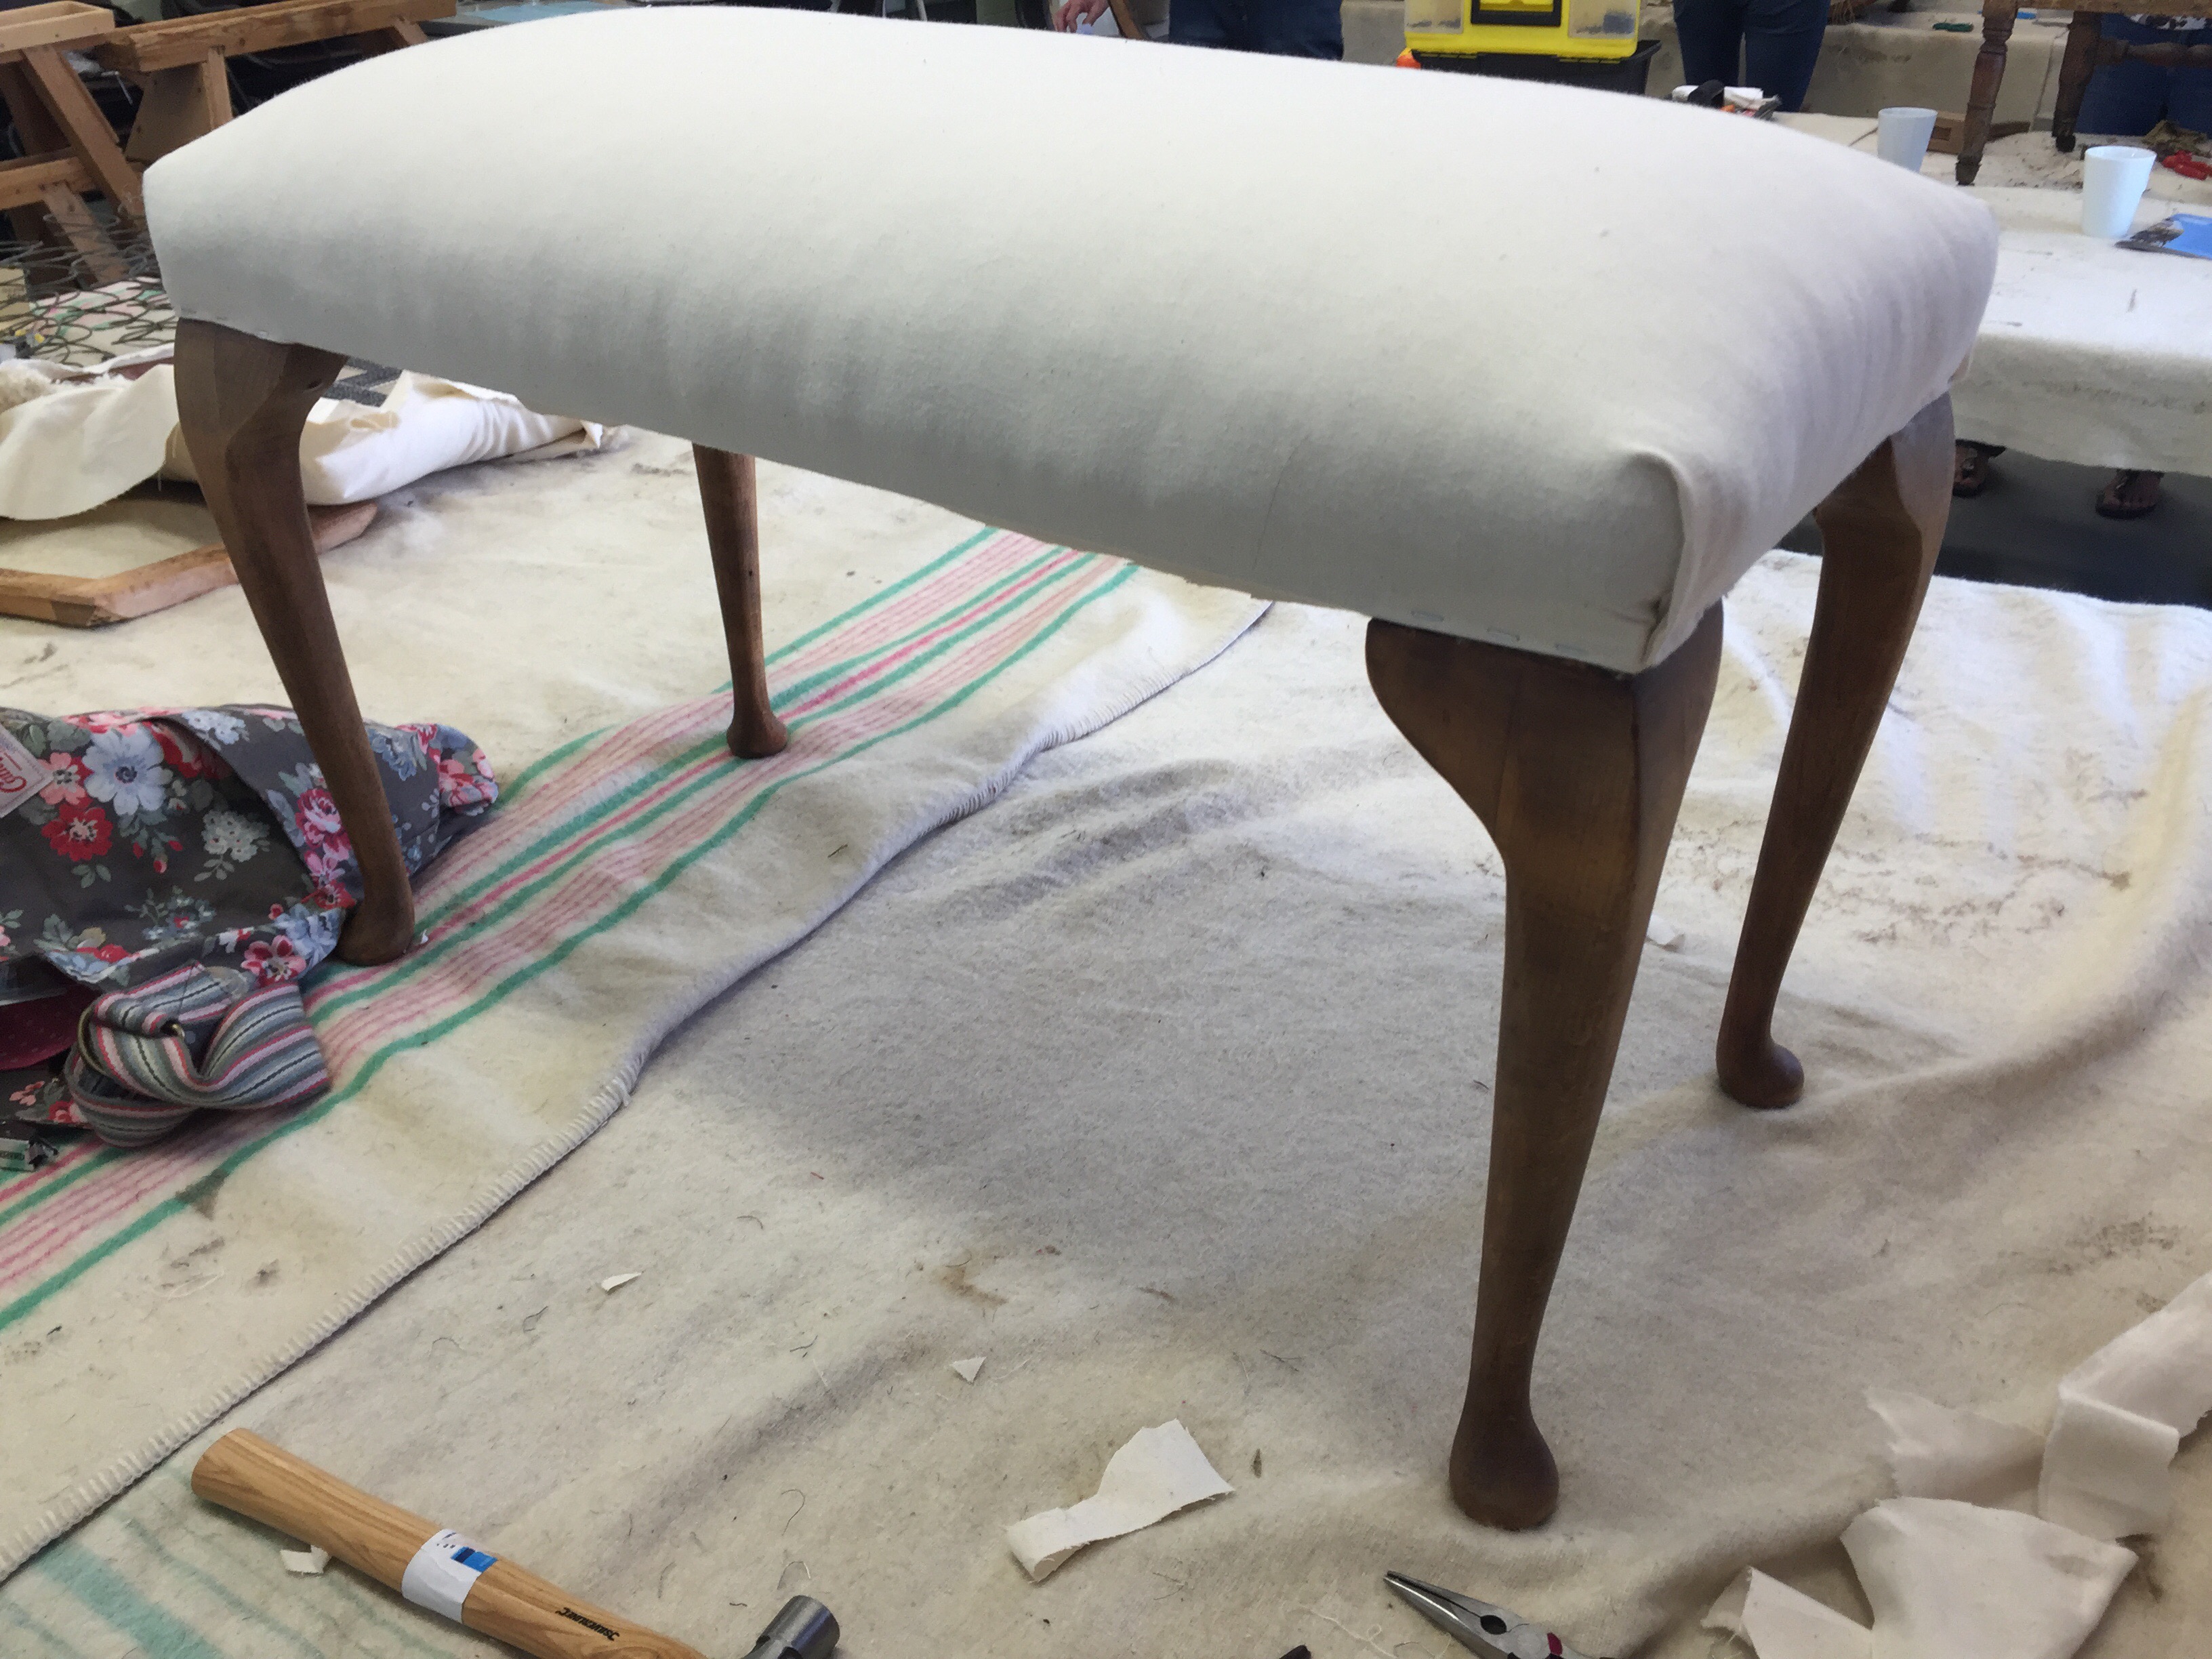
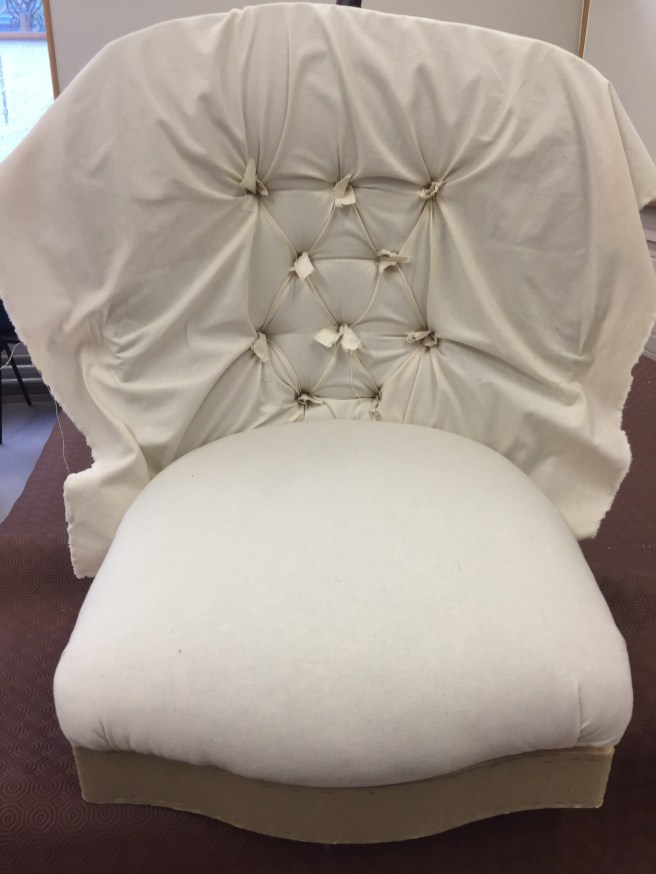
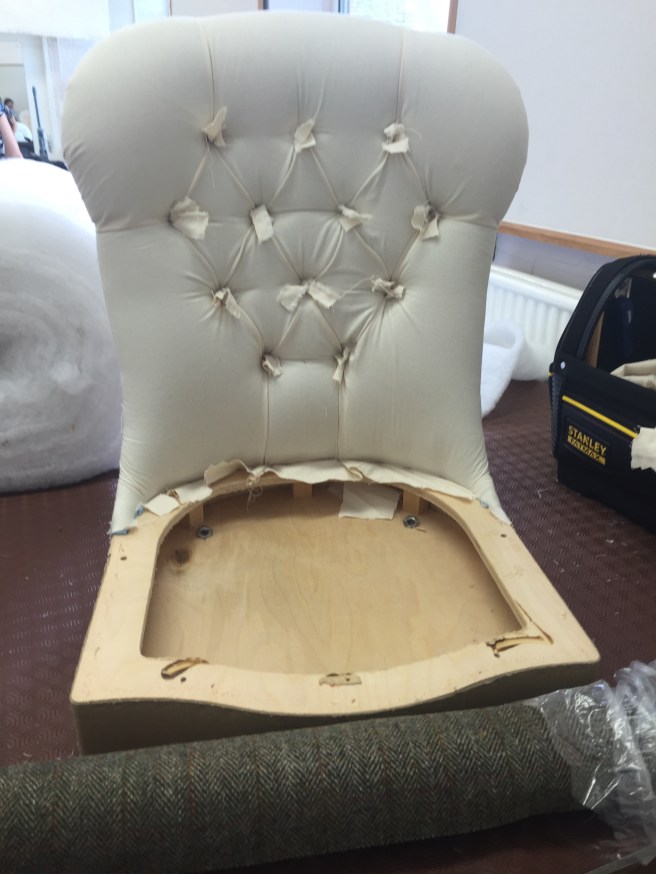
Calico on, small calico flags made and each buttonhole held in place…

Stapling the calico back in shape was brilliant as it absolutely gave me a vision into how the chair would look.


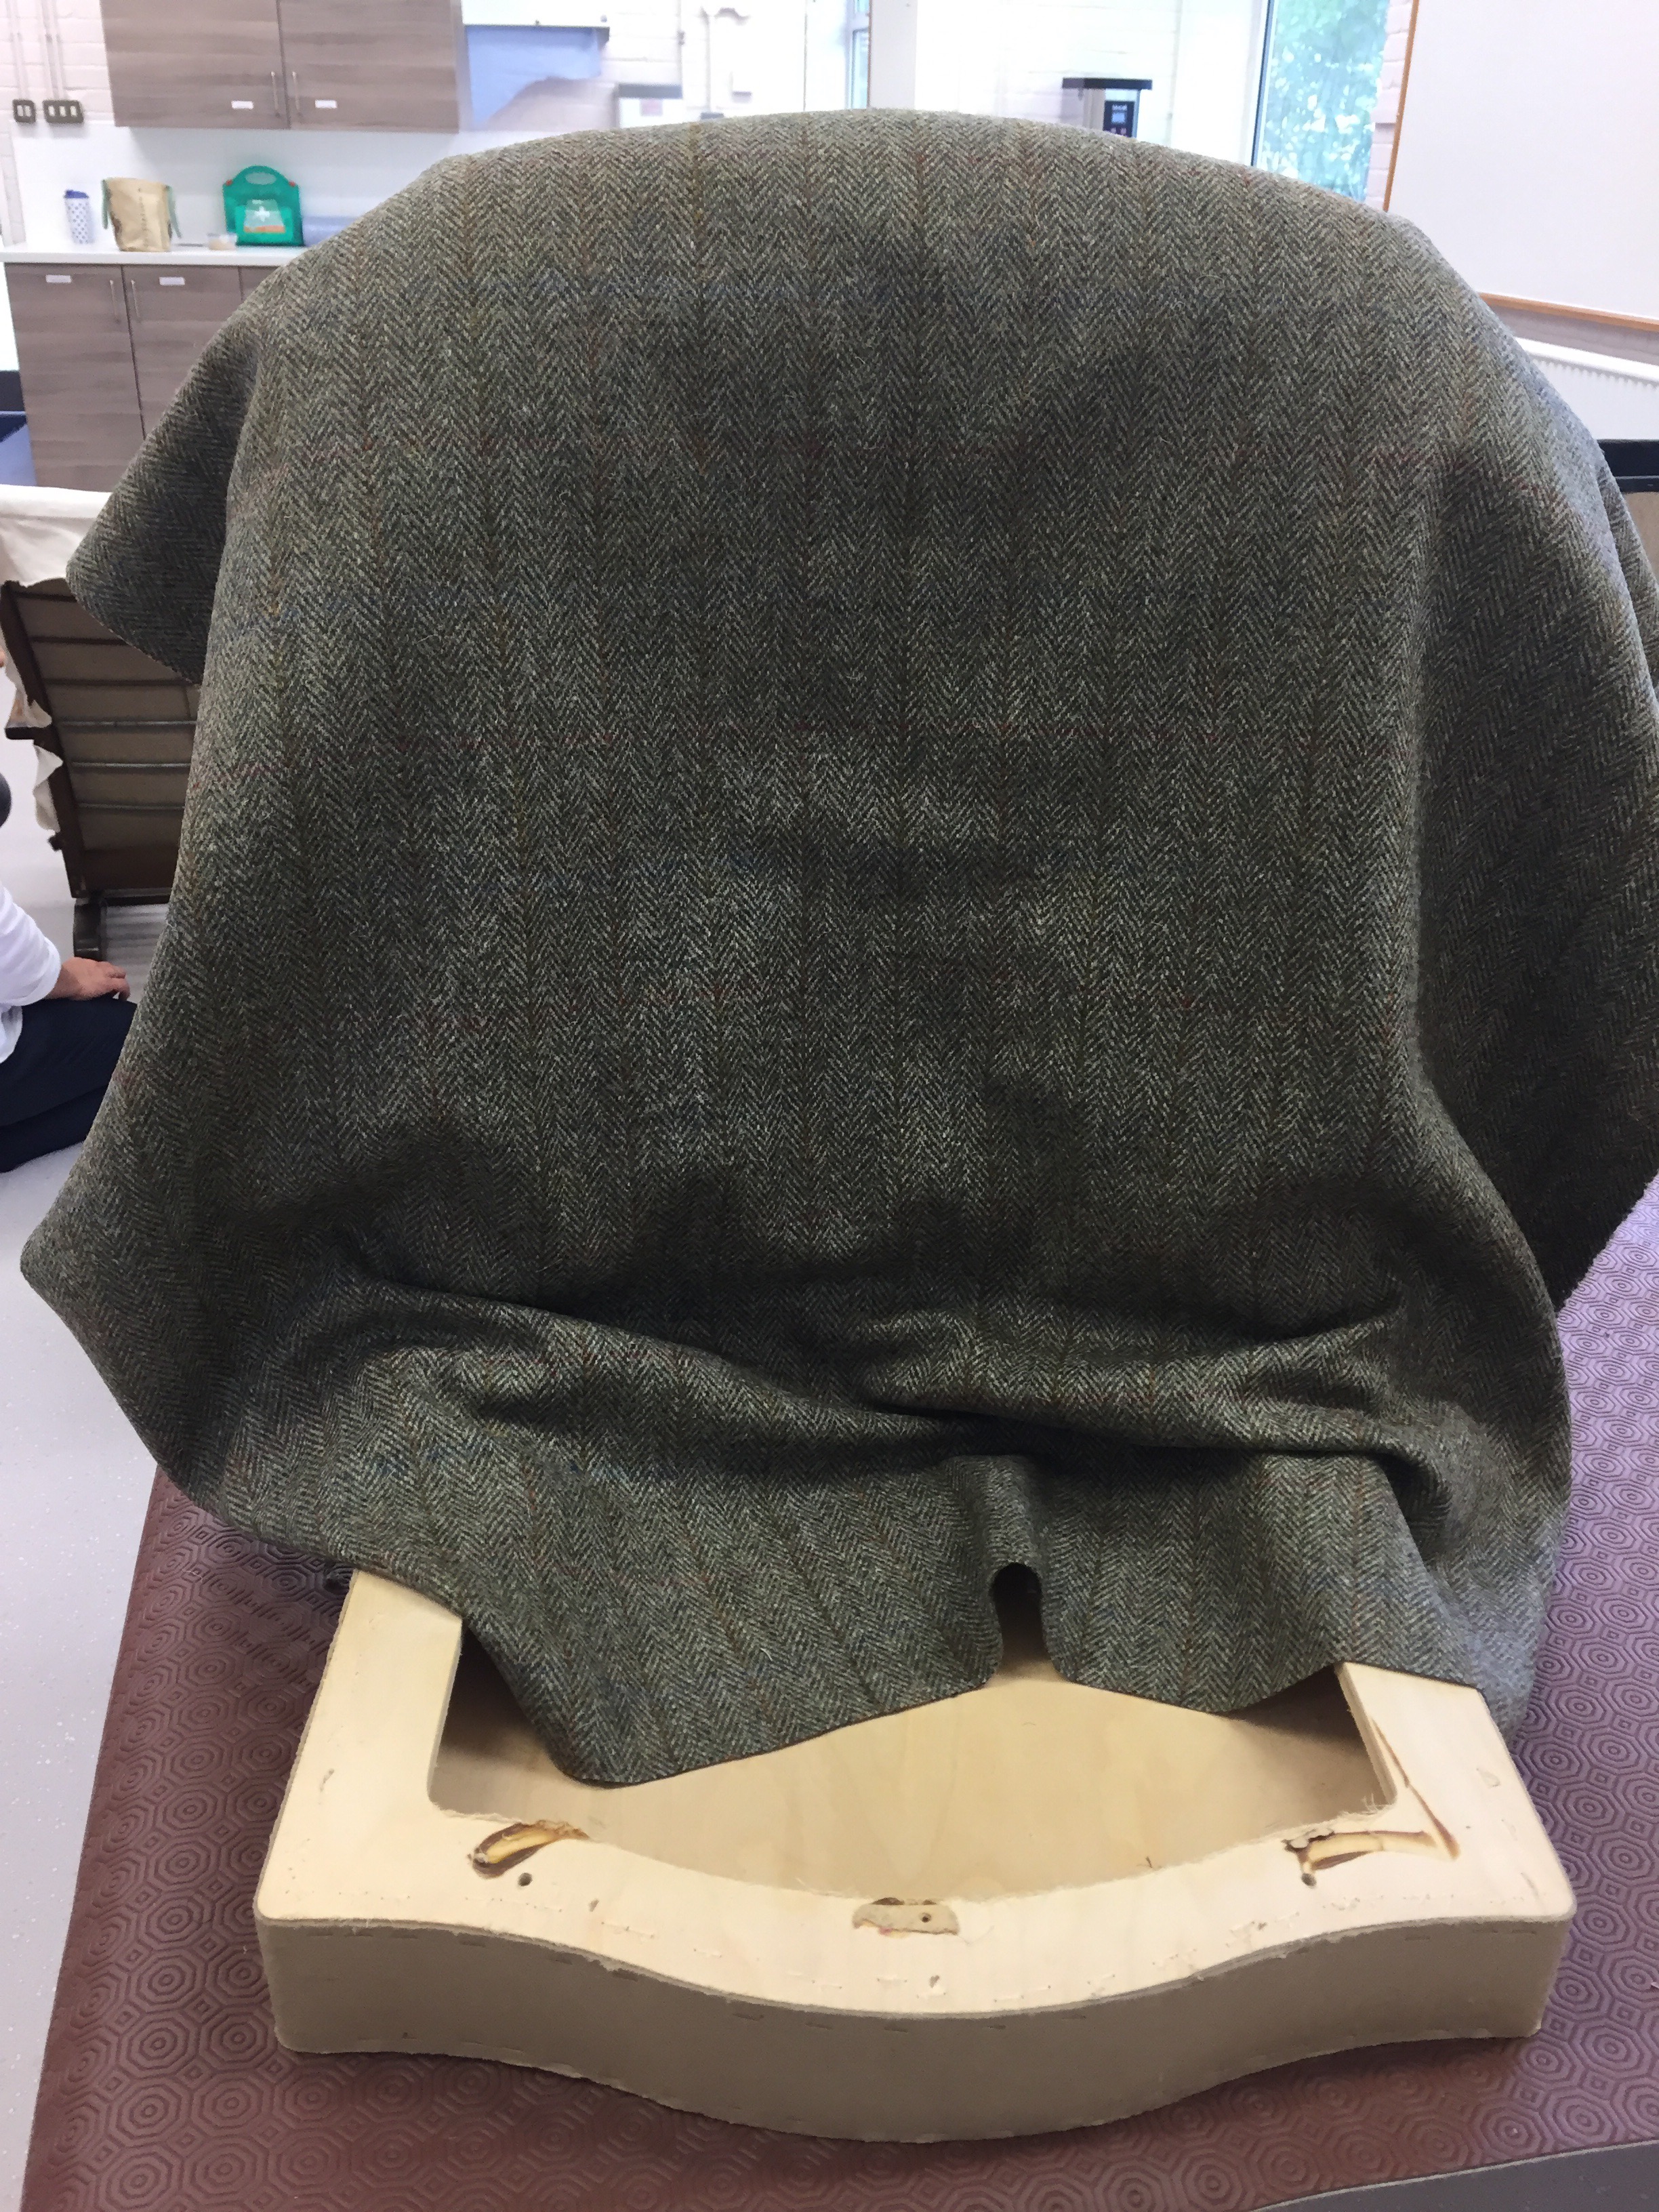
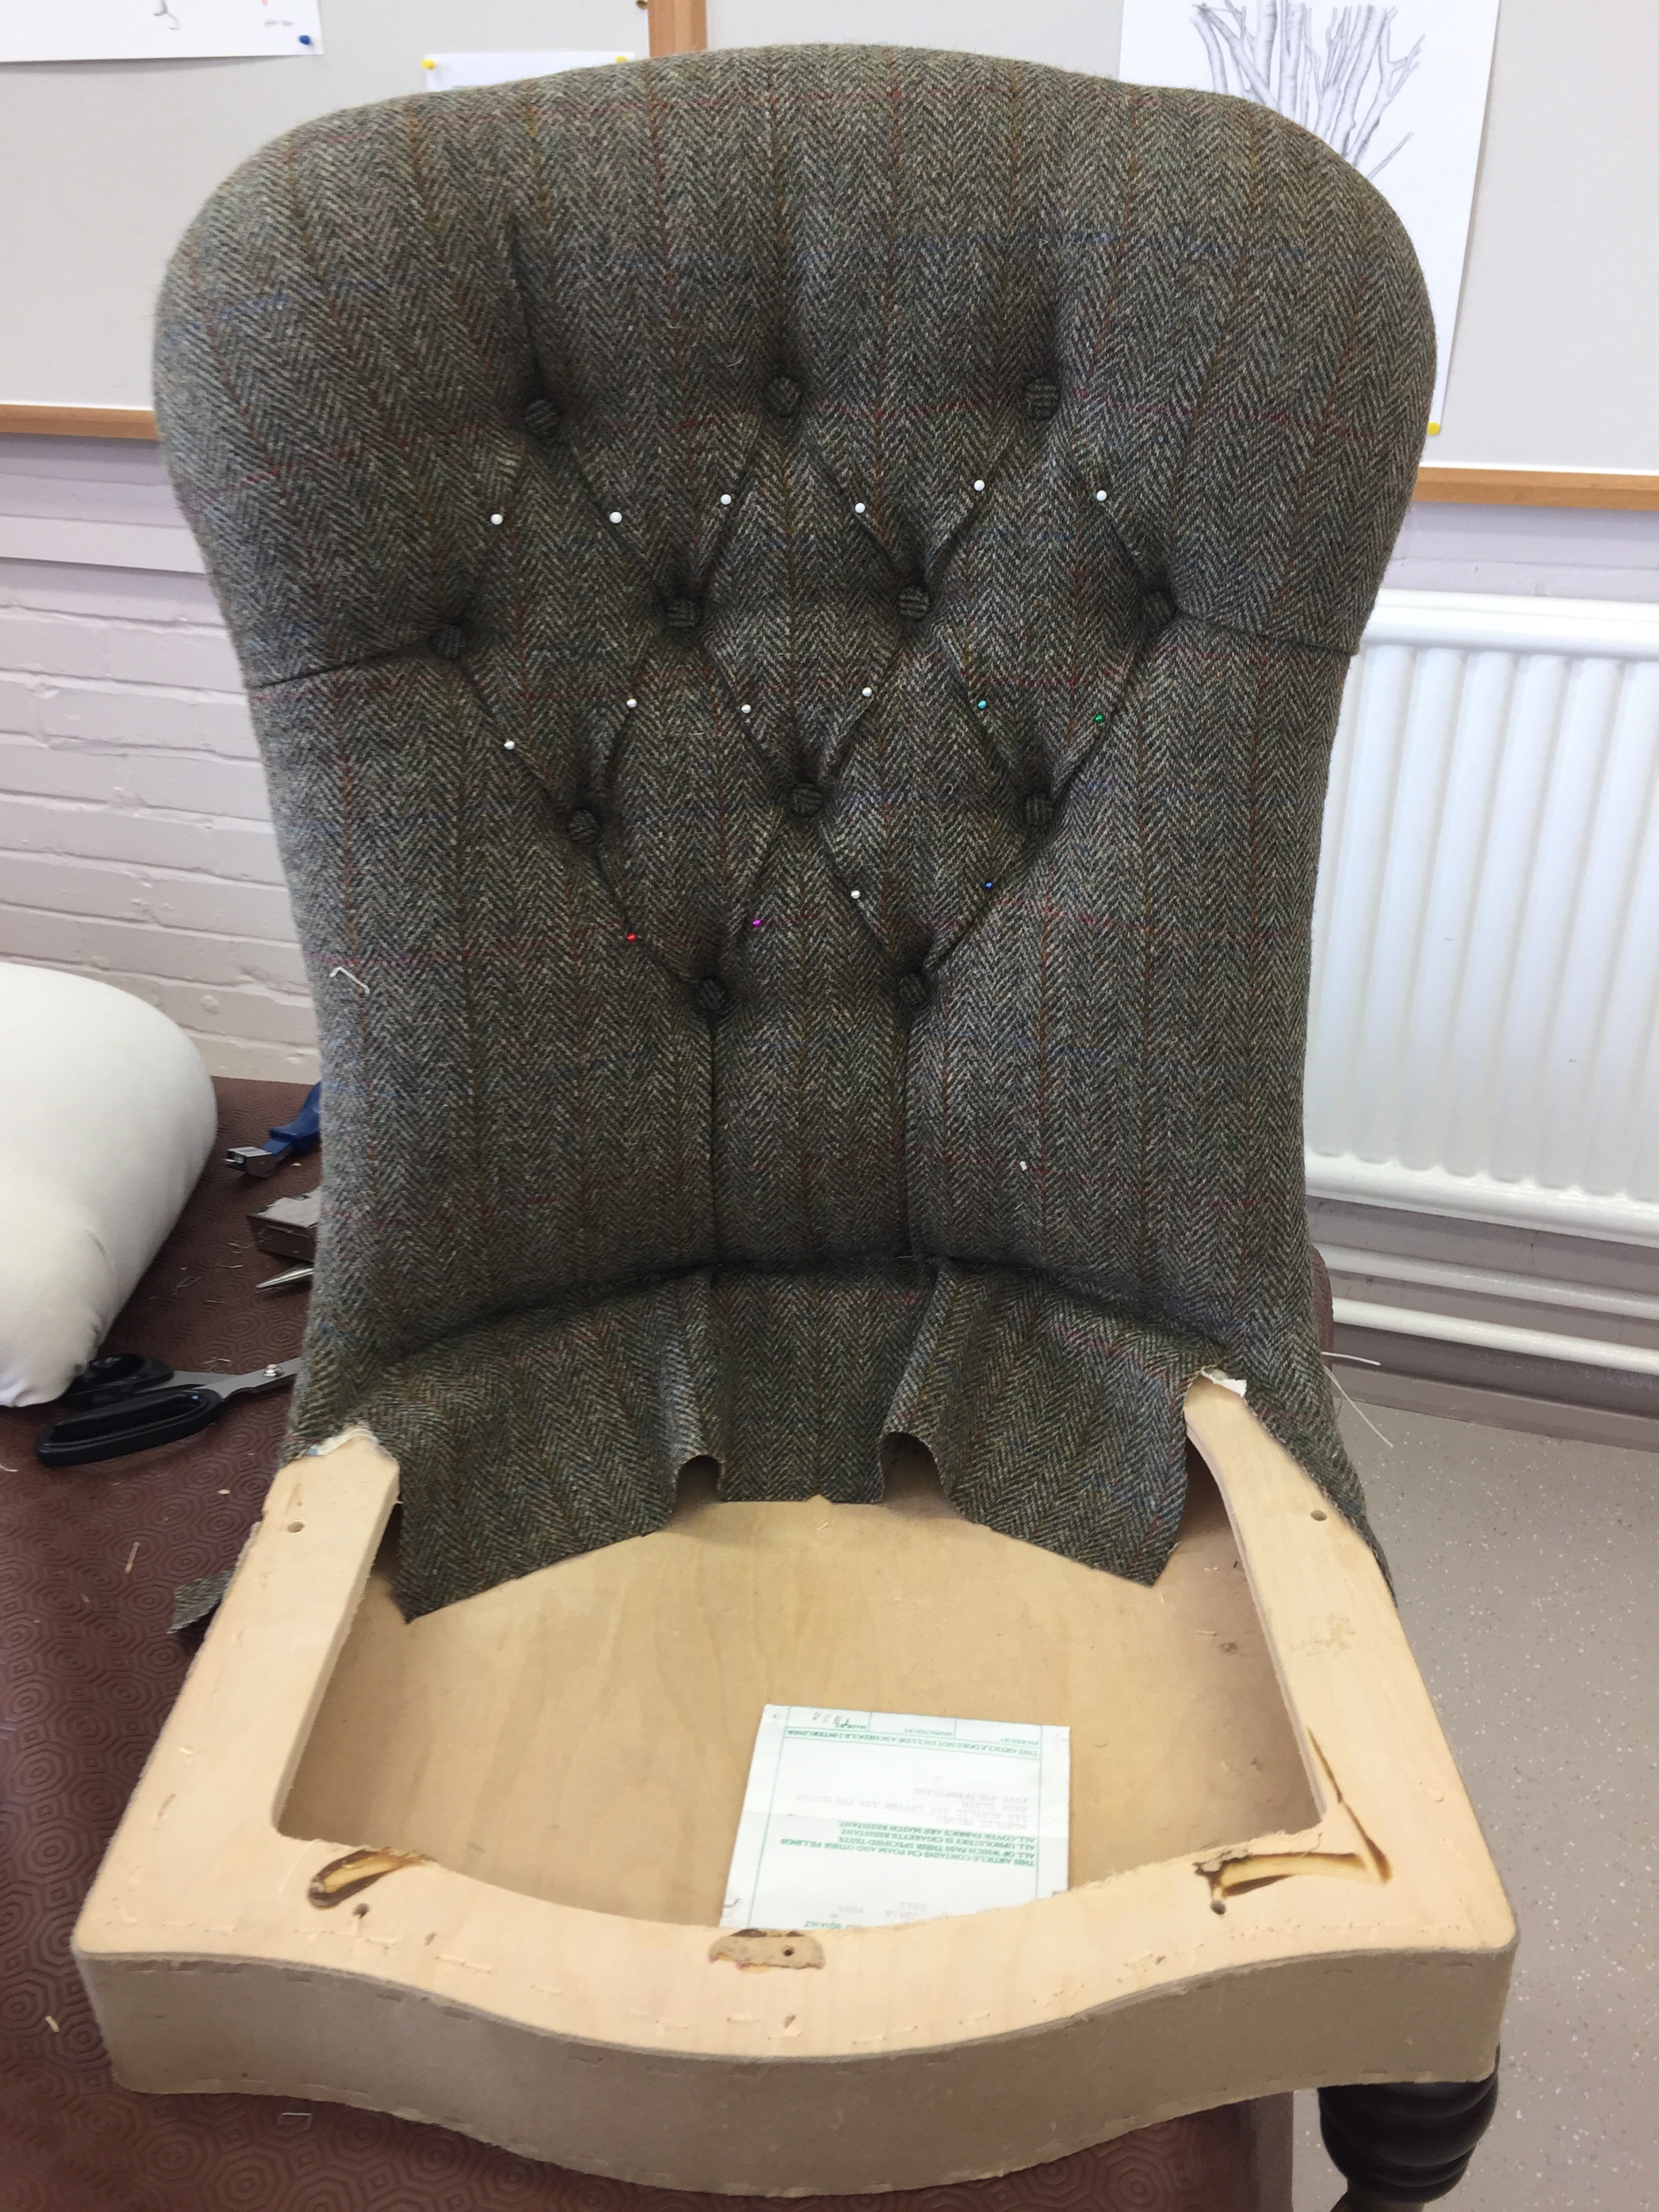
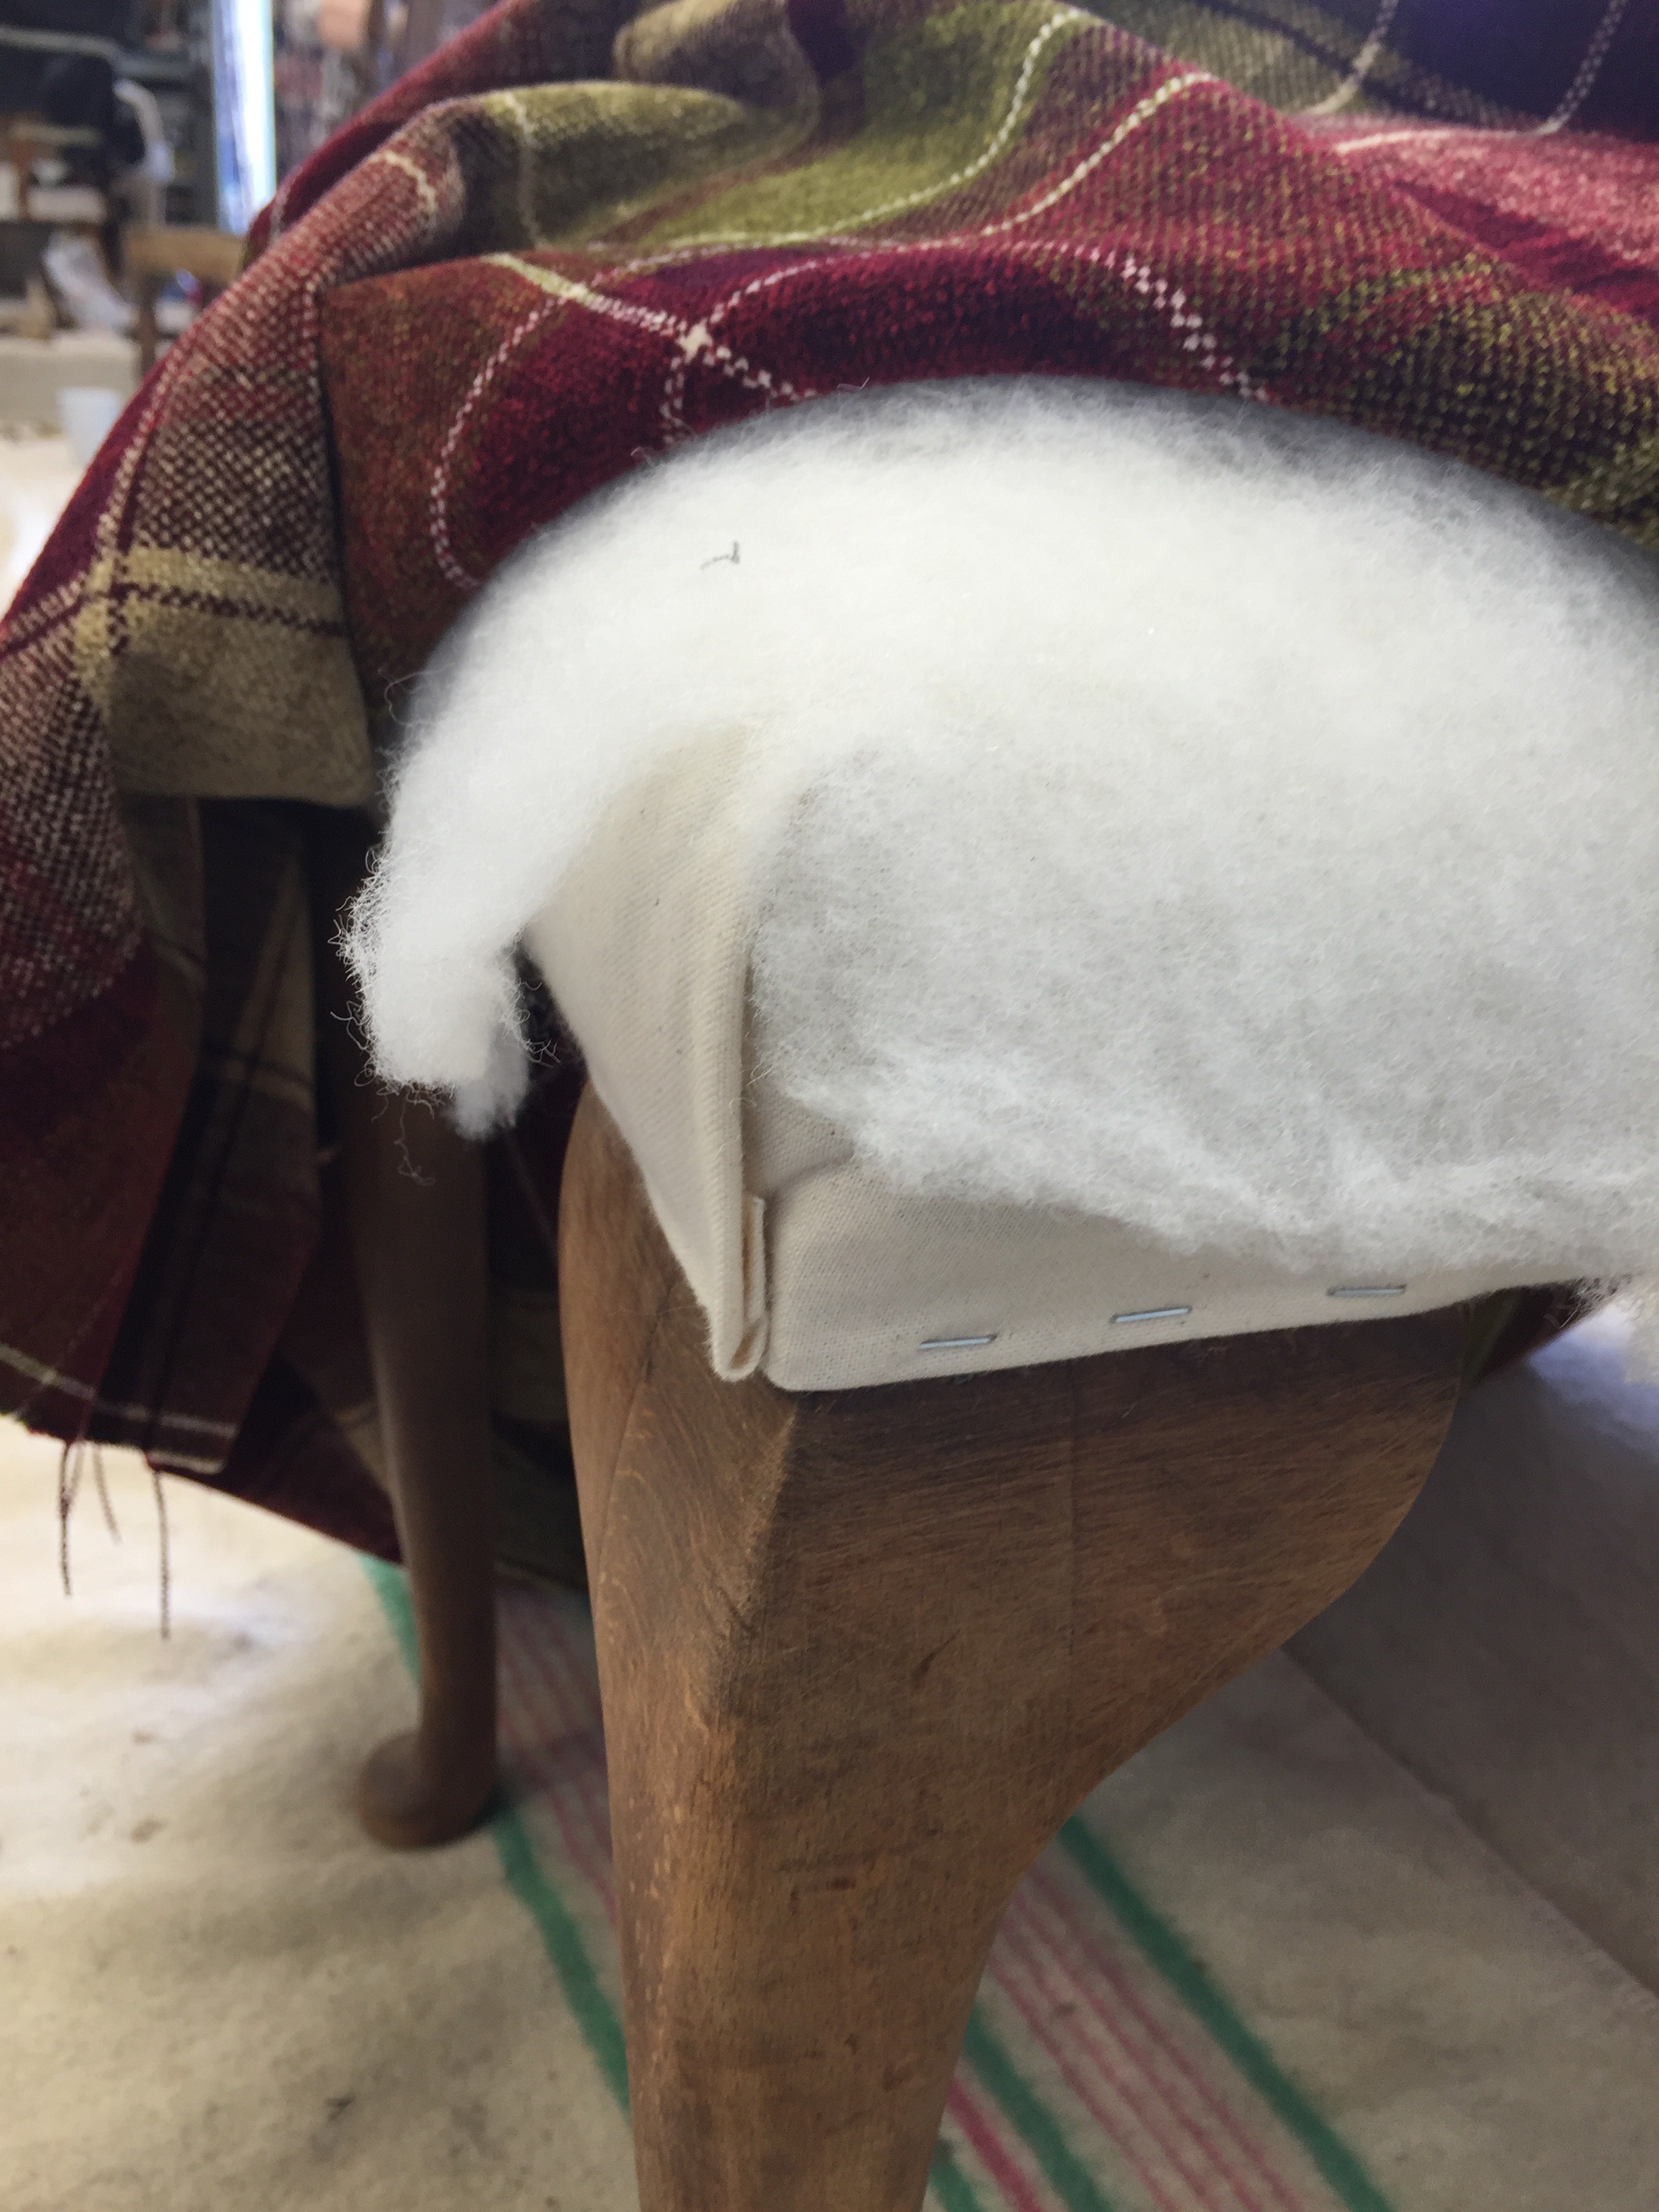
Then I got to lay the top cloth over and over… I stood and looked at it for a while. My father in law calls this ‘giving it a coat of looking at’ and I have entirely learned this from my husband who will always stand back and admire his work, not just for 10 seconds, but for 10 minutes sometimes. It’s quite satisfying. 

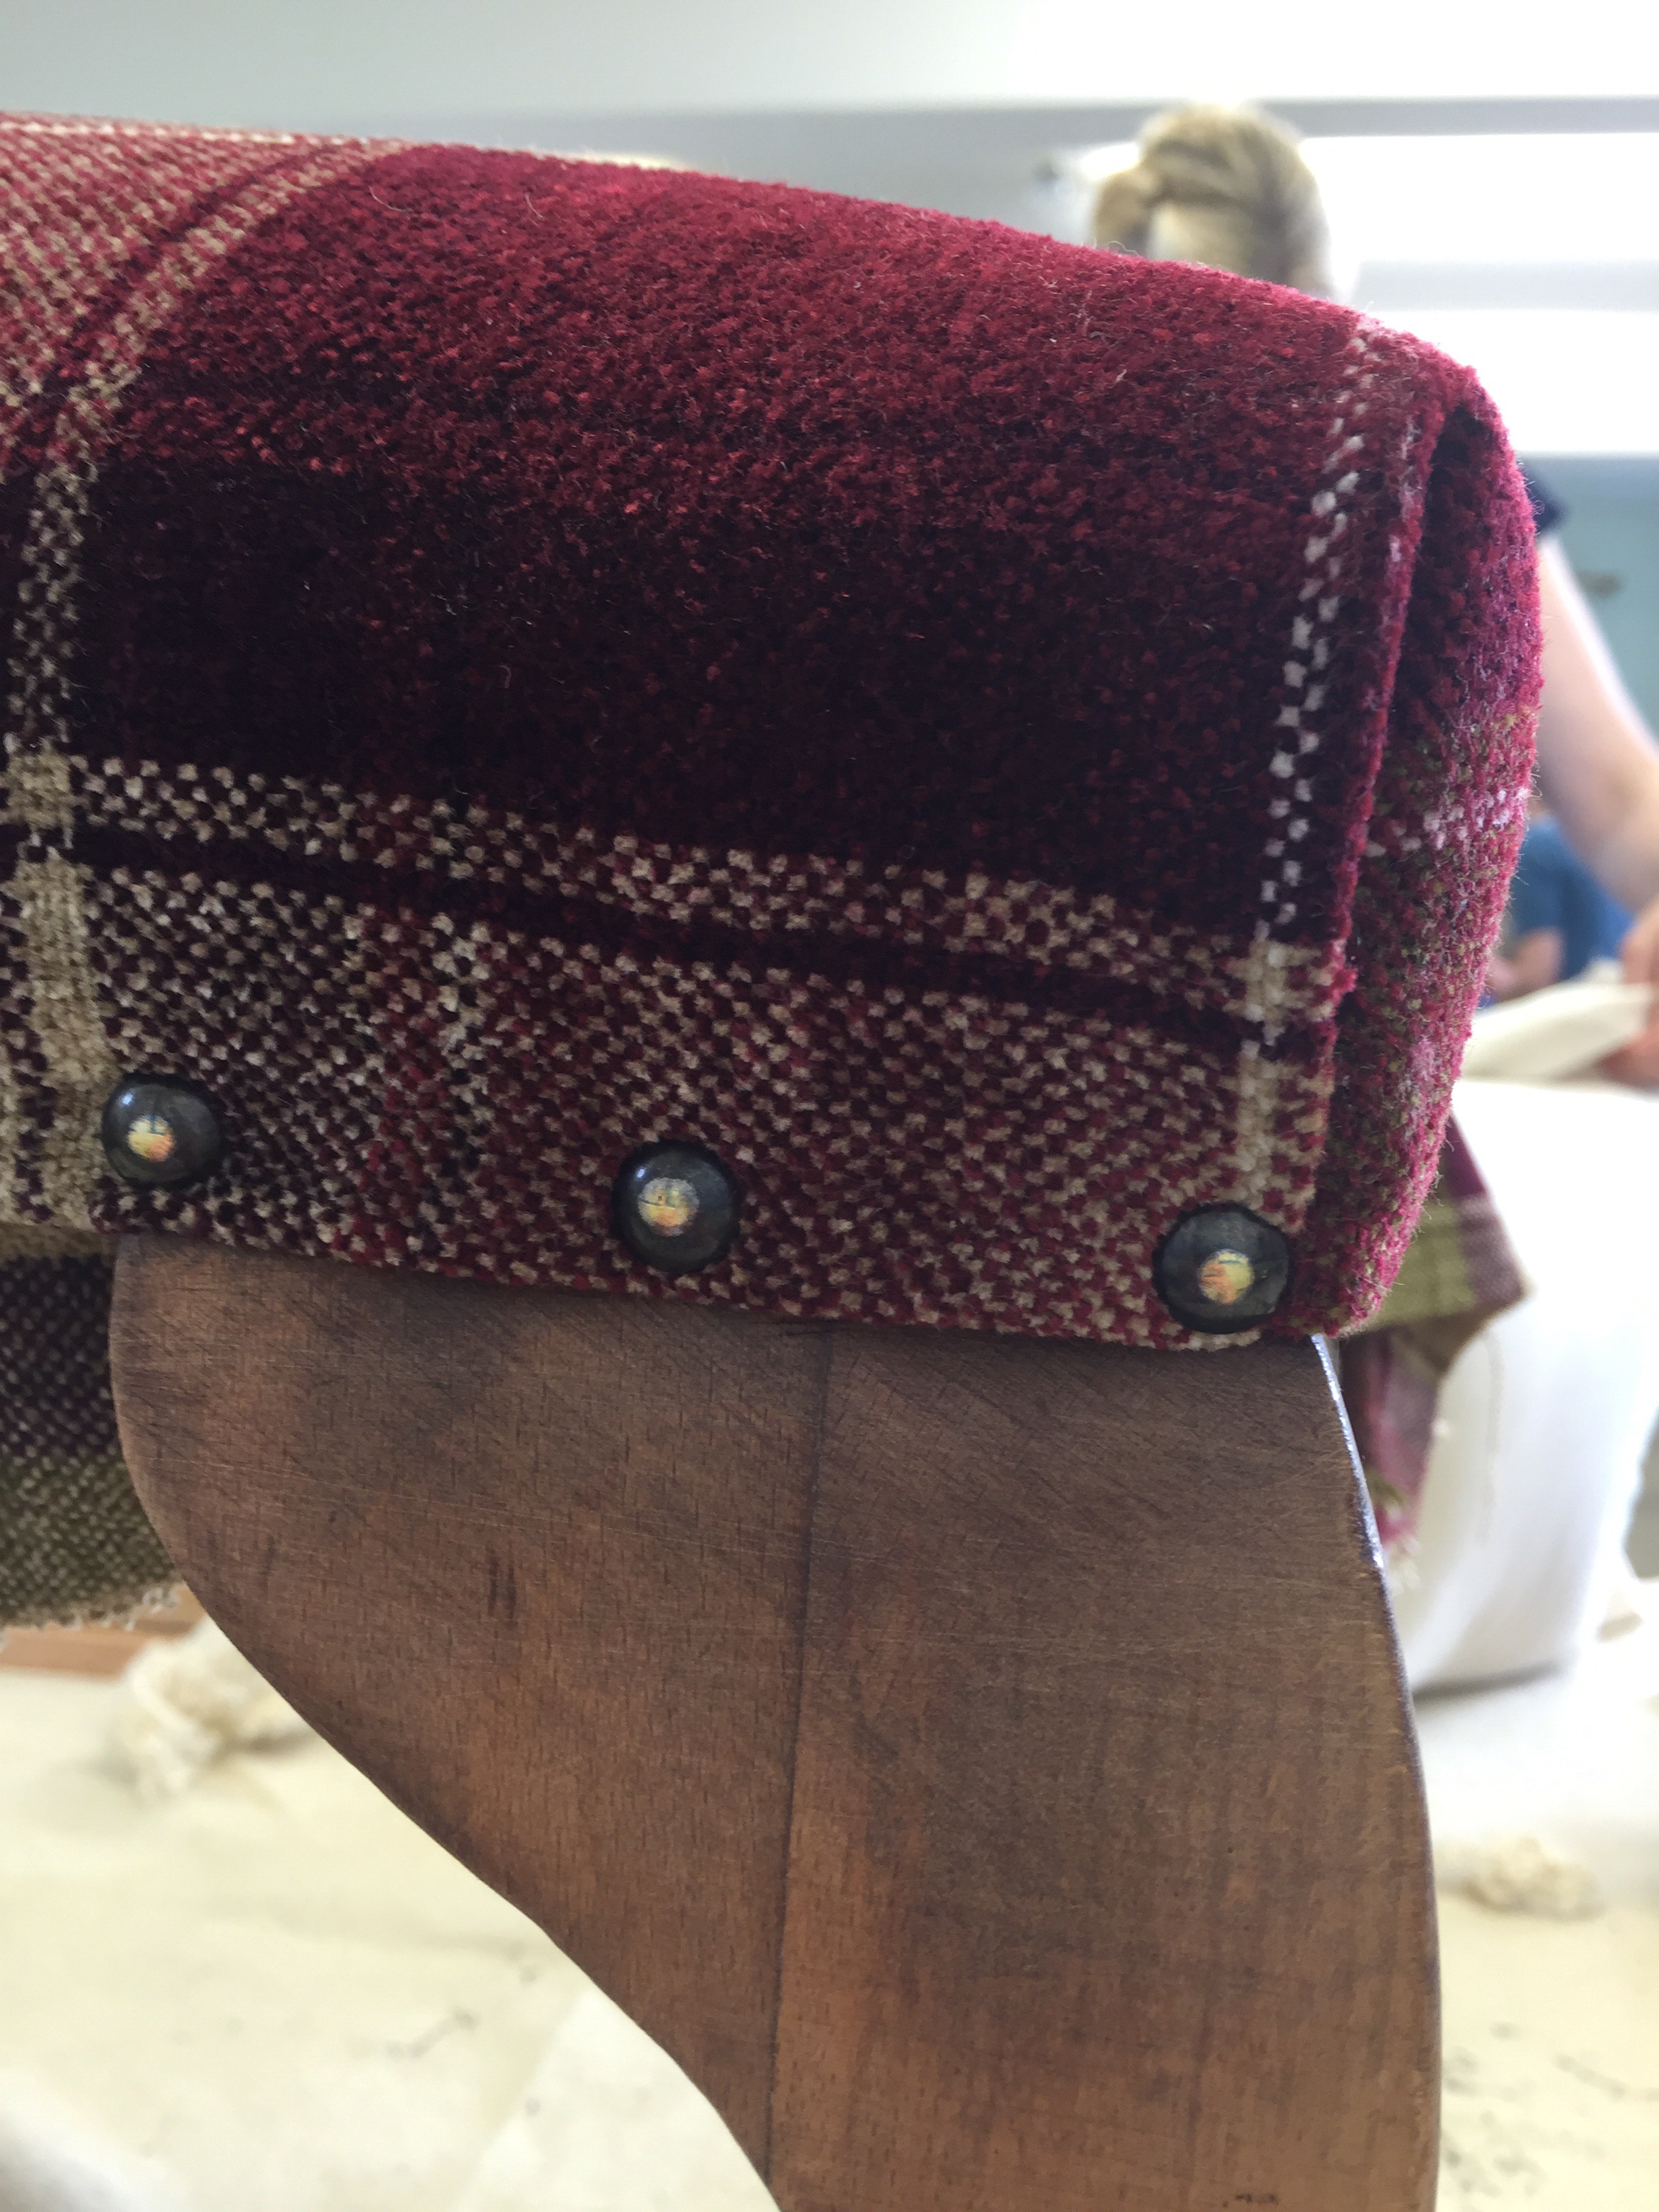
This amazing fabric for anyone who hasn’t seen this before, is proper traditional, beautiful Harris tweed. It has to be seen and stroked to be believed. Pure wool, made in Scotland in one of the last remaining traditional Mills anywhere.

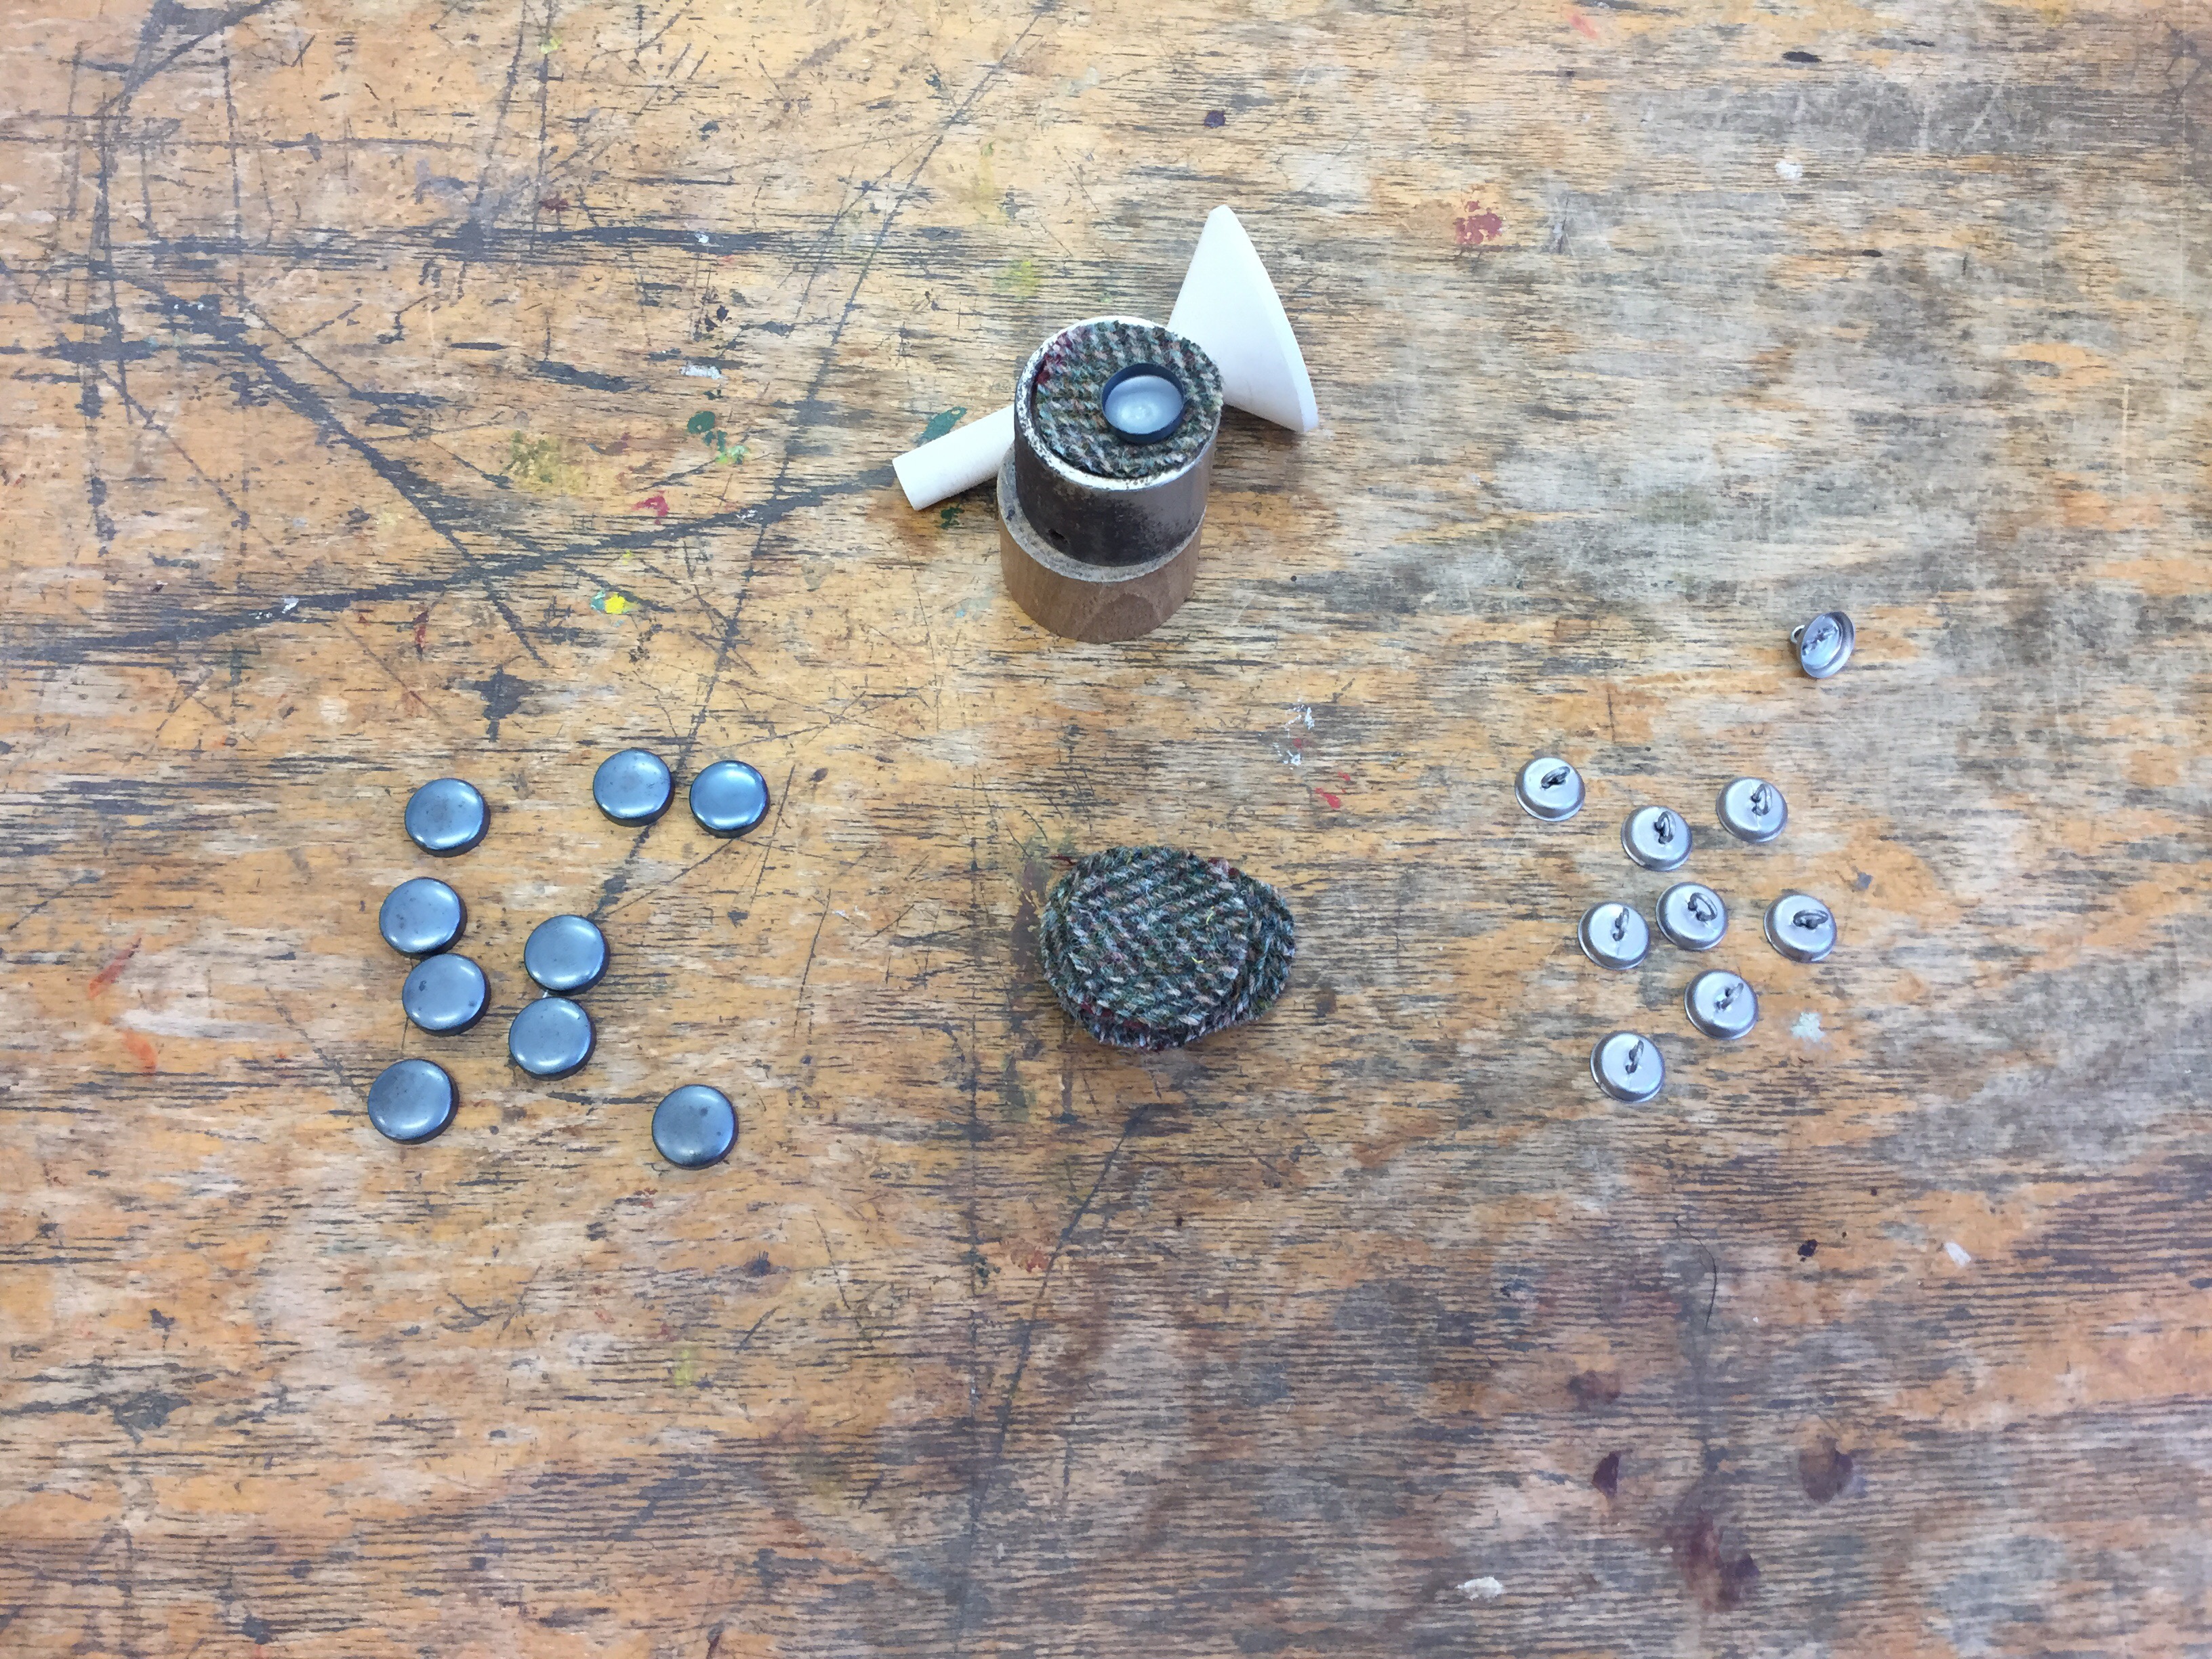
Onto I think the most fun thing I have made in years, buttons! It reminded me entirely of going to Brownies and making pin badges. Absolutely the same thing but with a much more heavy duty piece of kit.

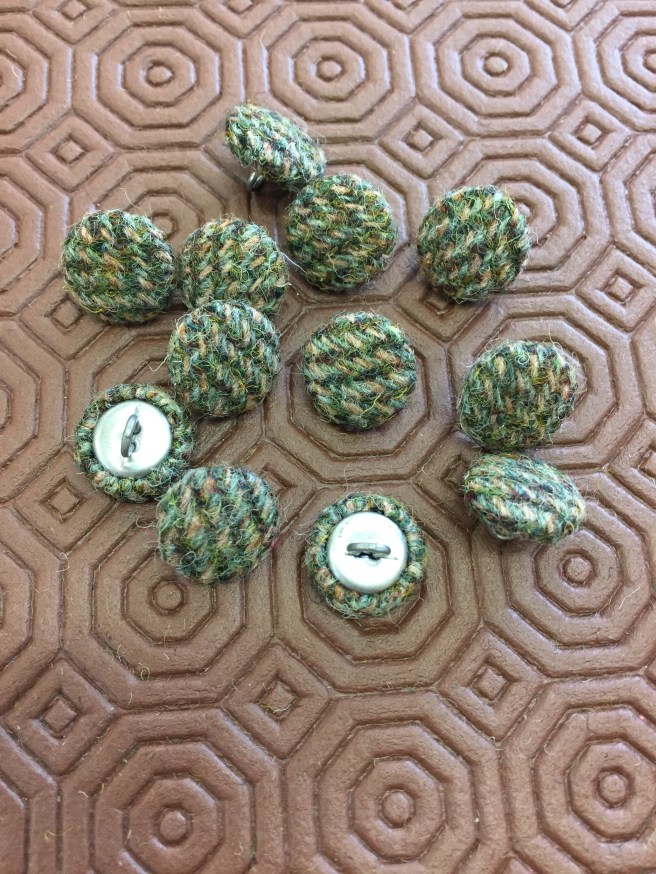
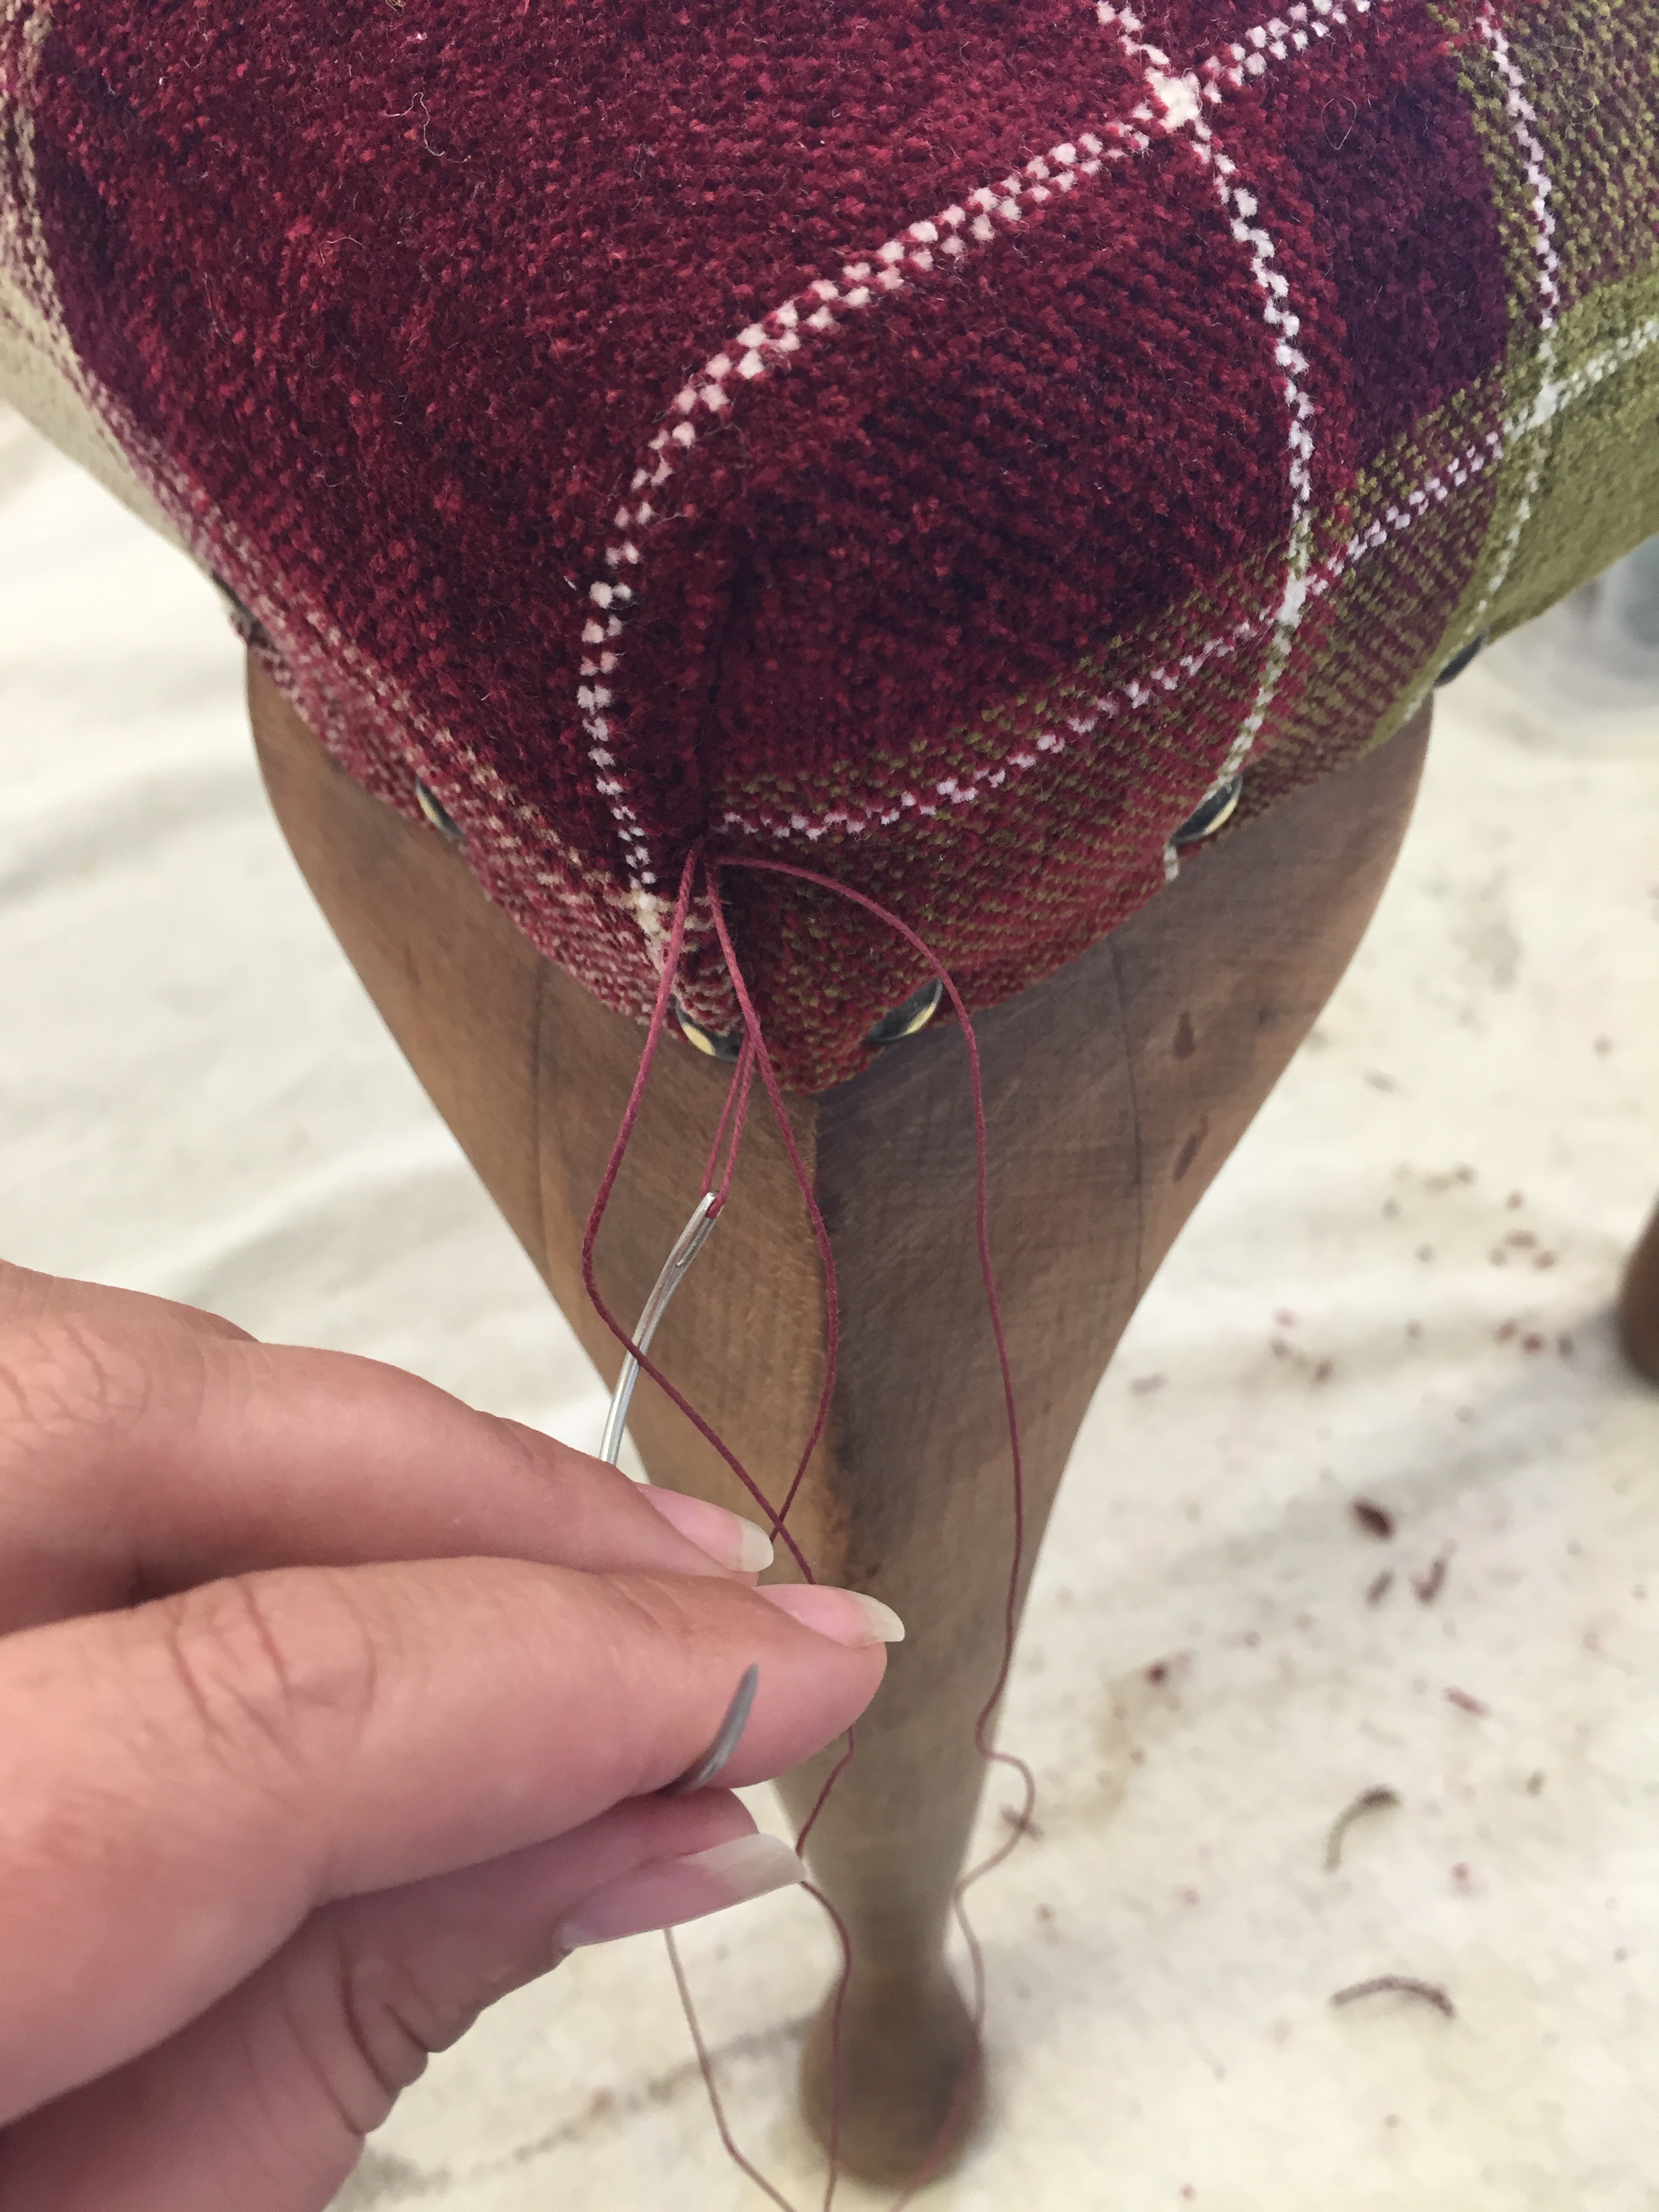
The same process again, using a large double ended needle to then take the twine through it buttonhole and attach it button in place and create the deep button folds, being sure to always keep each fold facing downwards.

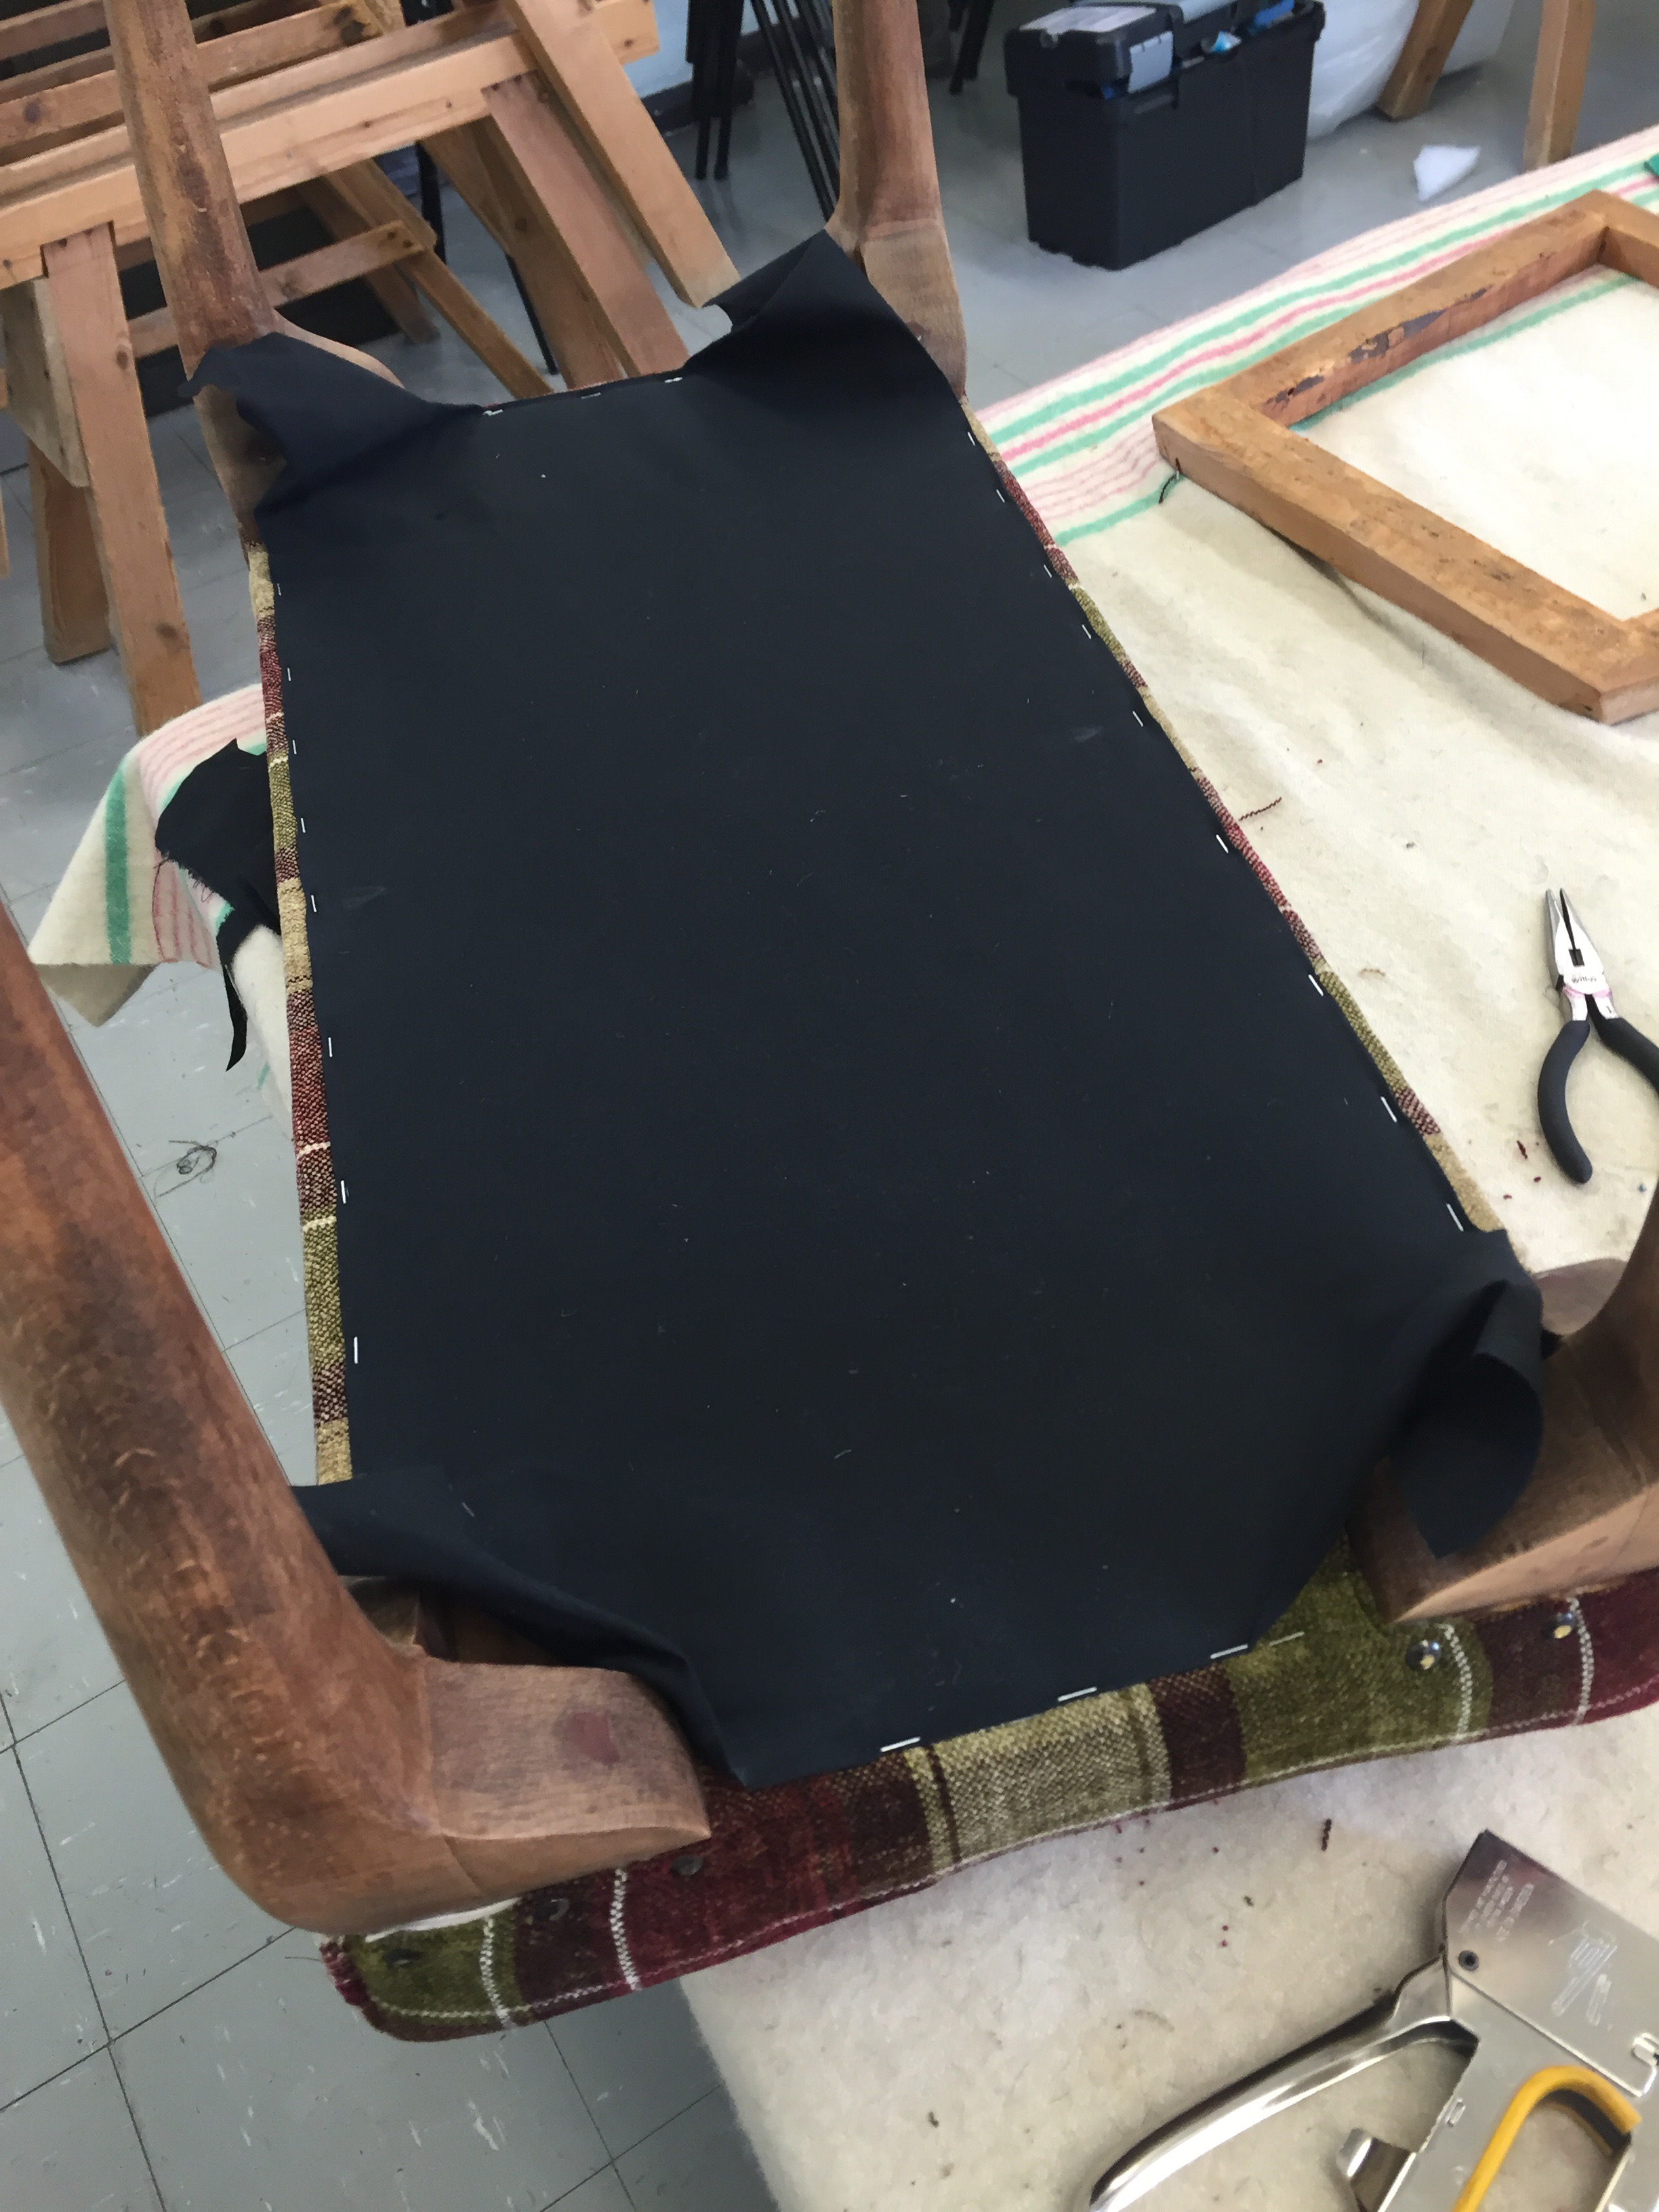
Then a bit more stapling to fix this…

I then got to recover the seat…

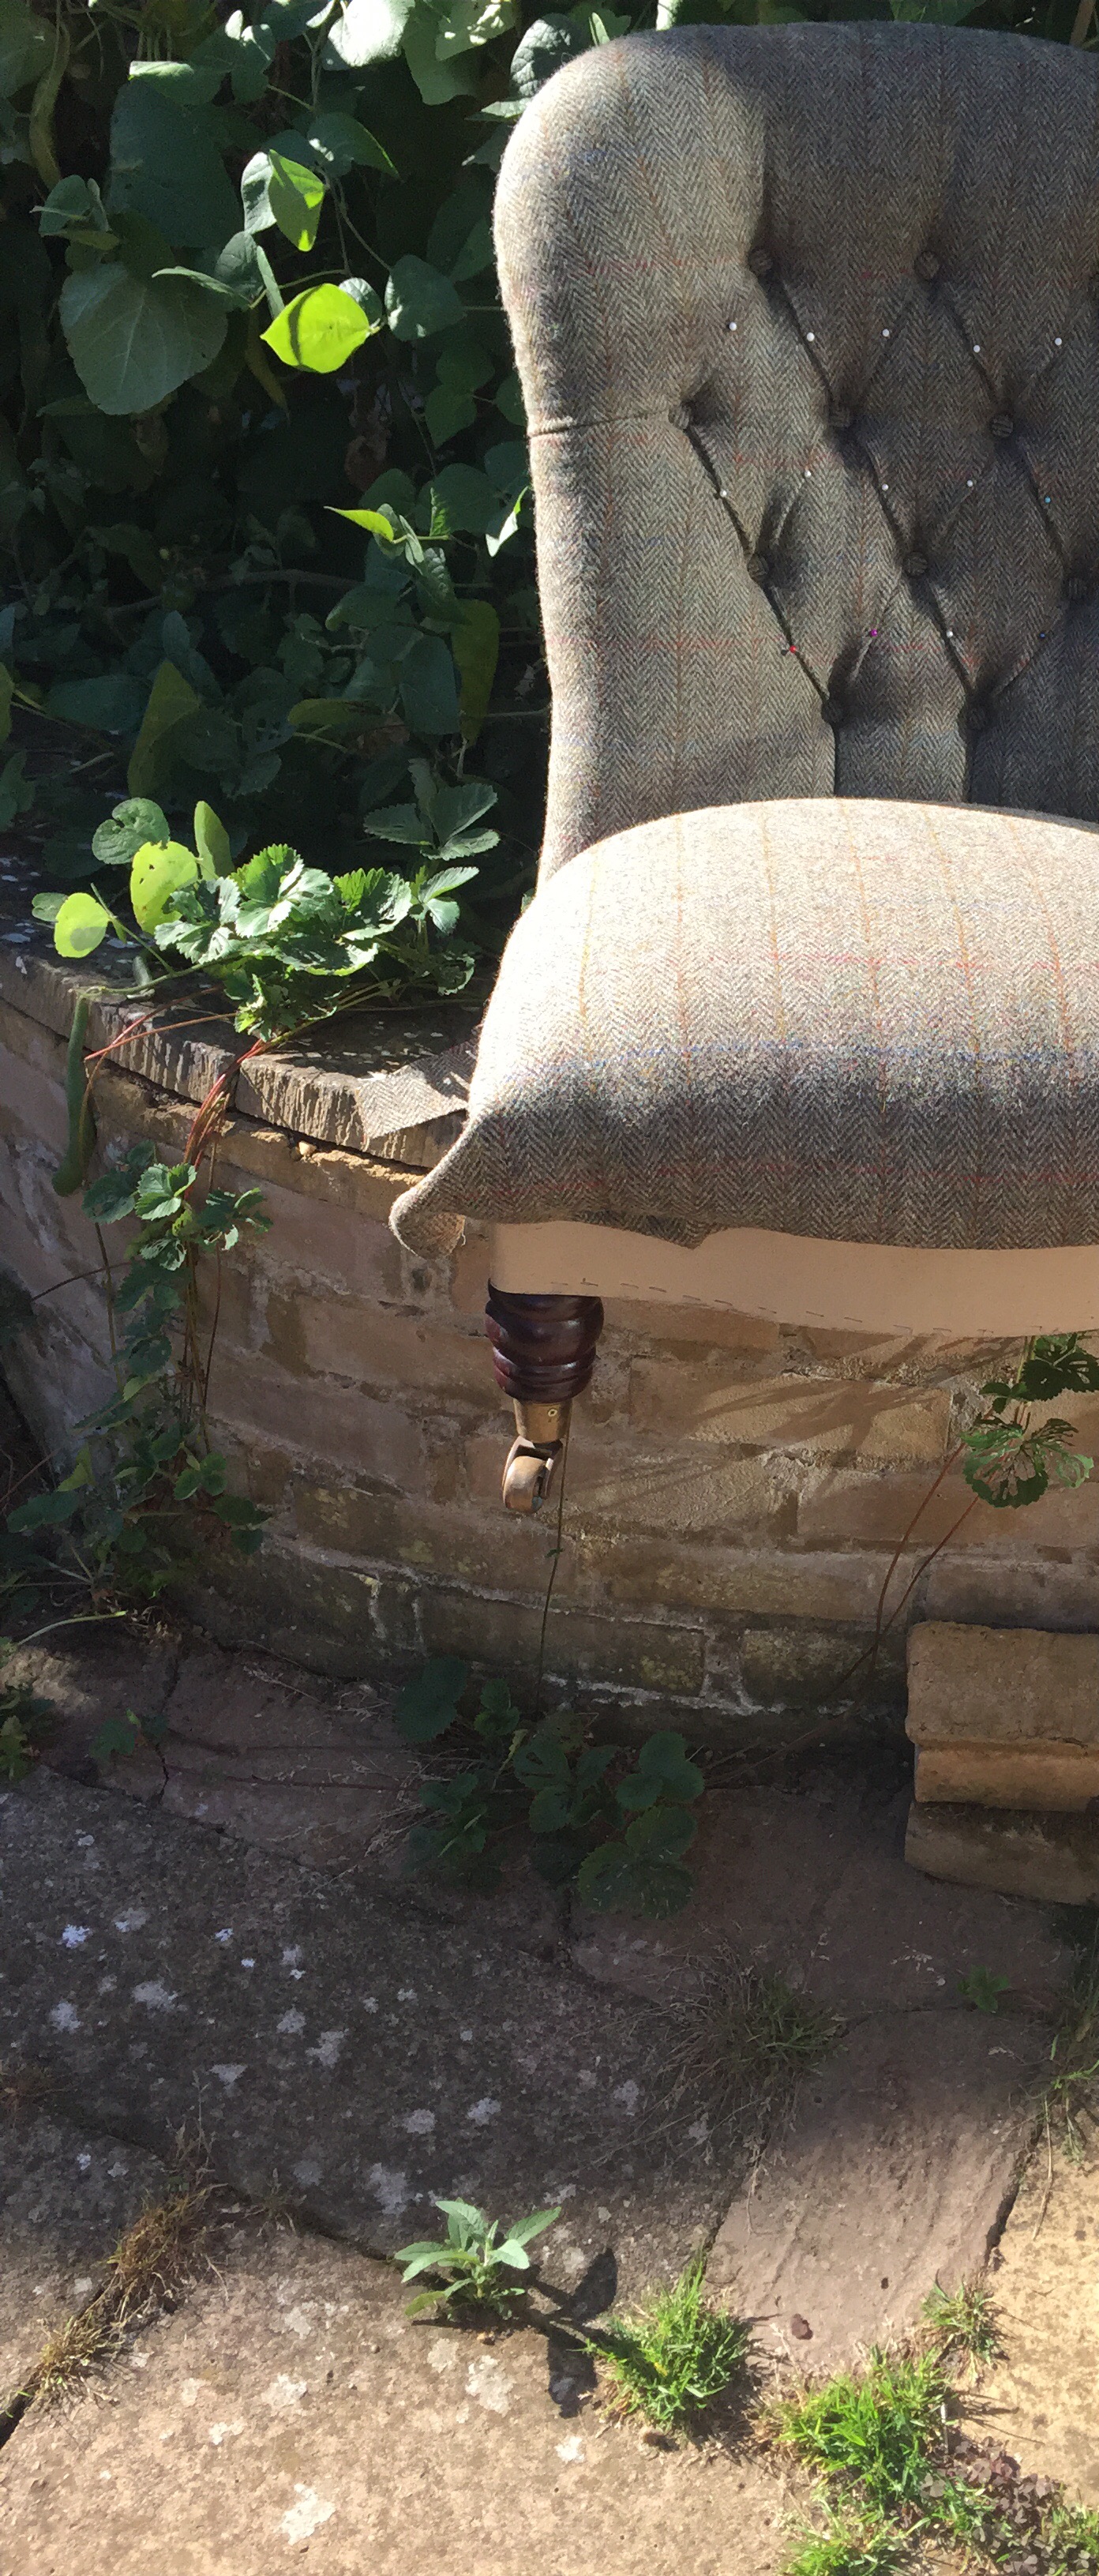
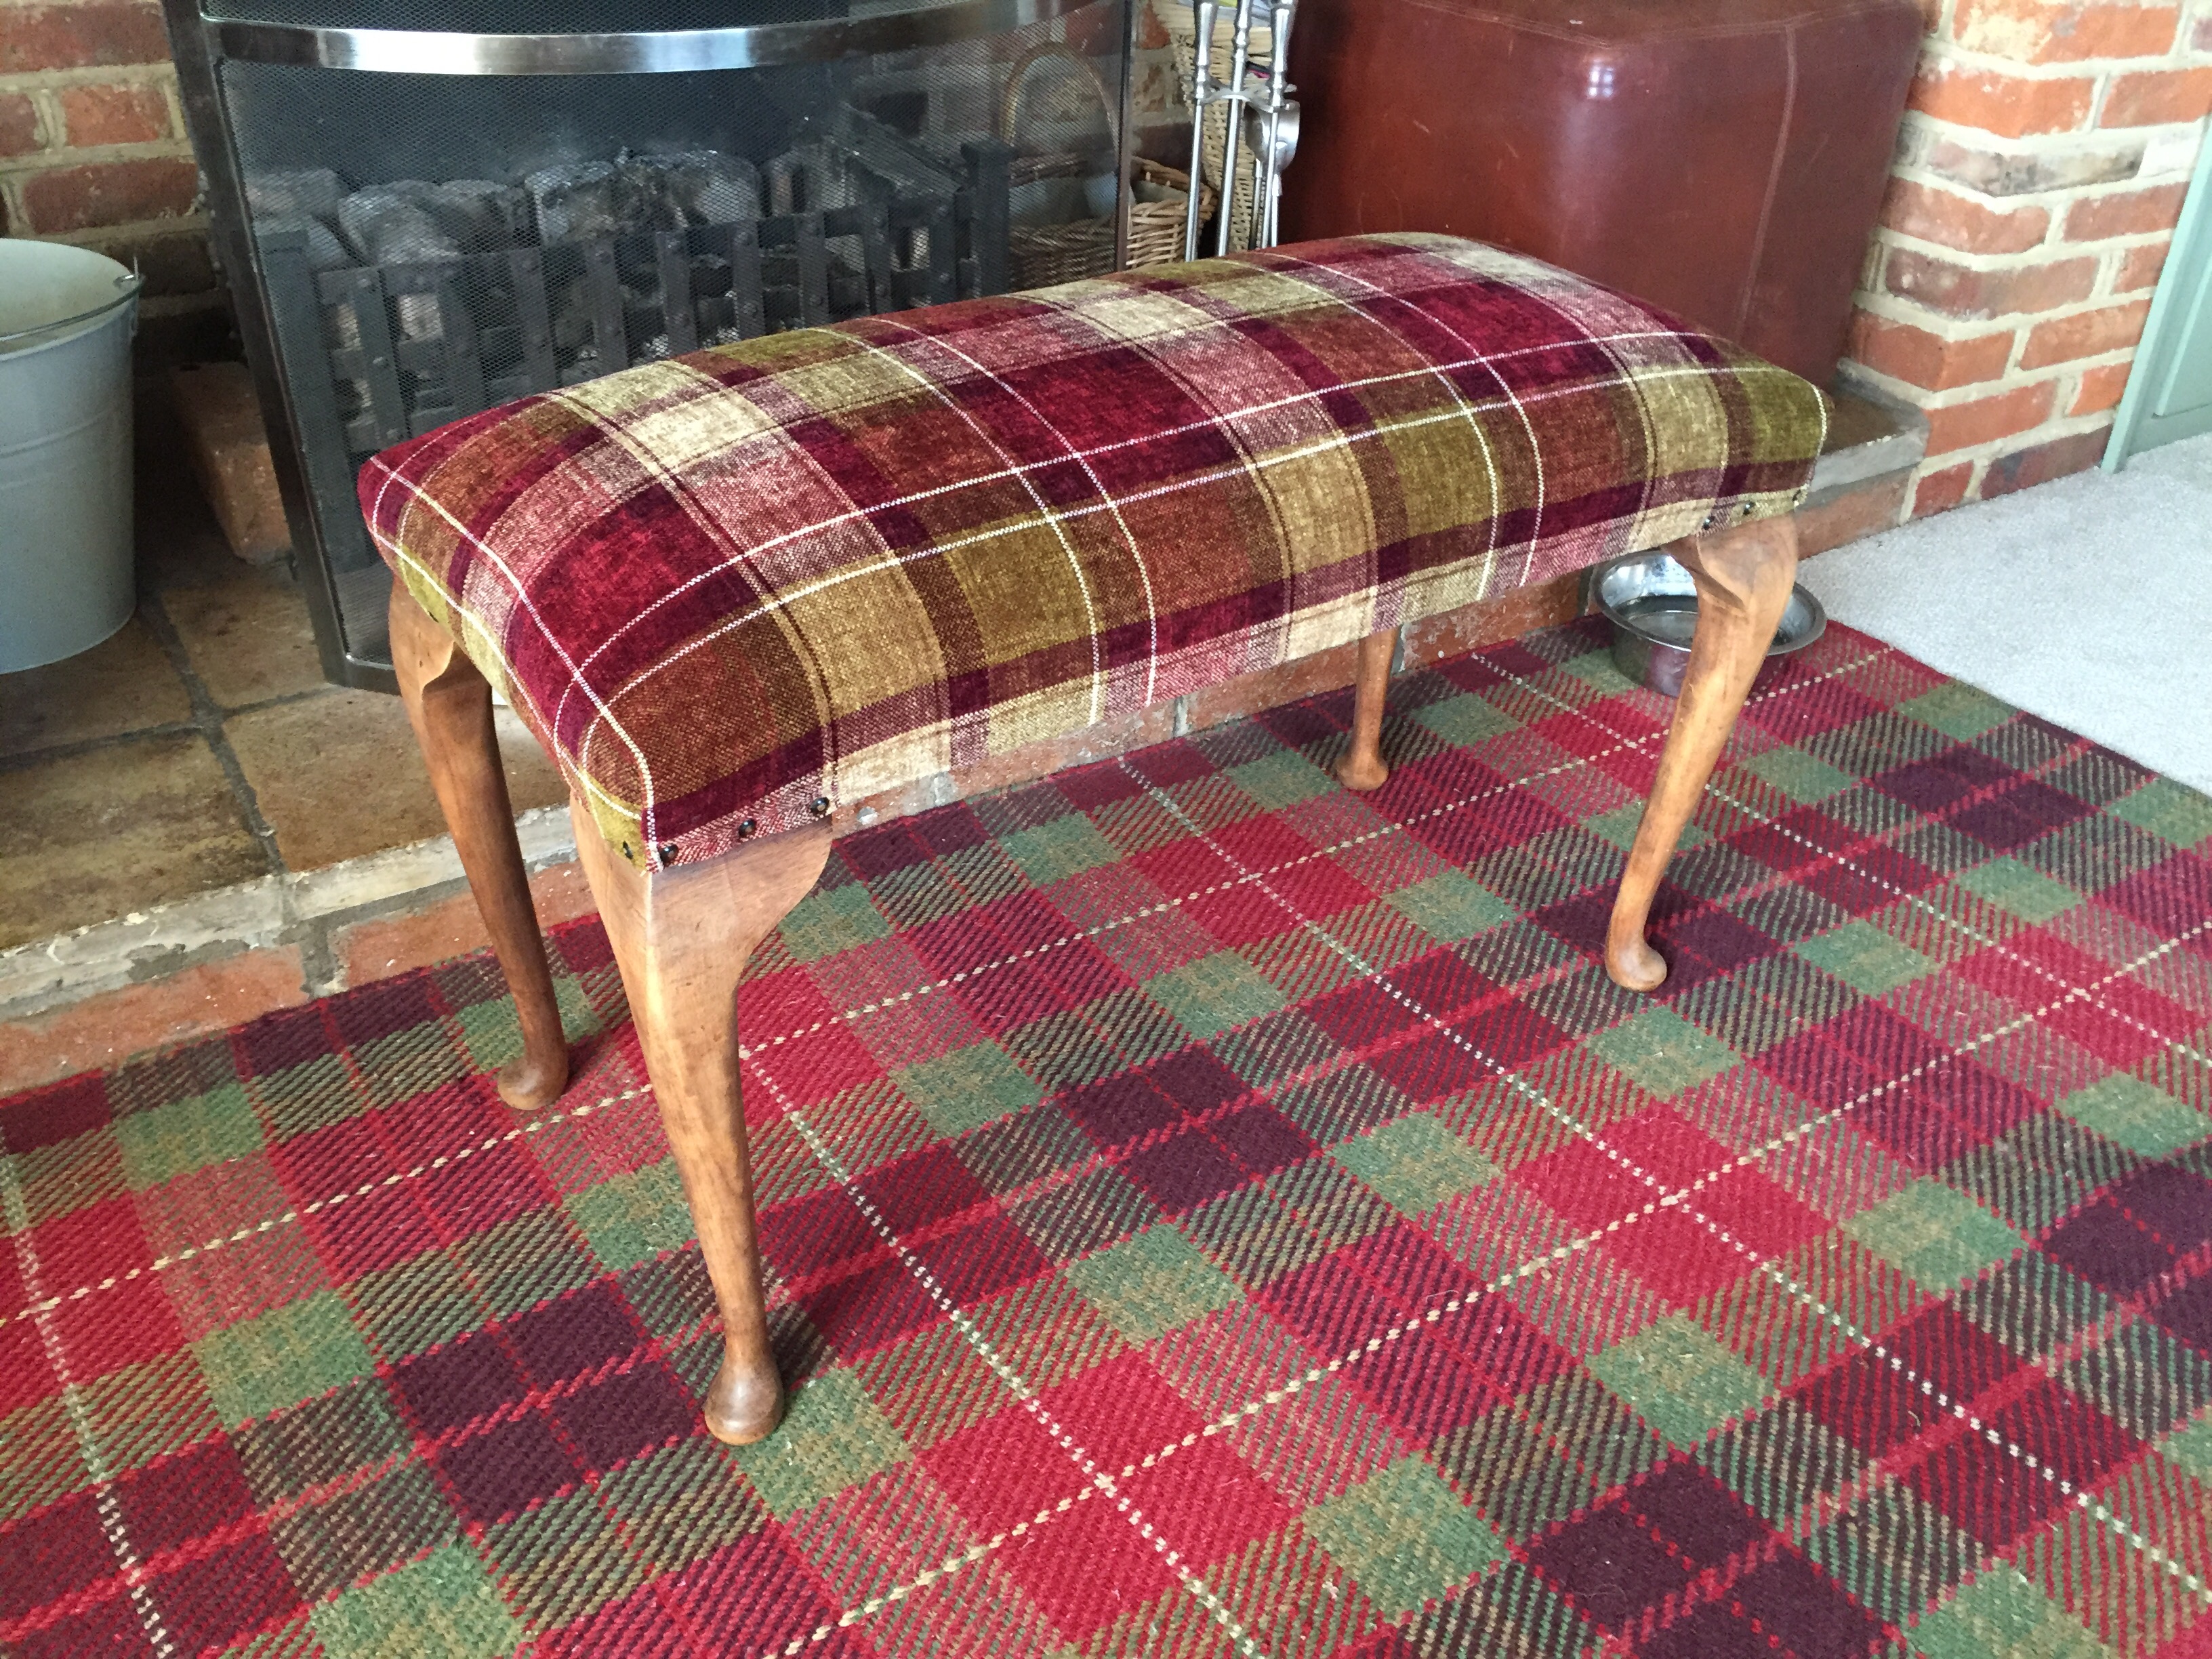
I’ve missed off the part where I bought some new legs, well old legs really but new to me and to the chair. EBay bargain.

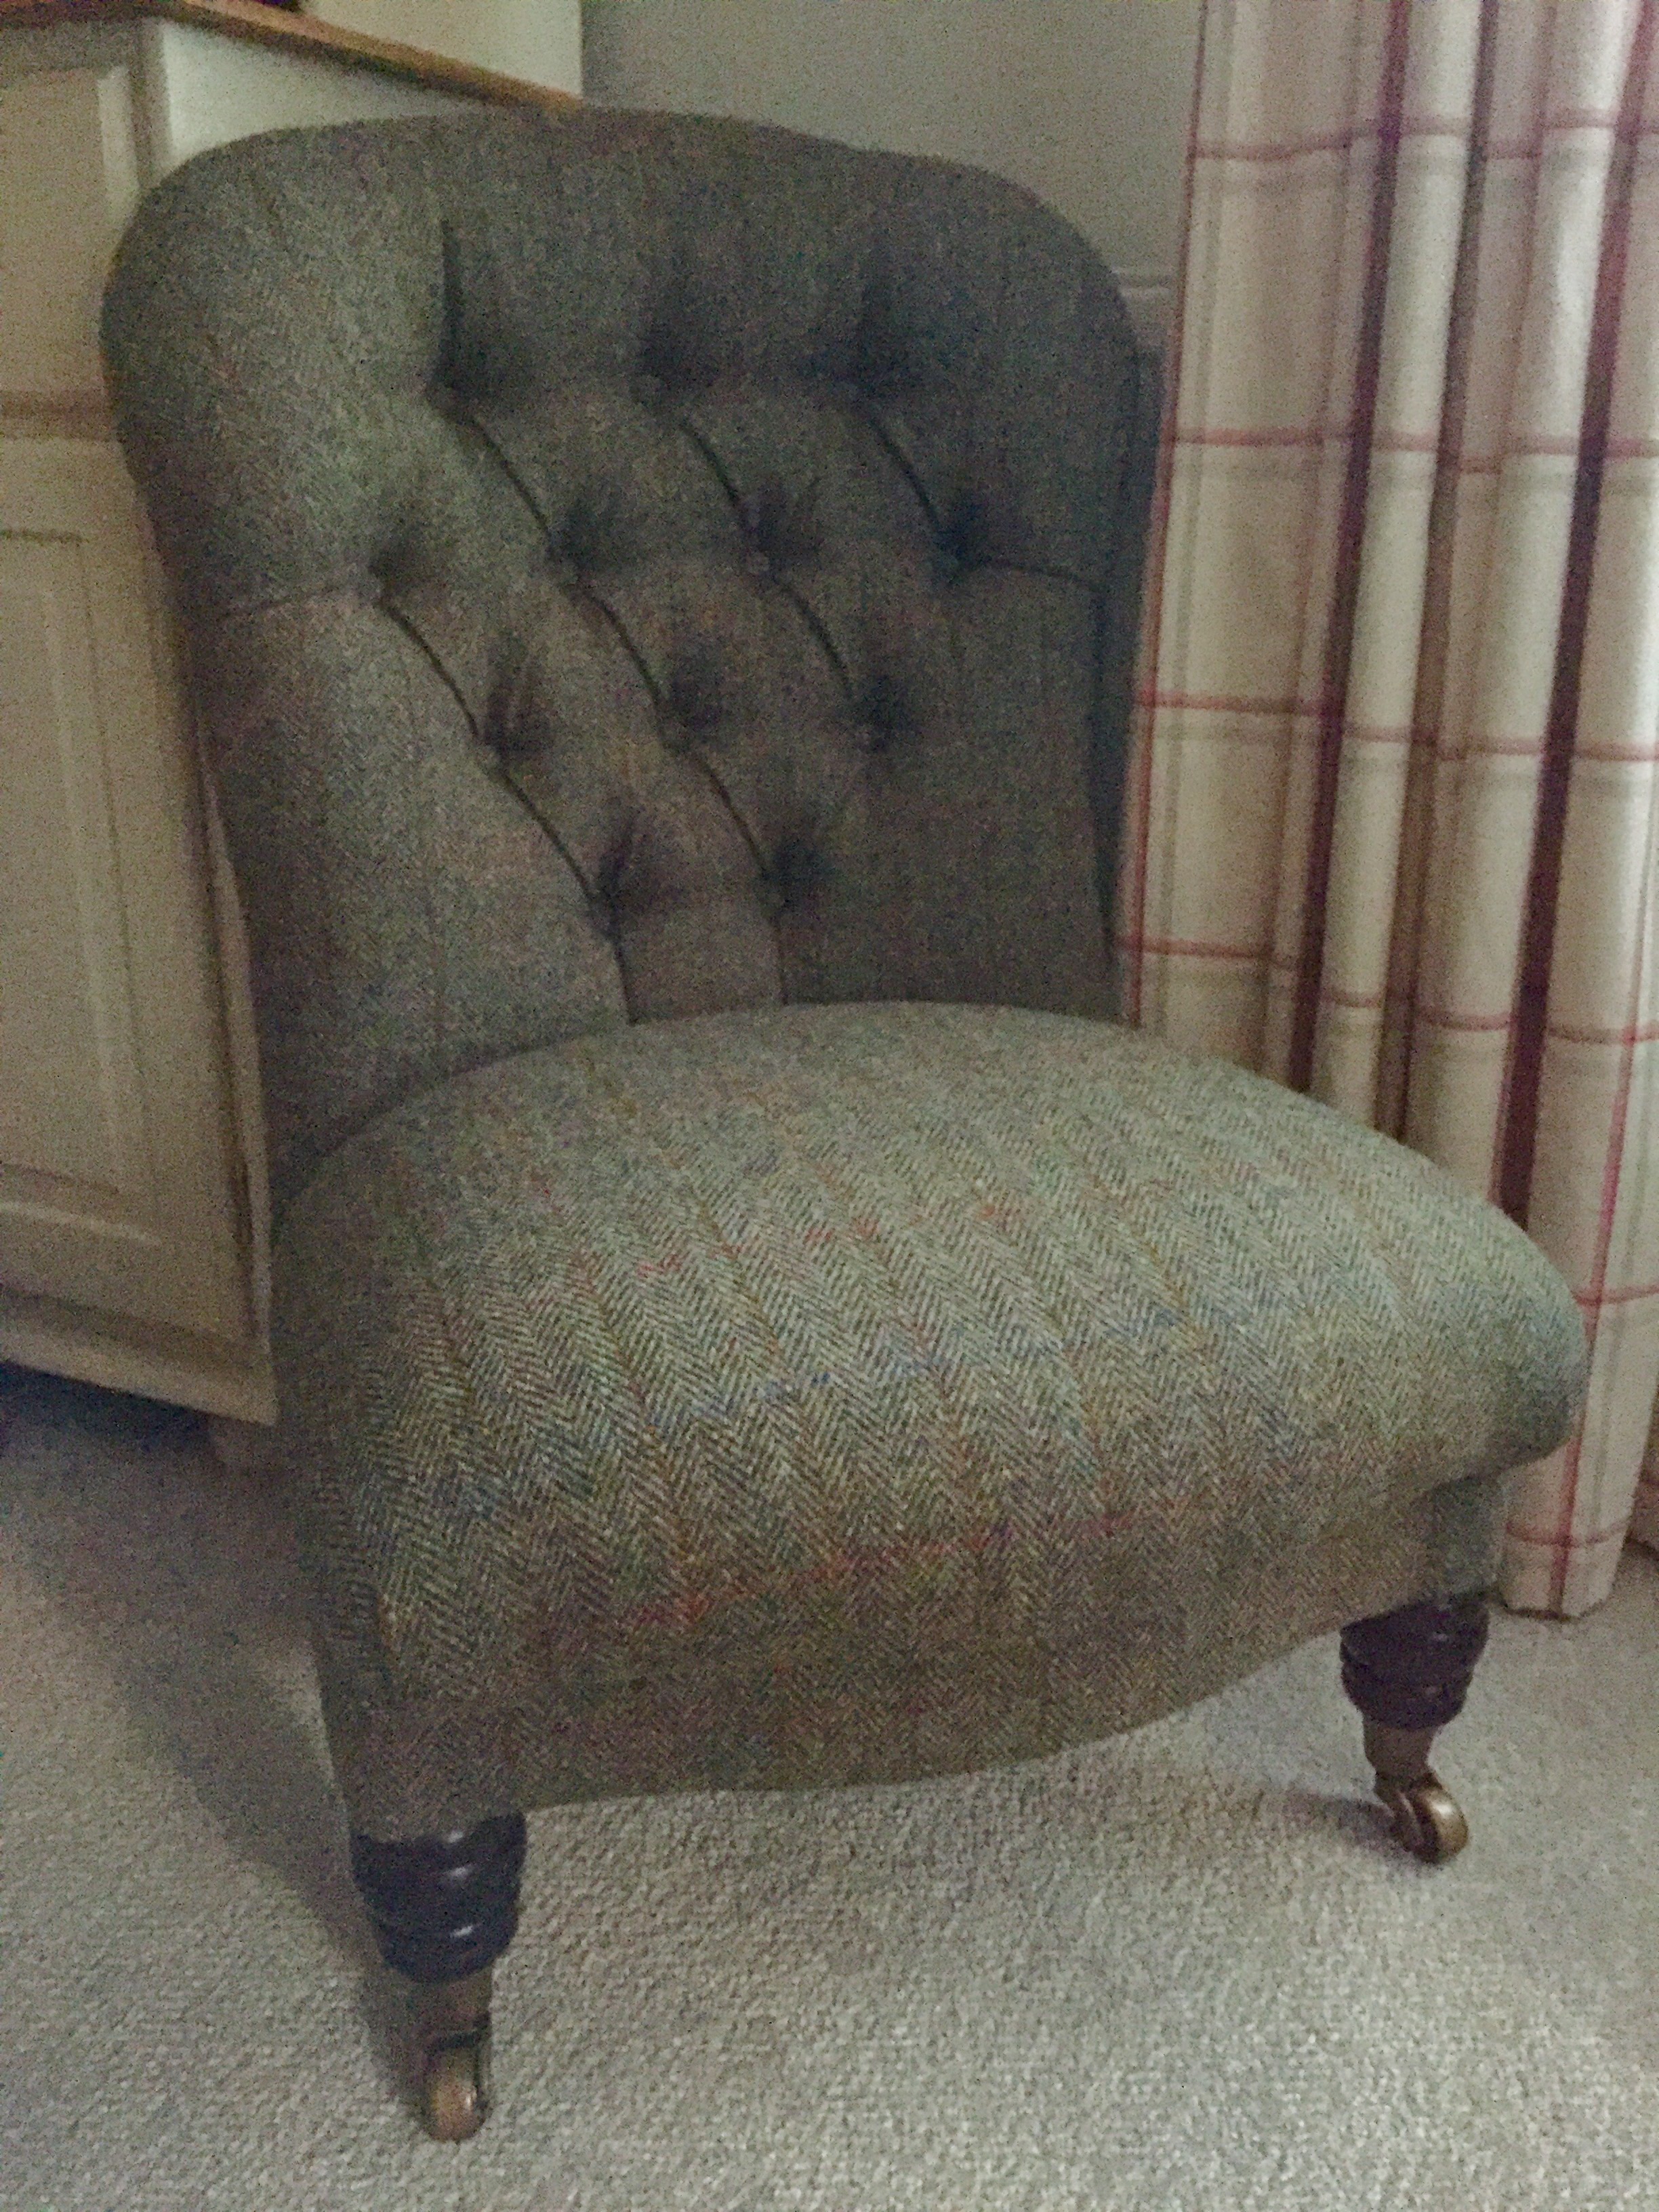
You have to agree, the difference is astounding if you look at the before and after photos.

My mum sent me a photograph of a chair she saw in a shop which was incredibly similar and over £1200. She couldn’t believe it.

The thing is, even if I had £1200 to spend (which I don’t) I could not love this any more. To know that I have taken the time to bring this chair back to life means more to me than money could ever buy and he will live with us for a very long time I’m sure.

I still haven’t found a permanent home for him as he seems to look happy in several different rooms but I will keep trying! 

What do you think?

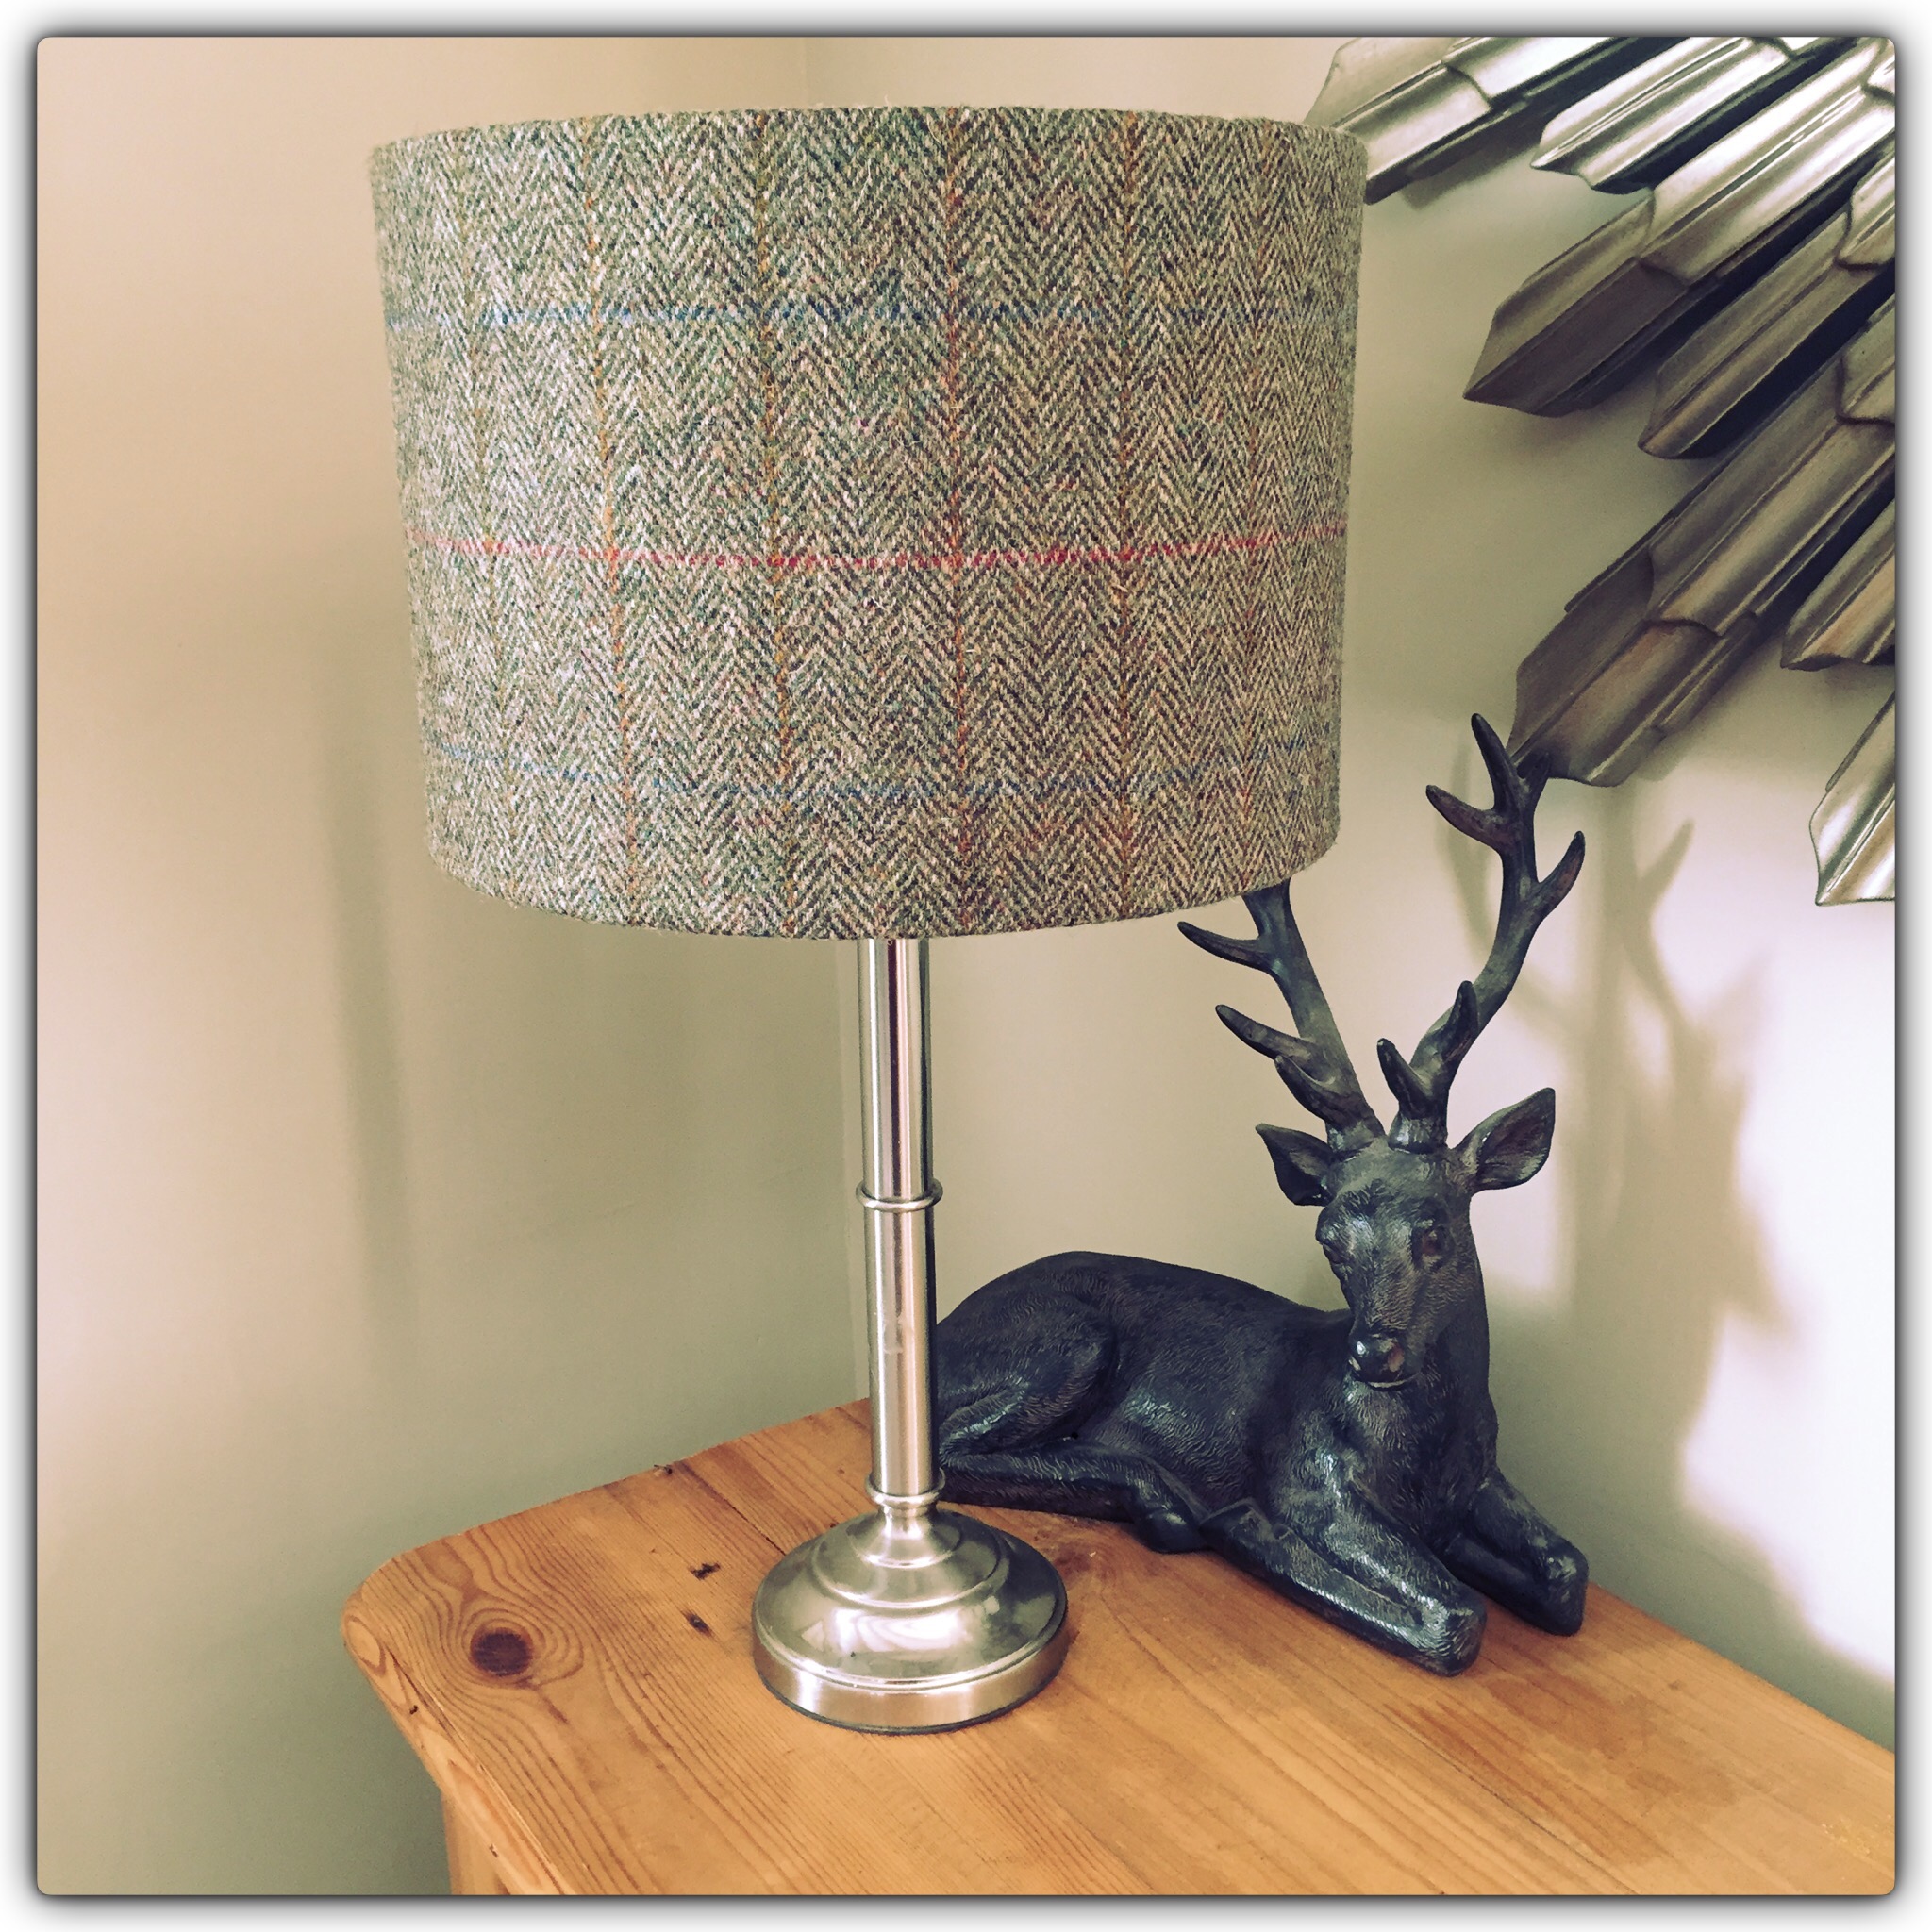
Oh, and I made a cheeky matching lampshade with a piece of leftover fabric, and then a cushion with the offcuts. Nothing wasted here!

Next project, an utterly manky thing which made me think of King Arthur’s throne when I first saw it. Stinky, wobbly and not much going for it but watch this space…

TTFN X

My Booky Wook…

I feel like I have a lot of hats, one for each job I have in life. Some are chosen, some are not.

Wife, baker, chutney fairy, furniture restorer, gardener, accountant, bin lady… 

Over the years, people have said to me that I should write cookbooks… I thought that writing this blog would at least get everything down in one place and give me the chance to just send people links to particular recipes when they asked.

BUT… 

… the old blog is now getting more and more hits, sometimes hundreds a day. I continue to be amazed by folks’ interest in what goes on here, down on the little old farm and in my kitchen.

And which pages do you think are the most popular? It’s the recipes and at this time of year, it’s the multiple courgette ones every time. 

Several years ago, my husband, God love him, came out with that age-old phrase ‘what’s for dinner darling?’ Before I had time to draw breath, he looked on the kitchen worktop and exclaimed ‘oh no not another bloody courgette!’ I think the idea for my first cookbook was pretty much decided for me on that day. 

I started putting my recipe inventions down on paper and a few years later, I have now managed to get everything together in one place which is now published in an e-book, available now  here

Many of my recipes are invented based on what I have in my fridge and certainly what I have growing in the garden and what is in season. Isn’t that how it should be? 

When I finally pressed the big red button to publish the book online a couple of weeks ago, I was amazed that in the 48 hours following, folk were actually buying it. 

So does that mean I am now allowed to add another thing to my CV? Am I now a writer? (blush) Or am I still just that mad crazy lady with the dogs that rambles on about growing veg and all the things you can do with courgettes?  

I’m already working on my next one… This could get addictive you know. What a fantabulous way to get the old creative juices flowing. A seasonally based allotment cookbook. Yes, there will be courgettes, and rhubarb, oh and runner beans. My preserving pan brain doth bubble over with ideas already. 

So if you’ve already bought my first one, can I give you a great big hug right here and now? Thanks millions. Honestly, I’m touched, and grateful, and humbled. 

In the meantime, I must go and create something interesting with a butternut squash and whatever’s in my fridge. 

TTFN X 

Ready, jelly, go!

I grew up in a world where as a child I was often sent down the road with a basket of eggs and a loaf of bread to give to a neighbour who would then fill up my basket with home-grown vegetables. I love that kind of trading amazing home-made and homegrown produce. It warms my heart that even in this modern age, if you live in the right place and have the right friends and neighbours then  these traditions are still very much commonplace.

A couple of days ago, one of my lovely new neighbours asked me if I’d like some of her red currant glut. To be honest, I have never had much to do with these as a fruit but how could I refuse? Anything grown organically with love and care has to be worshipped and used and never wasted! So accepted very gratefully and took a lesson from her on how to make a jelly.

Jellies are always something that have scared me, I am much more the throw it all in one pot and bubble it for a couple of hours chutney kind of girl. Anything that takes 24 hours I have veered away from previously but I think as I’ve got older and wiser, I have realised that the best things really do come to those who wait!

So I came home and the red currants were put into a pan and covered with water to boil. I think I made a bit of a mistake here misread the recipe slightly and rather than simmering for 20 minutes I actually boiled. Oops. It meant I had a very concentrated liquid and not very much of it. Lesson one.

I actually already have a jelly bag which I bought a few years ago for making flavoured vinegars so was pleased to find I had all the kit required and placed the red currants and their juice through this and left overnight.

In the morning, I was pleased to find that although I didn’t have a huge amount of liquid, what I did have looked good. I had around only 200ml but mixed this with an equal quantity of white granulated sugar and boiled for eight minutes in a large saucepan. It couldn’t have been simpler! 

Then it was just a case of pouring through the jam funnel into ajar. I only ended up with two jars but what I have is packed with flavour and just beautiful so I am chuffed to pieces.

Following on from my red currant success, I decided to try a chilli jelly recipe. While at the same neighbour’s house, we were looking through a recipe book and I spied a picture of a chilli jelly which caught my eye as it looked like a snowstorm, just beautiful, and I thought I have to make this! So I took a photo of the recipe and came home, two days later here I am, I’ve just finished it and I cannot explain how beautiful these jars look!

I bought two big fresh cooking apples from my farm shop and chopped roughly, skin, core, pips and all, everything into the pot. I covered with 3 pints of water and brought to the boil and then simmered for 30 minutes until the apples were really pulpy.

I then popped everything into the jelly bag on the stand and left overnight.

Do not wiggle, do not jiggle, do not squeeze, do not touch, do not pass go, do not collect £200. I cannot emphasise enough at this point how much you must not touch the jelly bag otherwise your liquid will be cloudy. 


The recipe called for 450 g of sugar to every 600ml of liquid, I find this far easier to just multiplied by 0.75, that’s how my brain works. I had 1.2 L of juice so used 900g of sugar. The juice and sugar went into a large preserving pan and were brought to the boil, once the sugar had completely dissolved, I boiled it for 20 minutes until set point had been reached at 105°.

I then added in two heaped teaspoons of dried chillies and allowed the mixture to cool slightly for 10 minutes before ladelling through a jam funnel into warm sterilised jars. I could not be more pleased with the result!

So I can now confirm that jellies on nothing to be scared of, in fact quite the opposite, they are really rather simple. 

I’m now deciding what to make next!

Nice baps dear!

This is just the phrase that keeps on giving and never do I take a batch of these little angels out of the oven without hubby making some Carry On reference to my lovely baps.

I wanted to try and put a bread recipe together that was fast and easy and therefore convenient to fit into life. I love my sourdough dearly but it does take some planning and organisation so it is lovely to have a ‘go to’ recipe that you know you can prepare in an absolute flash but that is reliable and makes you feel like an absolute domestic goddess.

Ingredients:

1tbsp quick yeast

1tbsp sugar

1tsp salt

250ml warm water

4tbsp vegetable oil

450g strong bread flour

So here is my methodology for the bestest, fluffiest, puffiest floury baps you’ve ever had – Ooh Matron!

I throw these ingredients into my bread machine, wet things first, flour last, then pop into the dough cycle for 45 minutes. You could easily mix by hand or in a mixer with a dough hook.

Then it’s 20-30 mins extra to prove in the machine once the cycle has ended, then take out, knock back and shape into nine equal sized rounds about the size of a small satsuma. You want them smooth side up and any rough edges tucked in and underneath.

Place onto a baking tray with a light dusting of semolina to stop them sticking.

Cover with a teatowel and allow to prove a second time for around another 60-90 minutes. It’s not too time sensitive so you’ve time to trot out and do some other chores without being chained to the kitchen.

Dust with flour and pop into a pre heated over at 190 degrees for 20 minutes and hey presto, this is another piff paff poof magic moment for me when you open the oven and see what you’ve created.

Check these out! 

They actually keep really well for a good few days in a cake tin or bread bag and make amazing breakfast, lunch or burger rolls. Also outstandingly fabulous with homemade soup and homemade butter. 

My lovely neighbour dropped some eggs in last weekend and I wrapped up four of these in newspaper and popped on their doorstep by way of a Thankyou… There was a comedy moment when across the field the next day she shouted ‘husband wanted to say how nice your baps were!’ We did chortle. 

As I said, the joke never ever gets old. ❤️

My continuing bread journey…

My bread journey continued from my first foray into the world of sourdough which became better and better with each attempt. I have made up and given away starter to at least half a dozen friends and family who have all succeeded too and caught the bread bug.

My bread got so good, I was able to wrap it in newspaper and proudly give loaves as gifts.

I then decided to try and have a jiggle with the recipe/method as is my way – really to make it easier to manage for someone (me) who has to go to work and isn’t at home all day able to tend to dough every fifteen minutes. It worked really well so here goes:

In a ceramic bowl, mix 150g starter, 150g water and 150g strong white flour. Mix well and leave for twelve hours. This is a perfect thing to do of an evening before you hit the sack. You’re basically really feeding up your starter with equal quantities but then removing this amount from the original recipe and then adding the remaining ingredients.

The next morning before work, add in the following and mix well. It should only take a few minutes to do this.

350g strong white flour

100g water

25g olive oil

Leave for 15 minutes while you clean your teeth then knead in 10g good quality fine sea salt. Lightly grease your bowl with olive oil and cover with cling film and a teatowel. Leave all day in a warm place (I put mine in the airing cupboard or on the dining table in the sun if it’s shining!) – Then go to work!

When you get home, take the dough out – it will have really grown at this point – and gently stretch and fold it just for a minute or so.

Lightly cover the base of your dutch oven/casserole dish with a dusting of semolina and shape your dough into a round, with the folds all tucked away underneath. Cover and again leave on the worktop until it has doubled in size, then dust with flour from a fine sieve and slash the top with your lame. Stick into a hot hot oven at 220 degrees for 25 minutes covered – then 25 minutes uncovered. Allow to cool on a rack for half an hour before devouring a chunk before bed. The loaf is PERFECT for sandwiches the next day!

The original method called for a total time of 60 minutes but I felt that this was just a little too long and settled on 50 total after experimenting in either direction. Much of this I am guessing is less science, and more getting to know your own oven so do have a play with timings yourself.

The bad news is… that my starter jar got ‘tidied’ away into the larder for two weeks. We went away and I forgot all about him. I feel terrible but poor Artem is no more. He is expired and cannot be revived – he has gone to the little bakery in the sky so I am hoping that someone might donate me back some of my original little friend so that I can continue his work.

In the meantime, I’m experimenting with French and Italian bread recipes and am today journeying into the world of the one and only “Bonjour, je voudrais une baguette s’il vous plait”.

I shall keep you posted…

TTFN. x

It’s been a while… 

Is it just me or do you feel like sometimes the days pass so quickly, you really don’t know where they go? 

The last couple of months feel like they have literally flown past and I can’t believe we are now in May. There is just so much to do…

I can’t list all of the projects I’ve been working on, let’s just say, my garage is absolutely bursting at the seams.

I’ll start I think by telling you about the old stool that I picked up for a song. I have a habit of falling in love with the shape of furniture. When I clapped eyes on this, I absolutely loved it’s beautifully carved wooden legs… No idea where to put it, just love it. Hmmm yes that’s me through and through. 

You have to look past the top cloth and the flimsy, not deep enough padding on the top as well as the jiggly red fringe. It looks to me as though someone has had a pop at reupholstering it before. 

I started by sanding and waxing his legs with clear Briwax which made an incredible difference. 

And so continues the journey to becoming glorious again. My next task was to strip him back to nothing removing all the old tacks which is what you can see me doing below.

The next job was to re-pad the naked frame using four layers of 1″ rubberised hair cut to size. Each layer is glued individually using spray adhesive and then a layer of felt before a layer of calico is added, with four holding staples put in north, south, east and west positions. Once that’s done, it’s pulled taught all the way around and the holding staples removed and the excess trimmed. 

The corners are folded tight and held with staples in the opposite position to the folds of your top cloth (ie not looking into the fold) 

Then a layer of wadding, and the top cloth can be positioned and again four holding staples added. 

I was very careful to line up the fabric evenly and symmetrically. Having added the top cloth and folded each corner, three upholstery pins were used to hold the fabric at each corner. 

The corners were then finished with a concealed ladder stitch…

Lining fabric was staples neatly underneath and taaaa-daah. C’est fini as we say! 


I love the way this has turned out. Super, uber happy and I’m sure we’ll have him in our home for many years to come ❤️

Lip balm – Little effort, maximum reward…

There is nothing so satisfying as experimenting with something completely new and finding it to be not only an outstanding success, but easy enough for a five year old to do. 

A month or so ago, I had one of my burning urges to make lip balm, I don’t know why really, I suppose the winter months make our Puckers suffer, and dried lips are not only uncomfortable but aren’t great to look at or to kiss with!

I like things which are simple, where less is more and wherever possible, I like my ingredients to be completely natural and unadulterated.

Having looked at the ingredients for this countless times, yesterday afternoon I decided to have a go. I’m not joking, the whole thing was done and dusted in less time than it took me to drink a cup of tea!

And the result? Just amazing. And so so simple. I’ve already given away all but one that I made, and have ordered some more little pots from a nice man on eBay so plan to make lots more and give them away to all my friends and family 🙂

So here is the method, you really could do it with a five-year-old under a little supervision.

Start by boiling the kettle, pour yourself a cup of tea and with the remaining boiling water, pour into a small saucepan and place on a low heat on the hob.

Place 1tbsp cocoa butter, 1tbsp beeswax and 2tbsp sweet almond oil in a little glass measuring jug and sit it inside the saucepan. Keep stirring with a metal spoon until everything is melted together.


Take off of the heat, and add just a few drops of essential oils. I used tea tree and lavender for their healing benefits. 

I then poured the molten balm straight into two of the pots until they were completely full and added half a teaspoon of good quality cocoa powder to the remaining contents of the jug. I stirred really well until everything was dissolved and then poured this brown balm into the other two pots.


Then drink your tea while the pots cool and solidify…

That is it, seriously done in five minutes and what a reward! And I can safely and honestly say that my lips feel better than they have in months!

You simply must have a go! I plan to experiment now with colour (beetroot?) and flavours (lemon? Vanilla? Coffee?) The possibilities are quite simply endless!